
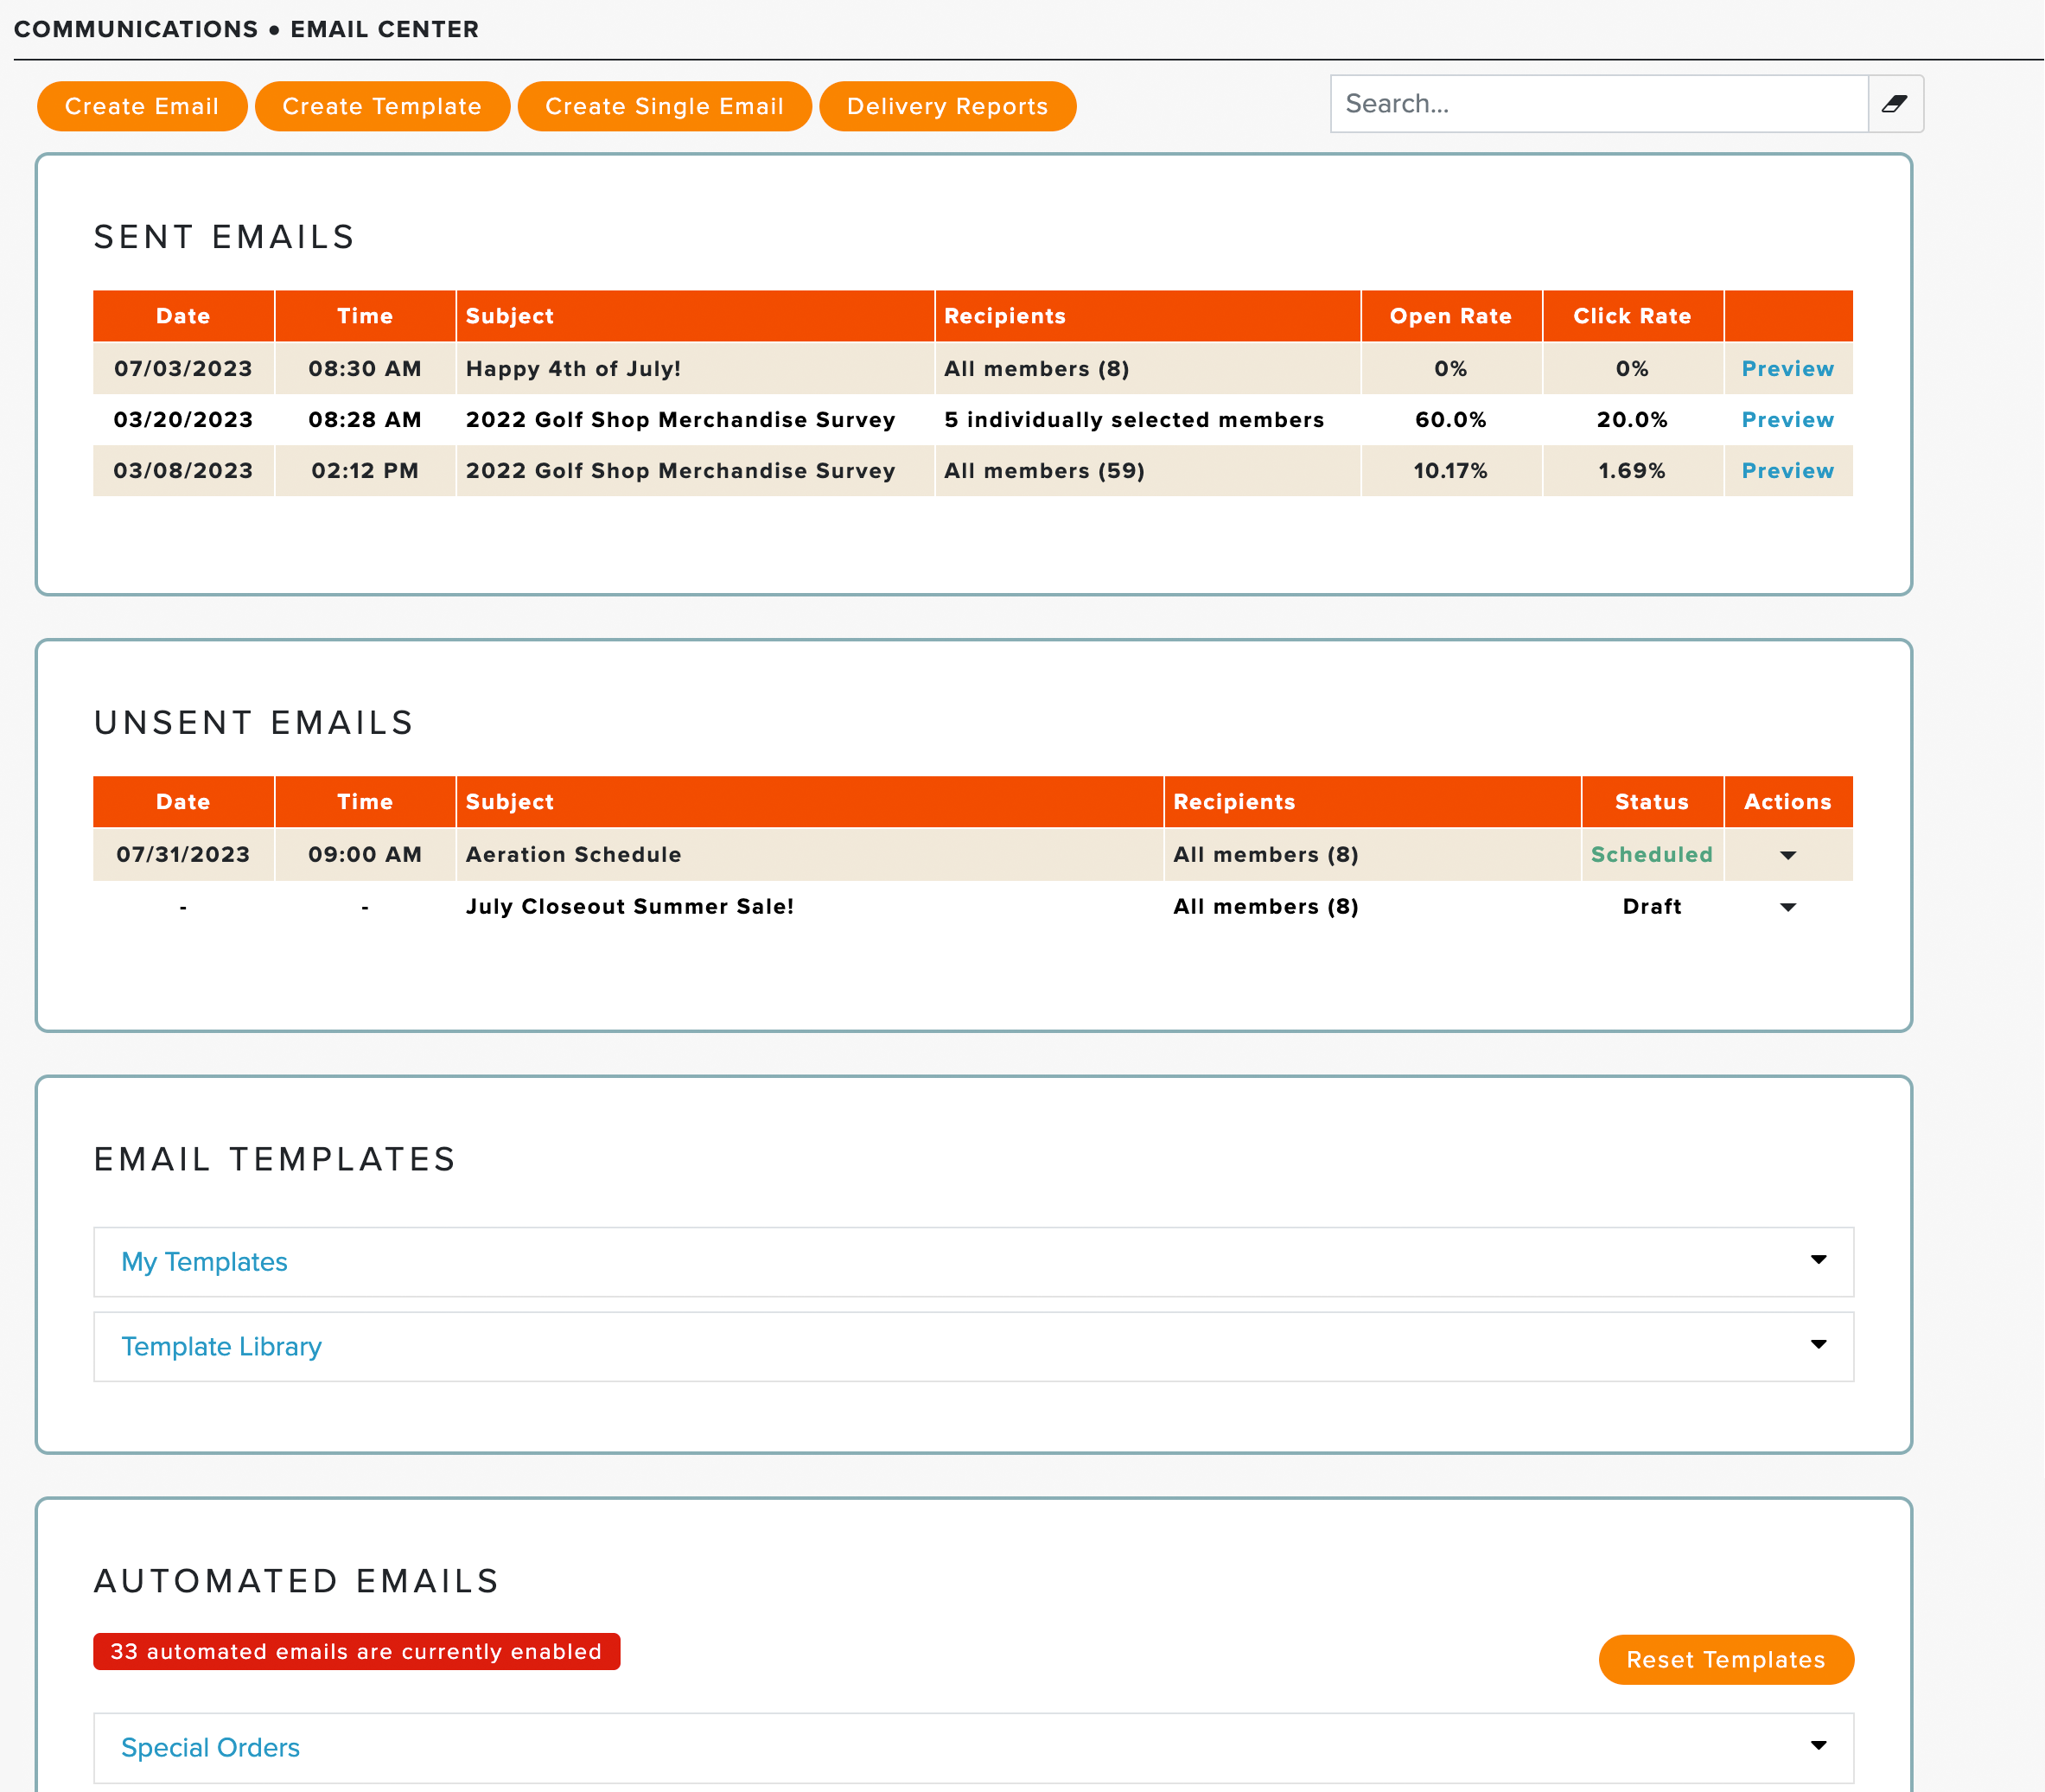
The Email Center is an excellent resource for viewing sent emails and unsent emails (i.e., schedule and draft), creating emails or templates, reviewing current templates, and updating automated emails that can be used to communicate with your members and guests (as shown below).
When visiting the Email Center, you can select the options to:
Create Email: Email all or some individuals on your member or guest roster.
Create Template: Create an email template to be used later.
Send Single Email: Immediately email an individual member or guest. Note: If selecting a guest, only guests associated with current special orders, demos, club repairs, and rentals will be listed.
Delivery Reports: View delivery reports to ensure members and guests received emails and identify those that were not. For more details about Email Delivery Reports, Click Here.
Further, you will see the following section within the Email Center:
Sent Emails: This section lists recent emails sent by composing a single email, bulk email, email from a template, or by sending invitations to surveys or online order forms.
Unsent Emails: This section shows a list of scheduled and draft emails.
Email Templates: This section lists system templates in the "Template Library" and customized templates you created in "My Templates."
Automated Emails: When certain scenarios are met, automated emails are generated, and Golf Shop can send an alert to members, guests, managers, technicians, and vendors with certain information. For more details about Automated Emails, Click Here.
In this article, we will discuss the benefits of the email composer, sending emails to the member roster, sending emails to the guest roster, sending single emails, unsent (i.e., Draft and Scheduled) emails, and creating templates.
Email Composer Overview:
When composing an email, you can:
Create professional-looking emails using a rich text editor.
Compose emails to include all or a subset of members in the recipient list.
Compose emails to include all or specific guests in the recipient list.
BCC managers or other recipients.
Include one or more attachments.
Use an alternate logo and banner.
Add custom fields from member profiles.
Preview messages before sending.
Save emails as drafts.
Schedule emails to be sent at a future date/time.
Composing Emails to Members:
To send emails to some or all of the individuals on your Member Roster, follow these instructions:
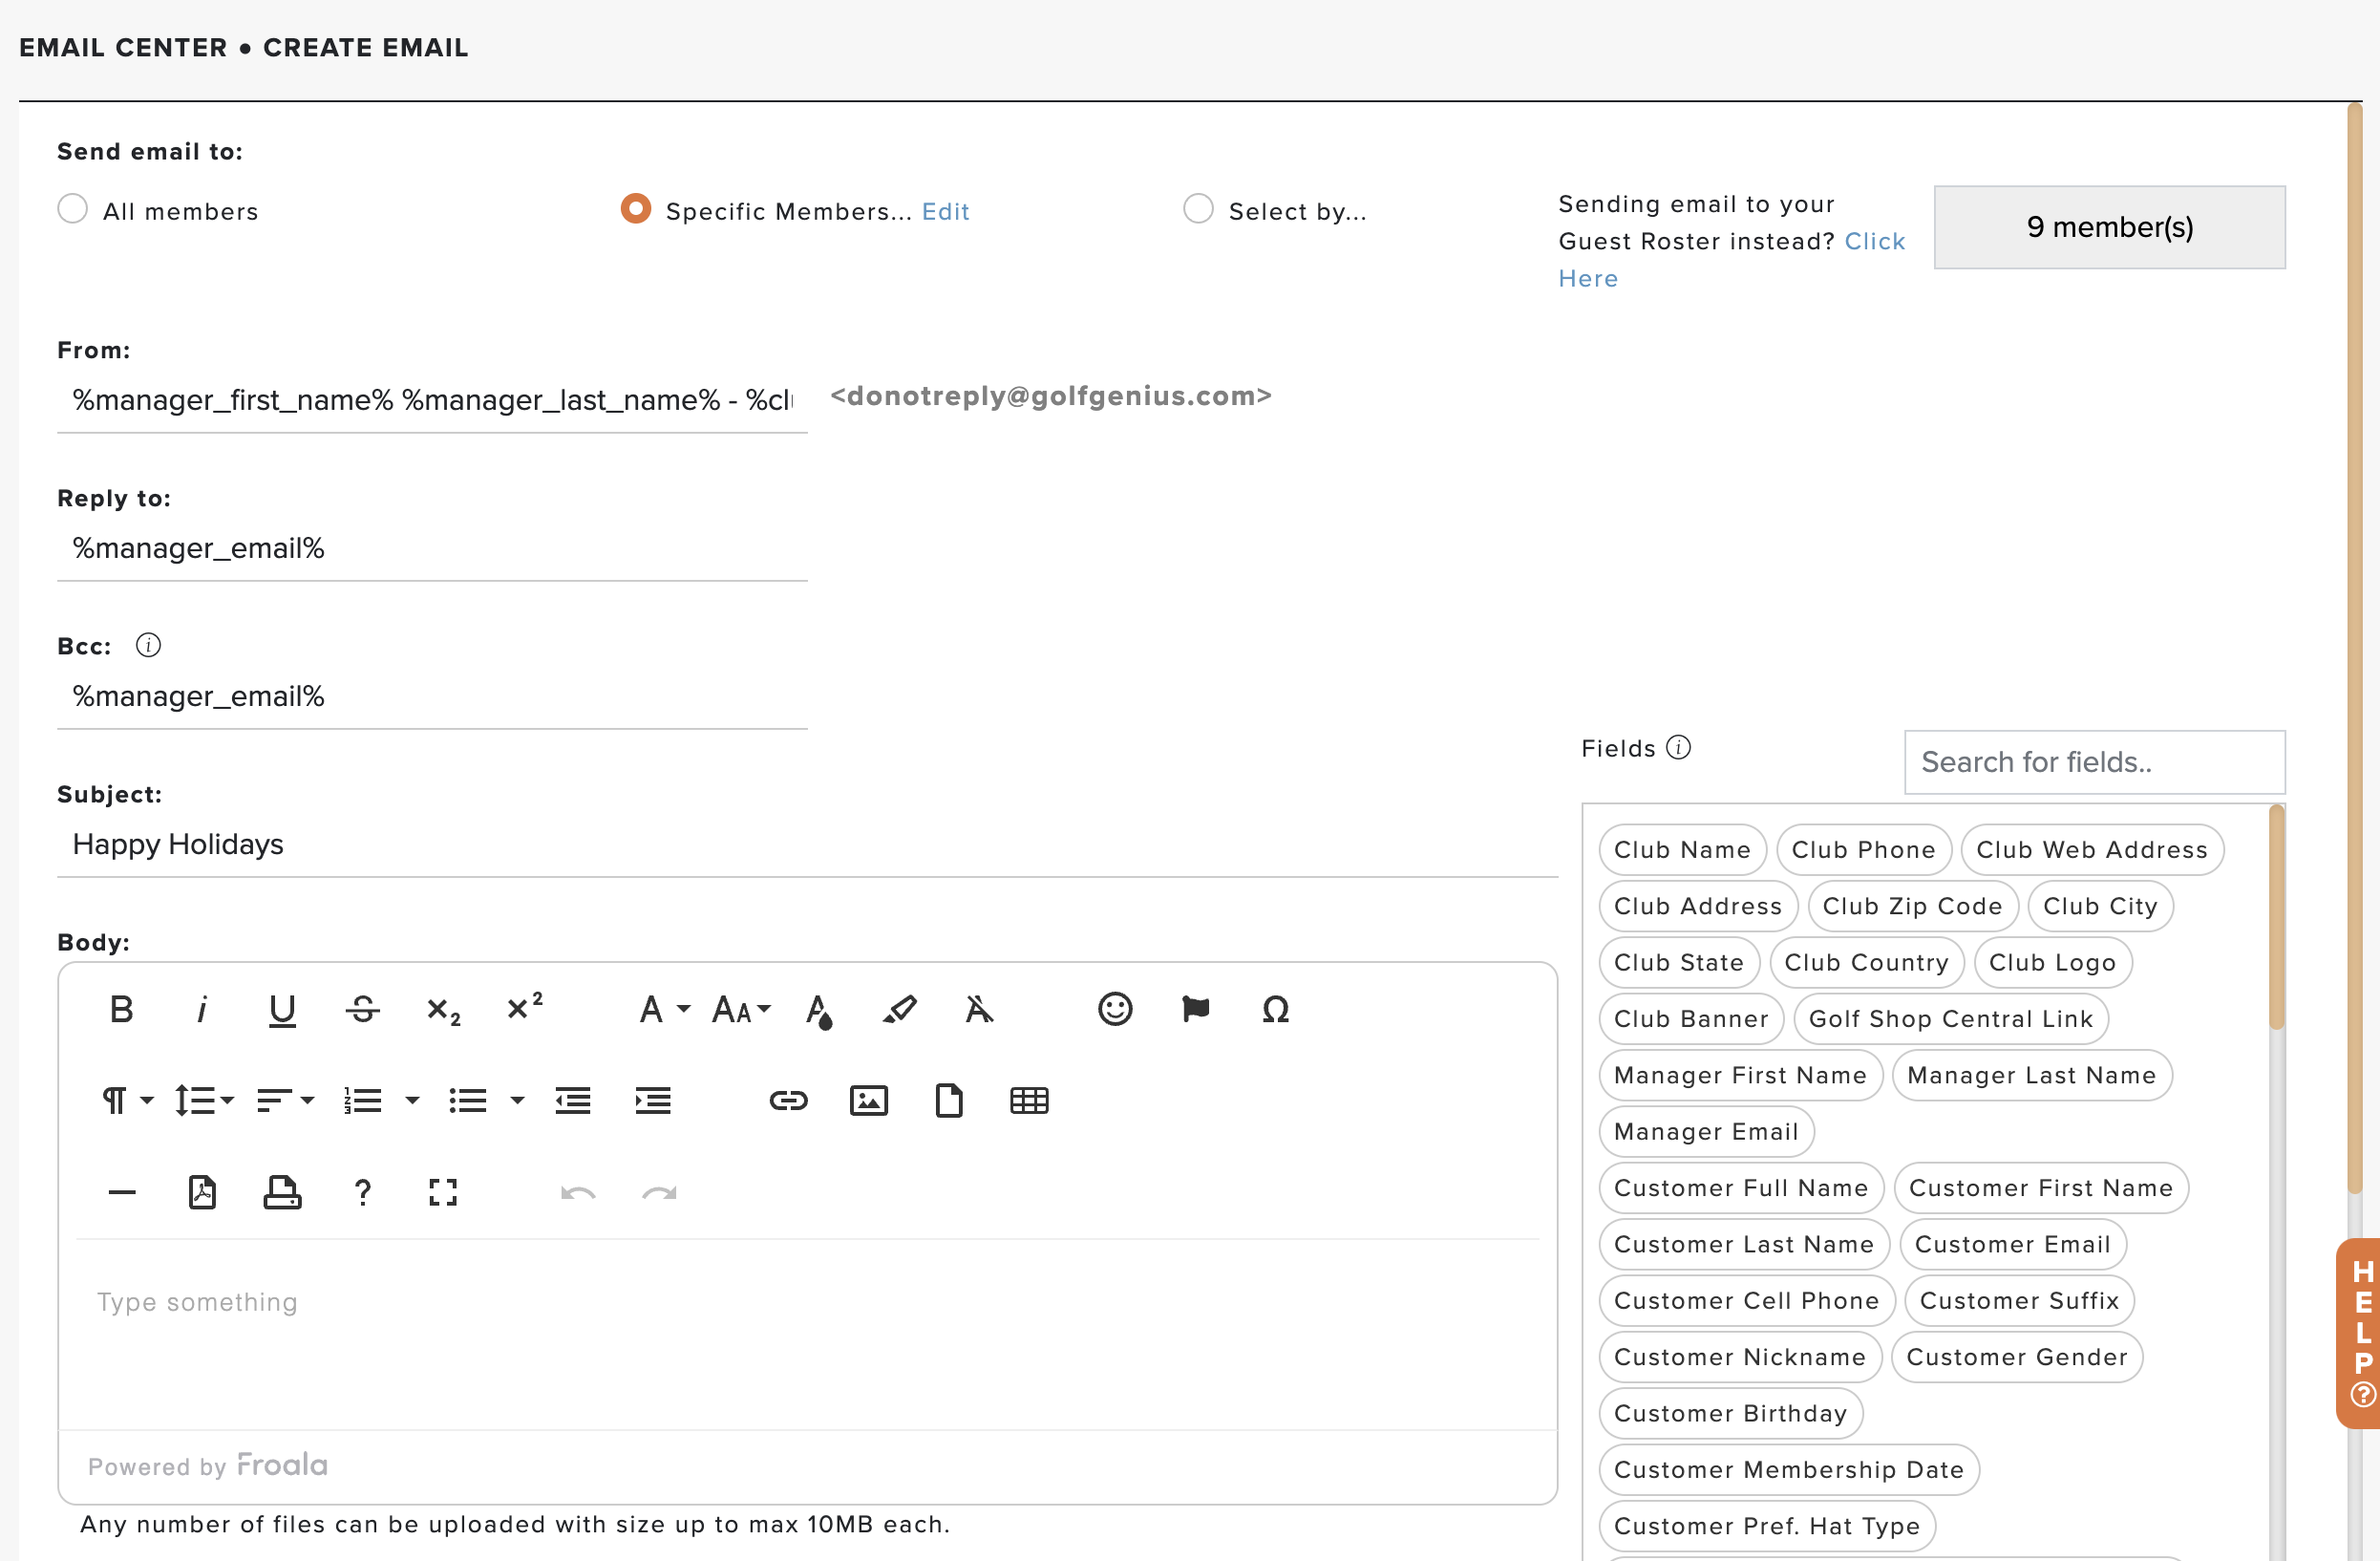
Go to Communication > Emails > Create Email (as shown below).

Select the recipients. You can send it to:
All members: Send to your entire member roster.
Specific members: Search and select specific members.
Select by: You can optionally filter the recipient list using the available custom fields. For instance, you can filter the recipient list by gender. After selecting the filtering settings, click "Apply Filter."
Sending email to your Guest Roster Instead: Send emails to individuals on your Guest Roster. More details can be found later in this article.
Edit the "From:" (if necessary). When an email is sent, you can modify the text that shows up before the system email (donotreply@golfgenius.com). For example, you could have the from line show your club name, the sender name, or both.
Edit the "Reply to:" (if necessary). If a member responds to the email, this email address will receive the reply.
Edit the "Bcc:" (Blind Copy) (if necessary). Bcc any additional email addresses.
Enter the email "Subject:"
Enter content into the email's body using the rich text editor. You can insert data fields (available to the right) anywhere in the email. Along with basic formatting (e.g., font size & color, font type, bullets, numbering, text alignment, etc.), the rich text editor allows you to insert links, videos, images, and files.
Set an alternate Logo or Banner (if necessary).
Click "Refresh Preview" to preview the email before saving, scheduling, or sending it.
Review the Recipient count to ensure the proper members are receiving the email.
Click one of the following options:
Cancel: Cancel the email. Note: all changes will be lost.
Save as Draft: Save the email as a draft to be updated, scheduled, or sent later. All drafts will be saved to the Email Center in the Unsent tile, where they can be updated.
Schedule: Schedule the email to be sent at a specific date and time. All scheduled emails will be saved to the Email Center in the Unsent tile, where they can be updated.
Send: Immediately send the email to the selected members.
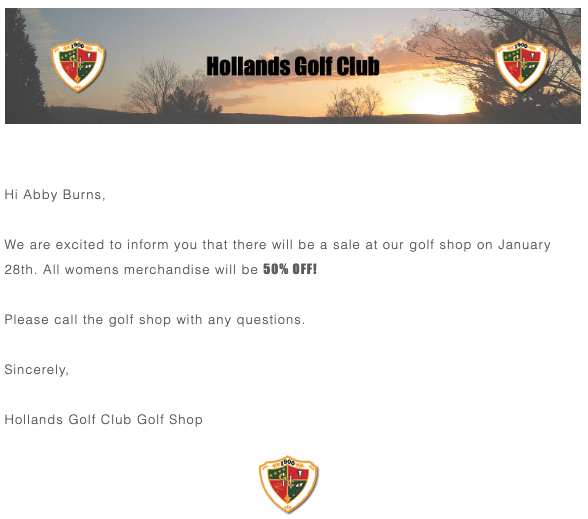
Below is an example email sent to a member. As you can see, the club logo and banner are also included in the email.
Composing Emails to Guests:
To send emails to specific or all of the individuals on your Guest Roster, follow these instructions:
Go to Communication > Emails > Create Email.
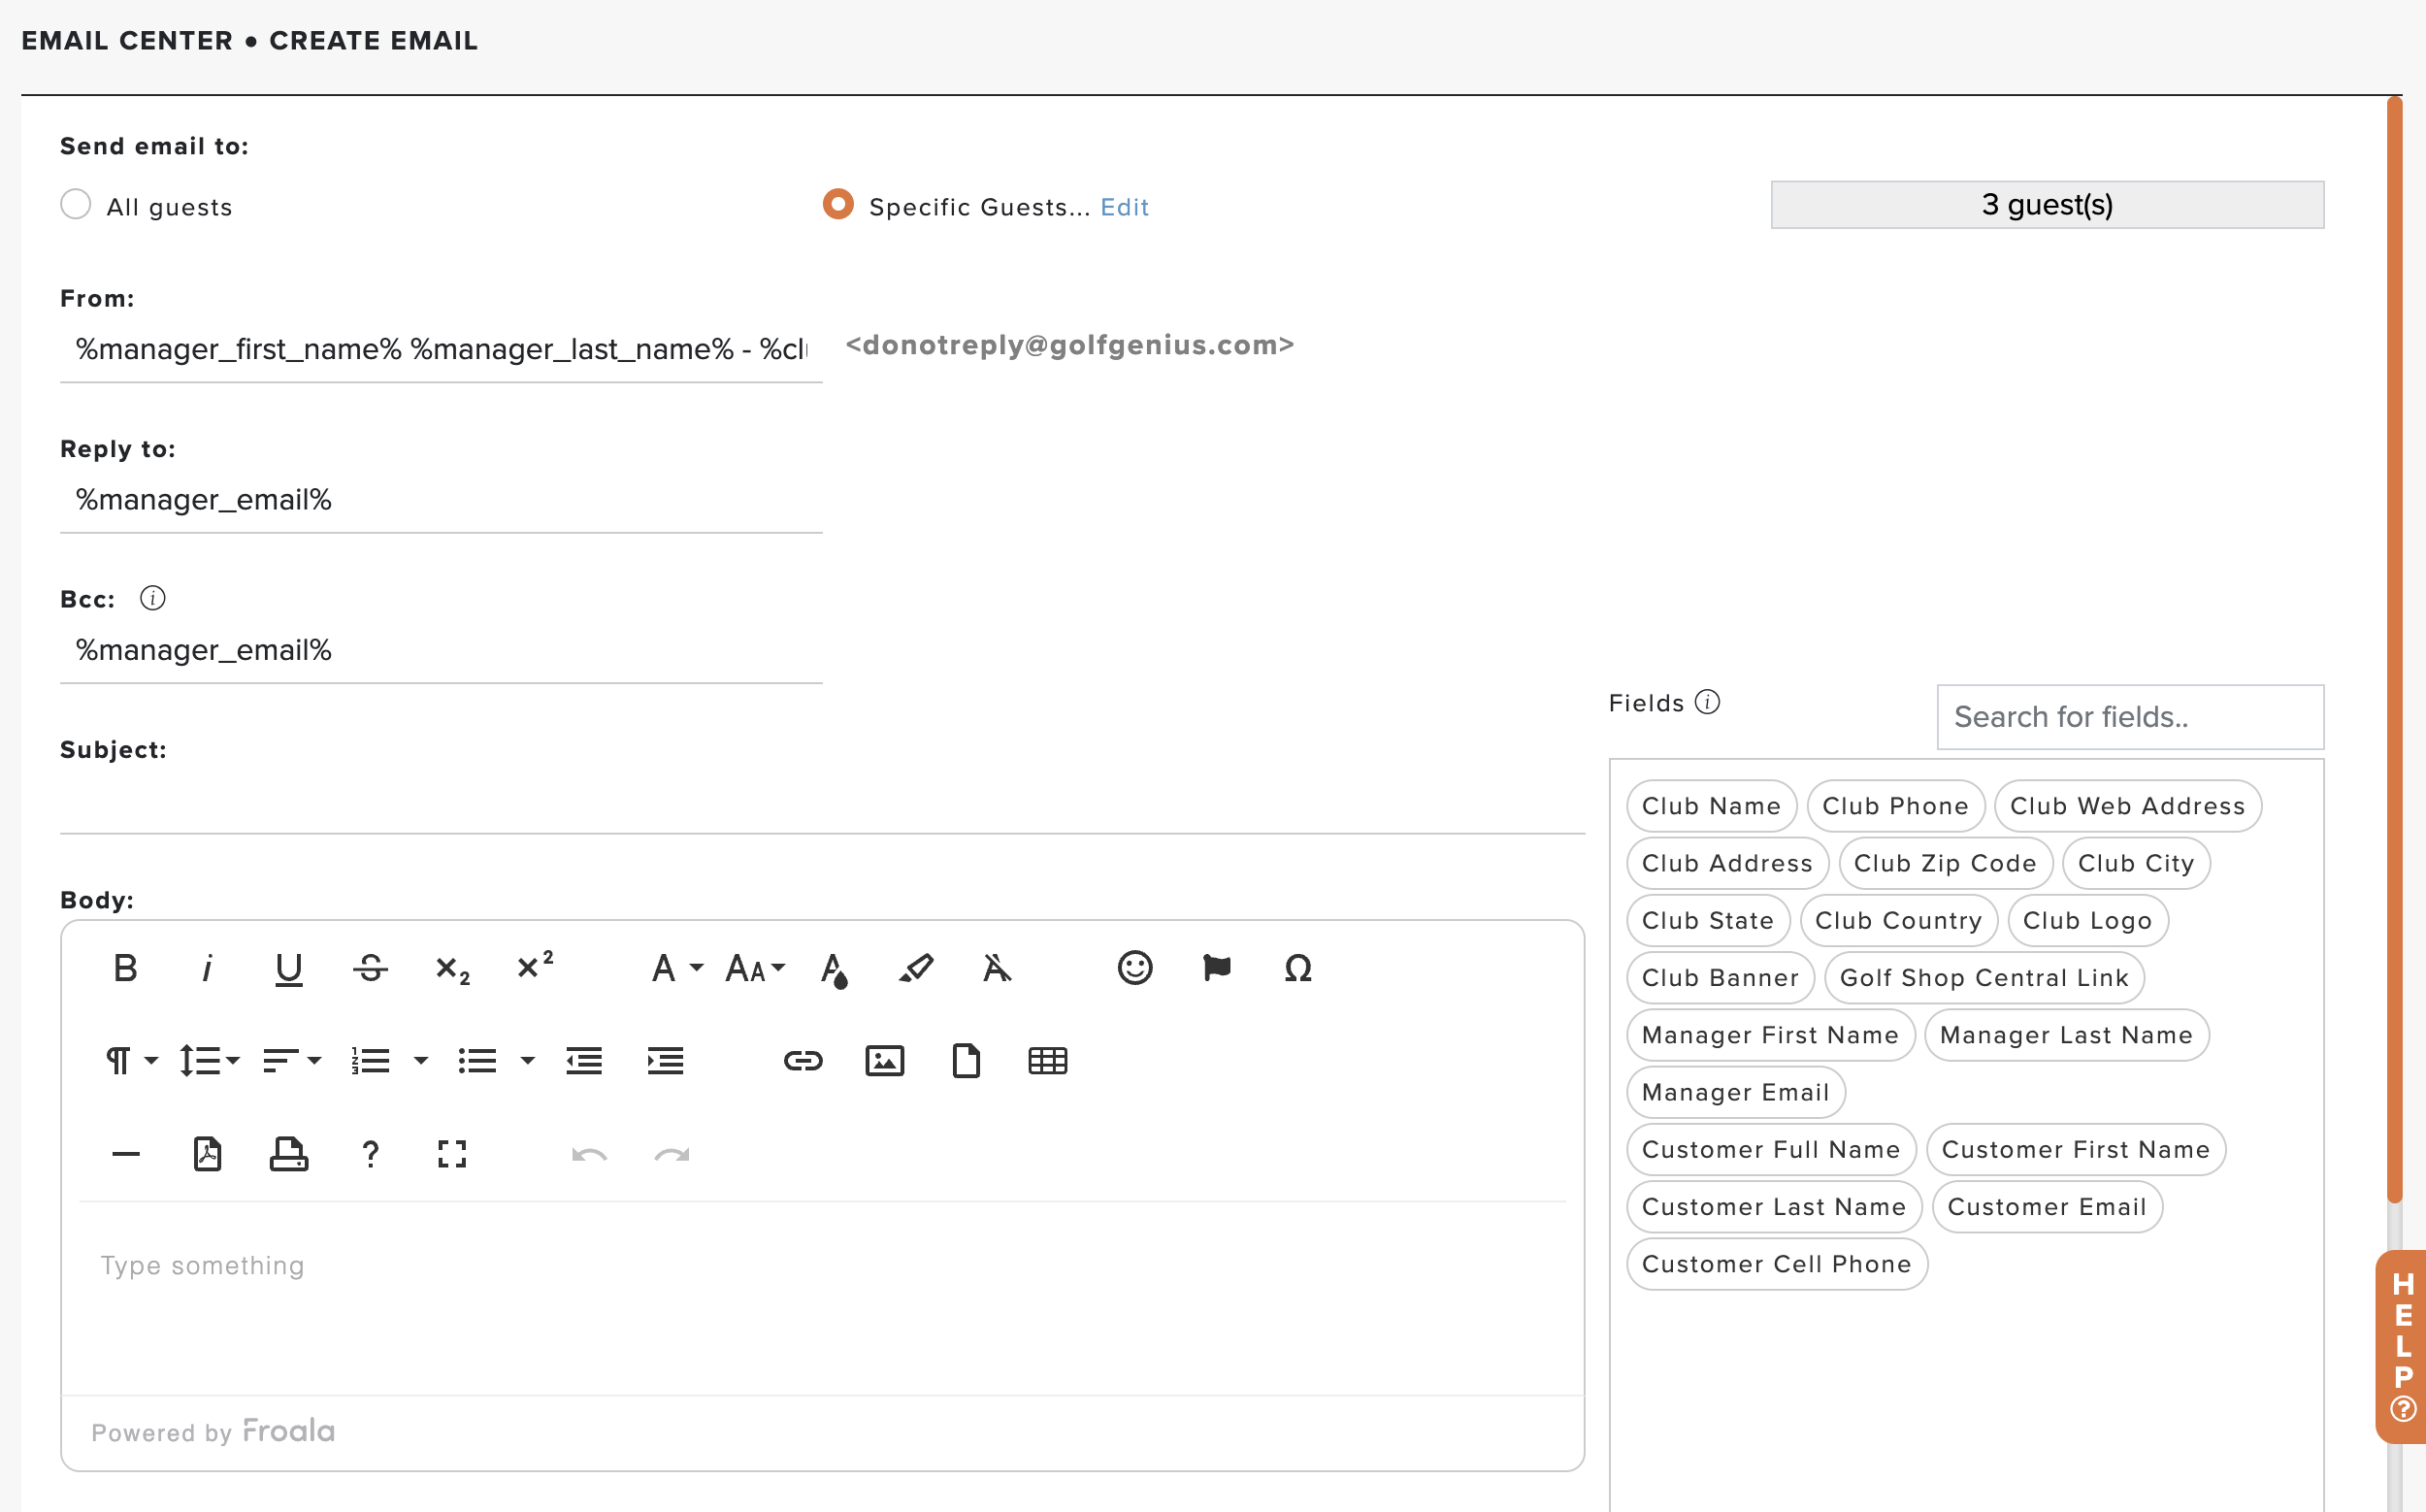
You will see a note, "Sending email to your Guest Roster instead, click the option "Click Here" to send emails to your guest roster (as shown below).

Select the recipients. You can send it to:
All Guests: Send to your entire guest roster.
Specific Guests: Search and select specific guests.
Edit the "From:" (if necessary). When an email is sent, you can modify the text that shows up before the system email (donotreply@golfgenius.com). For example, you could have the from line show your club name, the sender name, or both.
Edit the "Reply to:" (if necessary). If a guest responds to the email, this email address will receive the reply.
Edit the "Bcc:" (Blind Copy) (if necessary). Bcc any additional email addresses.
Enter the email "Subject:"
Enter content into the email's body using the rich text editor. You can insert data fields (available to the right) anywhere in the email. Along with basic formatting (e.g., font size & color, font type, bullets, numbering, text alignment, etc.), the rich text editor allows you to insert links, videos, images, and files.
Set an alternate Logo or Banner (if necessary).
Click "Refresh Preview" to preview the email before saving, scheduling, or sending it.
Review the Recipient count to ensure the proper guests are receiving the email.
Click one of the following options:
Cancel: Cancel the email. Note: all changes will be lost.
Save as Draft: Save the email as a draft to be updated, scheduled, or sent later. All drafts will be saved to the Email Center in the Unsent tile, where they can be updated.
Schedule: Schedule the email to be sent at a specific date and time. All scheduled emails will be saved to the Email Center in the Unsent tile, where they can be updated.
Send: Immediately send the email to the selected guest.
Sending Single Emails:
You can also send single emails to individual members or guests. To do this, follow these instructions:
Go to Communication > Emails > Send Single Email.
Select the Customer Type. If selecting a guest, only guests associated with current special orders, demos, club repairs, and rentals will be listed.
Select the member or guest in the dropdown.
Follow steps 3-8 in the previous section.
Click "Refresh Preview" to preview the email before sending it.
Review the Recipient list to ensure the proper member or guest receives the email.
Click "Send" to send the email.
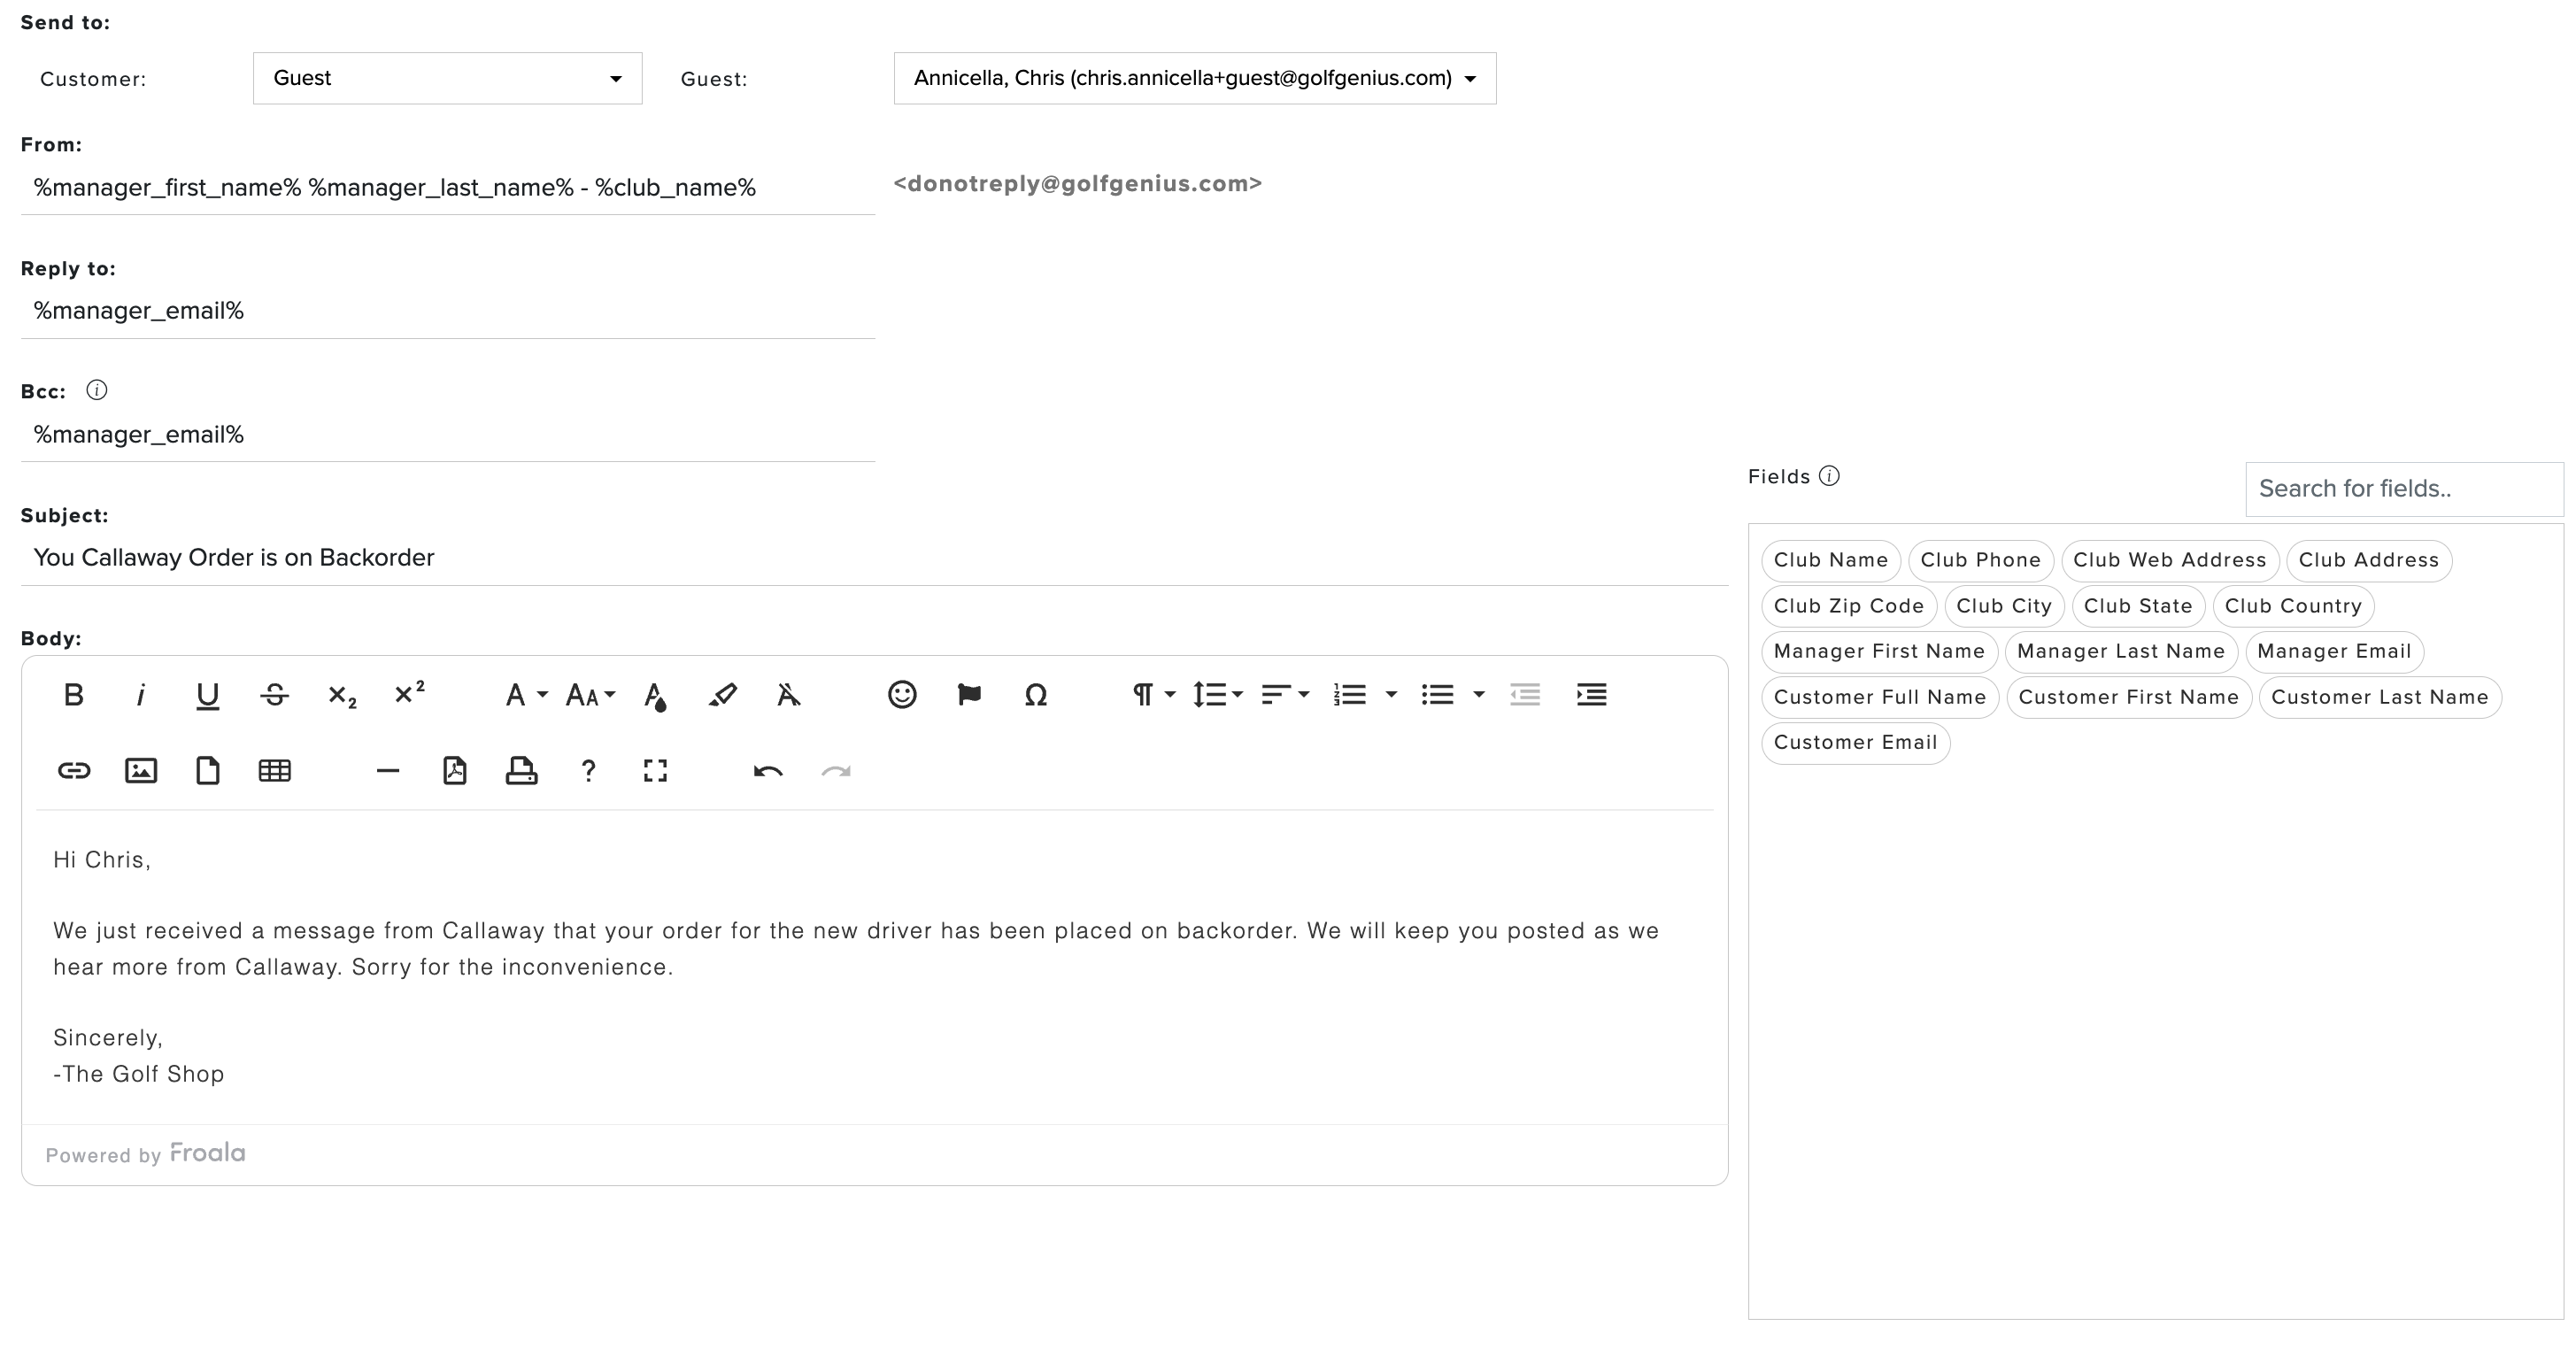
Below is a drafted email to a single member notifying them that their special order is now back-ordered.
Unsent Emails (Drafts and Scheduled Emails):
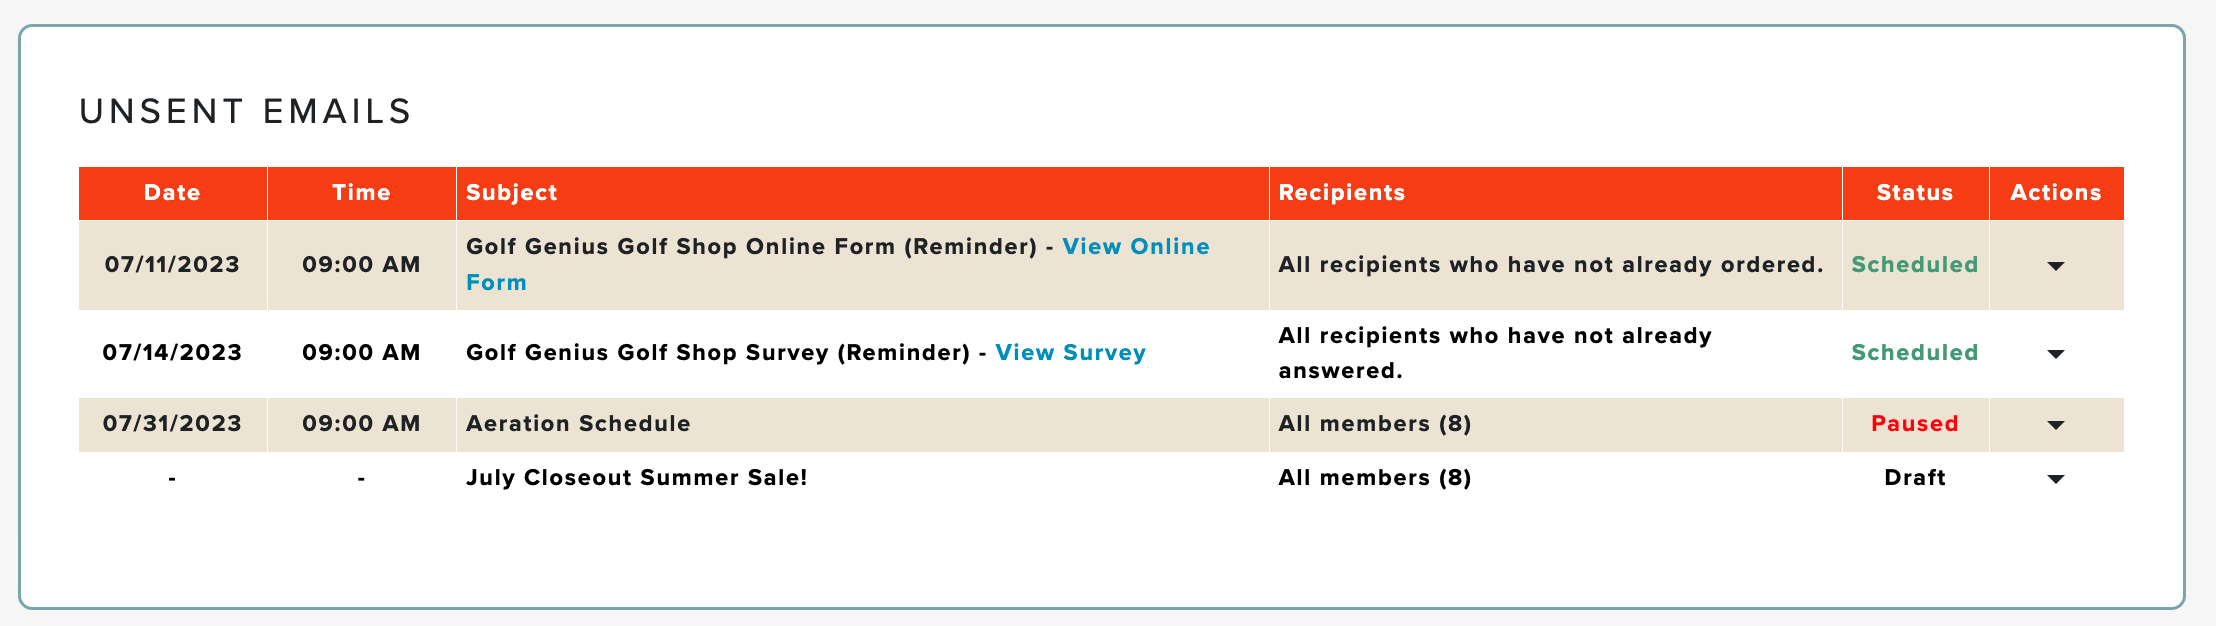
The "Unsent Emails" section in the Email Center contains all your scheduled and draft emails (as shown below).
The communications include:
Create Email: When creating an email using "Create Email" from the Email Center, you can save it as a draft or schedule it to be sent at a later date/time.
Survey Invitations: When Sending a Survey, you have the action options to "Send by Email" and "Send reminder email." When sending a survey using these options, you can save it as a draft or schedule it to be sent at a later date/time.
Online Order Form Invitation: When Sharing the Online Order Form, you have the action options to "Send by Email" and "Send reminder email." When sending an online order form using these options, you can save it as a draft or schedule it to be sent at a later date/time.
You can take the following actions on Unsent emails:
Preview: Displays a popup preview of the email to get a quick look at what is being sent and to whom the email will be sent.
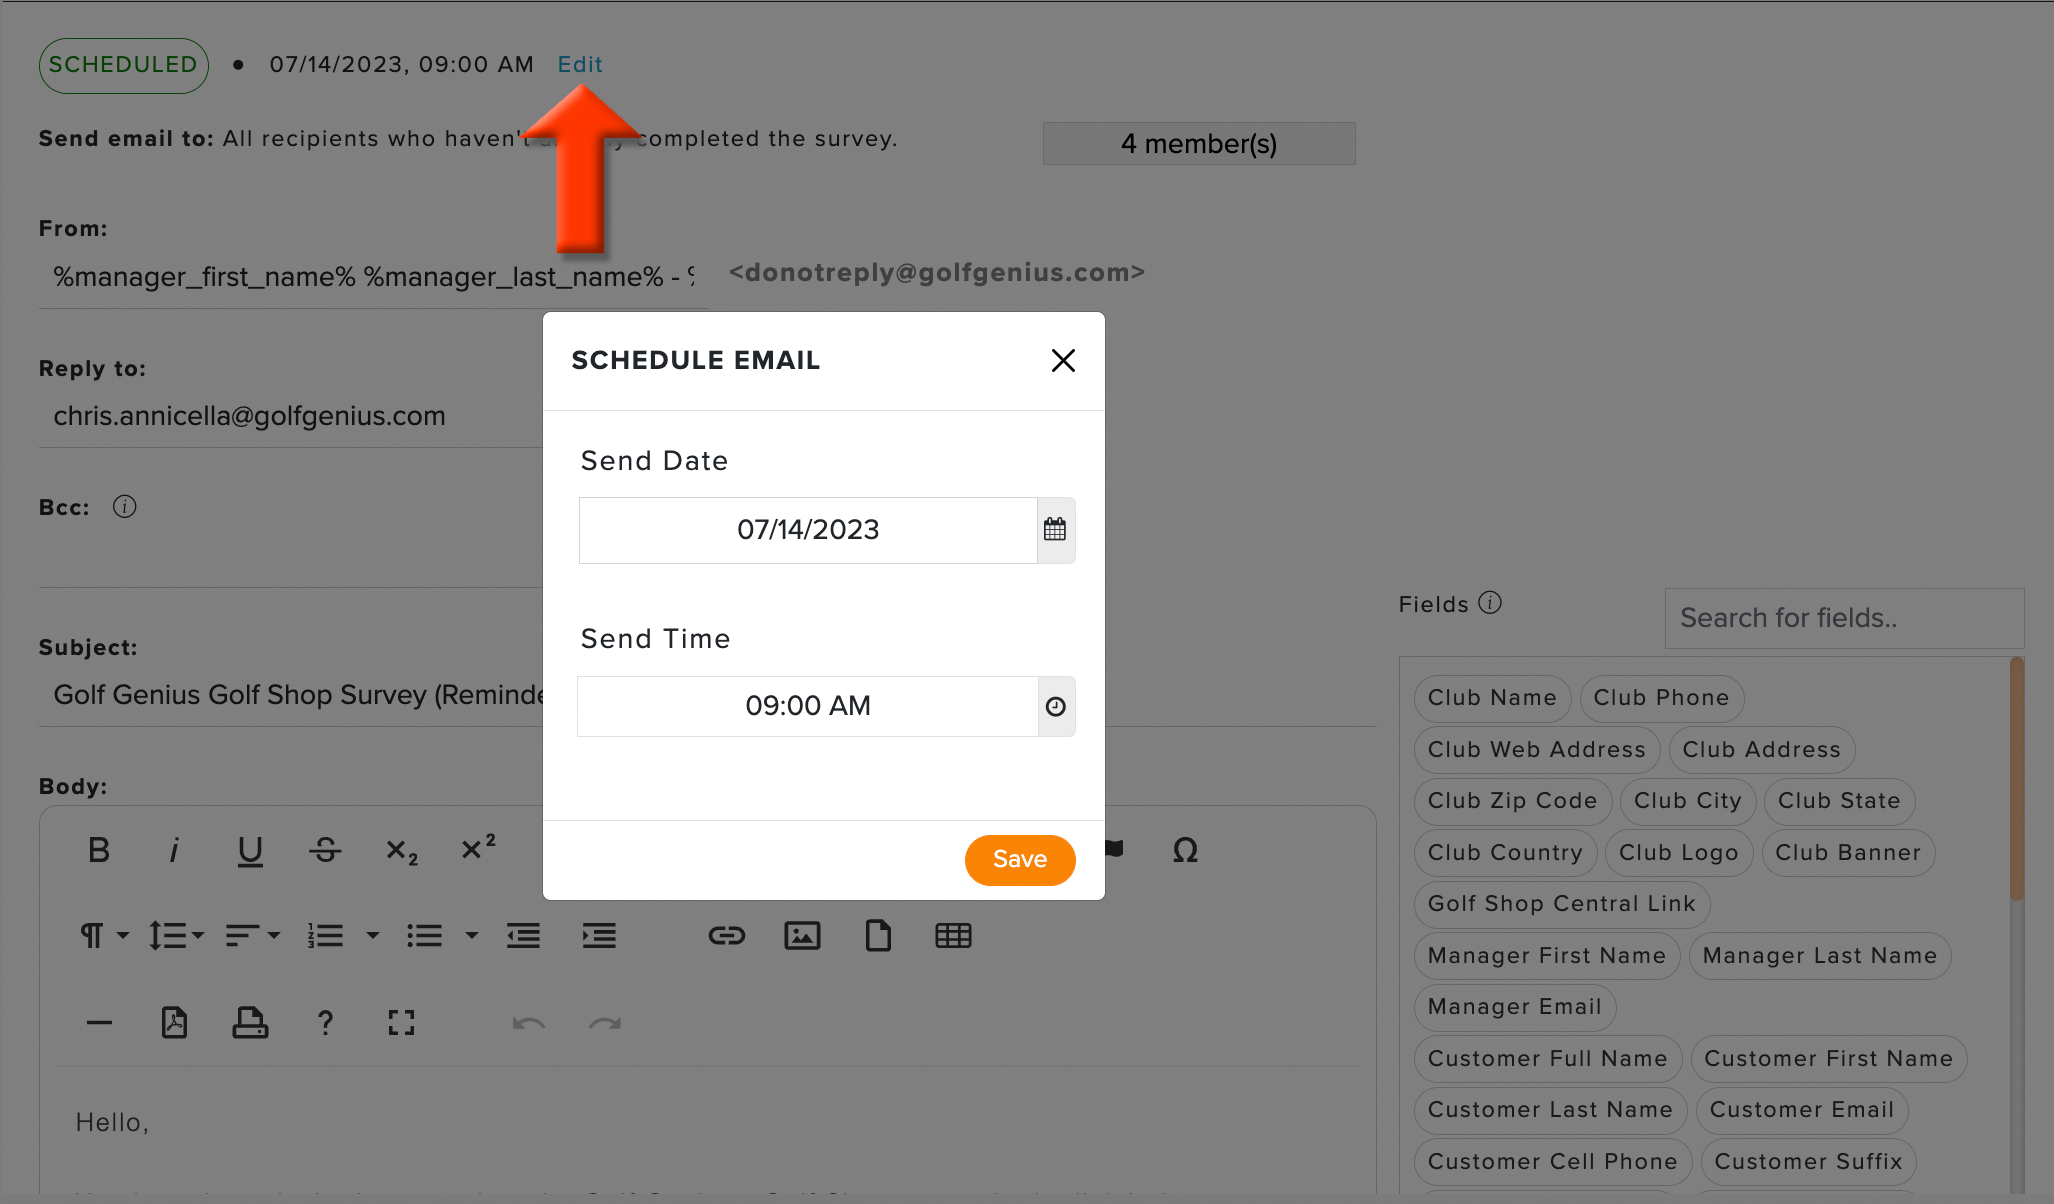
Edit: Allows you to edit the scheduled or draft email and save it. When editing an email, you can update the scheduled date/time by clicking "Edit" (as shown below).

Pause/Resume: Allows you to pause/resume scheduled emails.
Unschedule: Allows you to delete a scheduled email. Note: Deleted emails cannot be recovered.
Creating Email Templates:
If you send emails frequently with the same content, you can create templates for future emails, thus removing the need to create new emails from scratch every time.
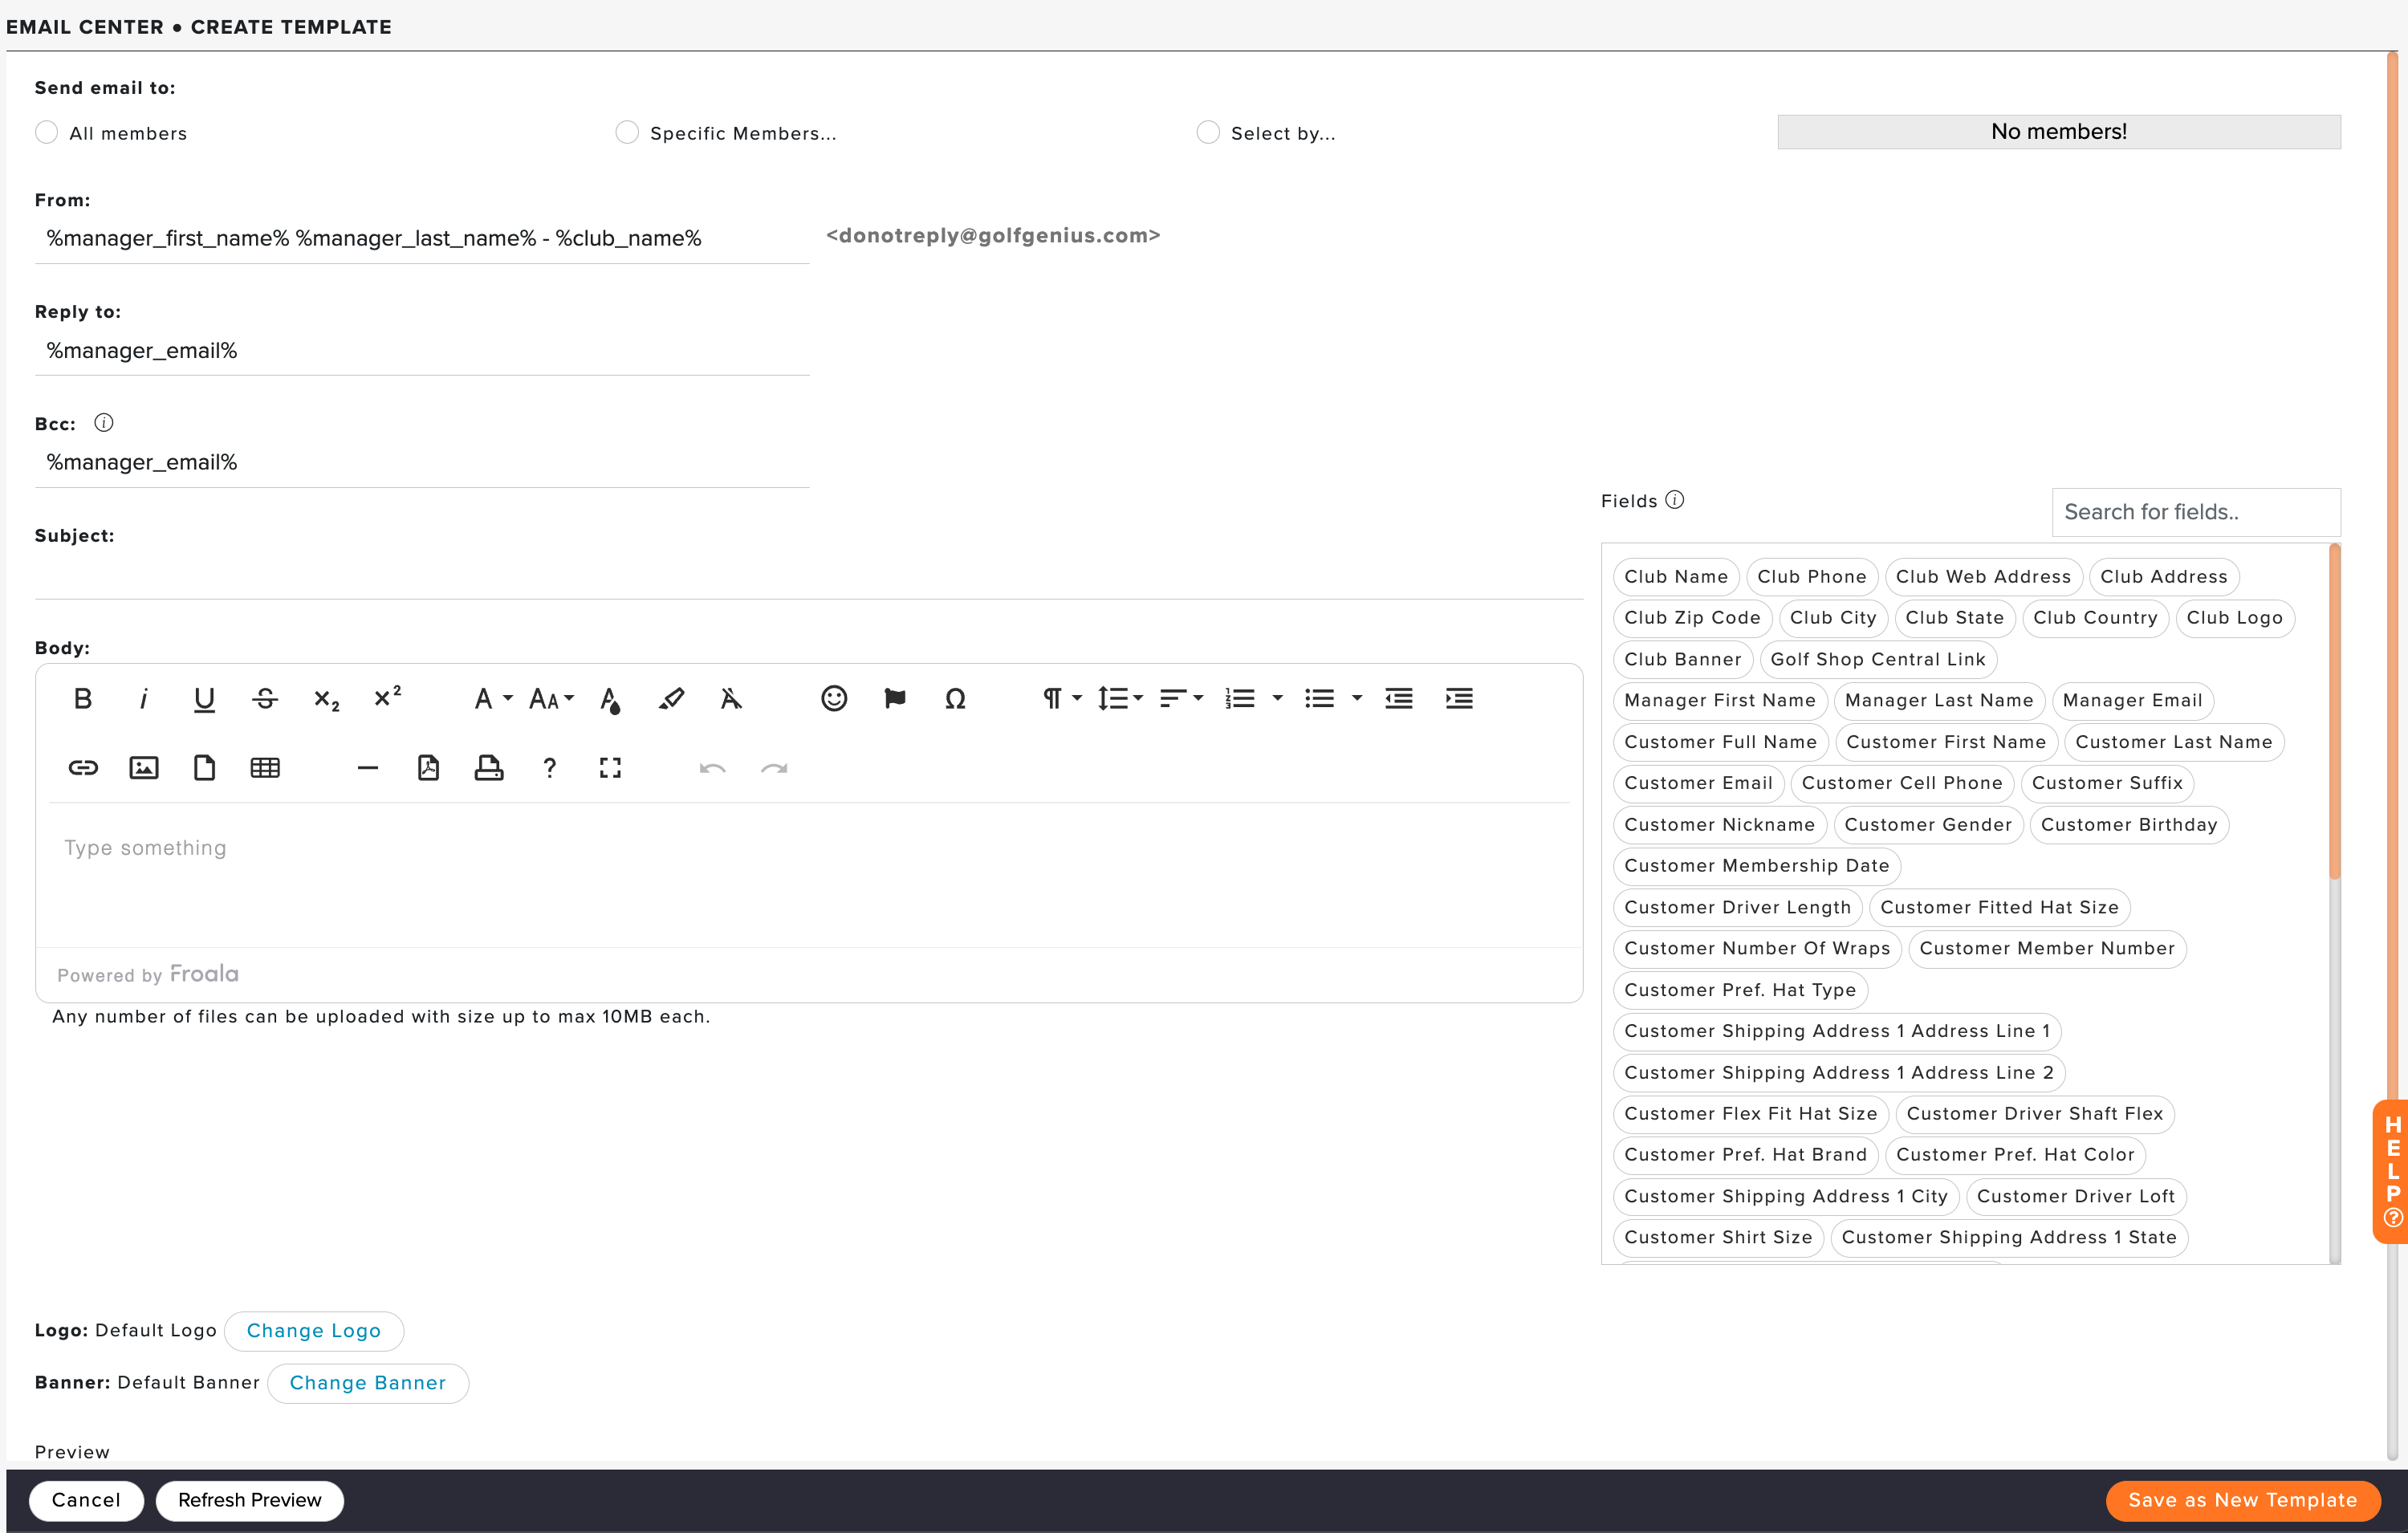
To create email templates, go to Communication > Emails > Create Template. Use the instructions in the previous sections, "Creating Emails," and click "Save as New Template" to create a new custom template (as shown below). All templates will be saved in the Email Center in the "Email Templates" section, where they can be used to send new emails or updated if needed.
Managing Email Templates:
All your email templates can be found in the Email Center by going to Communication > Emails > Email Templates (as shown below).
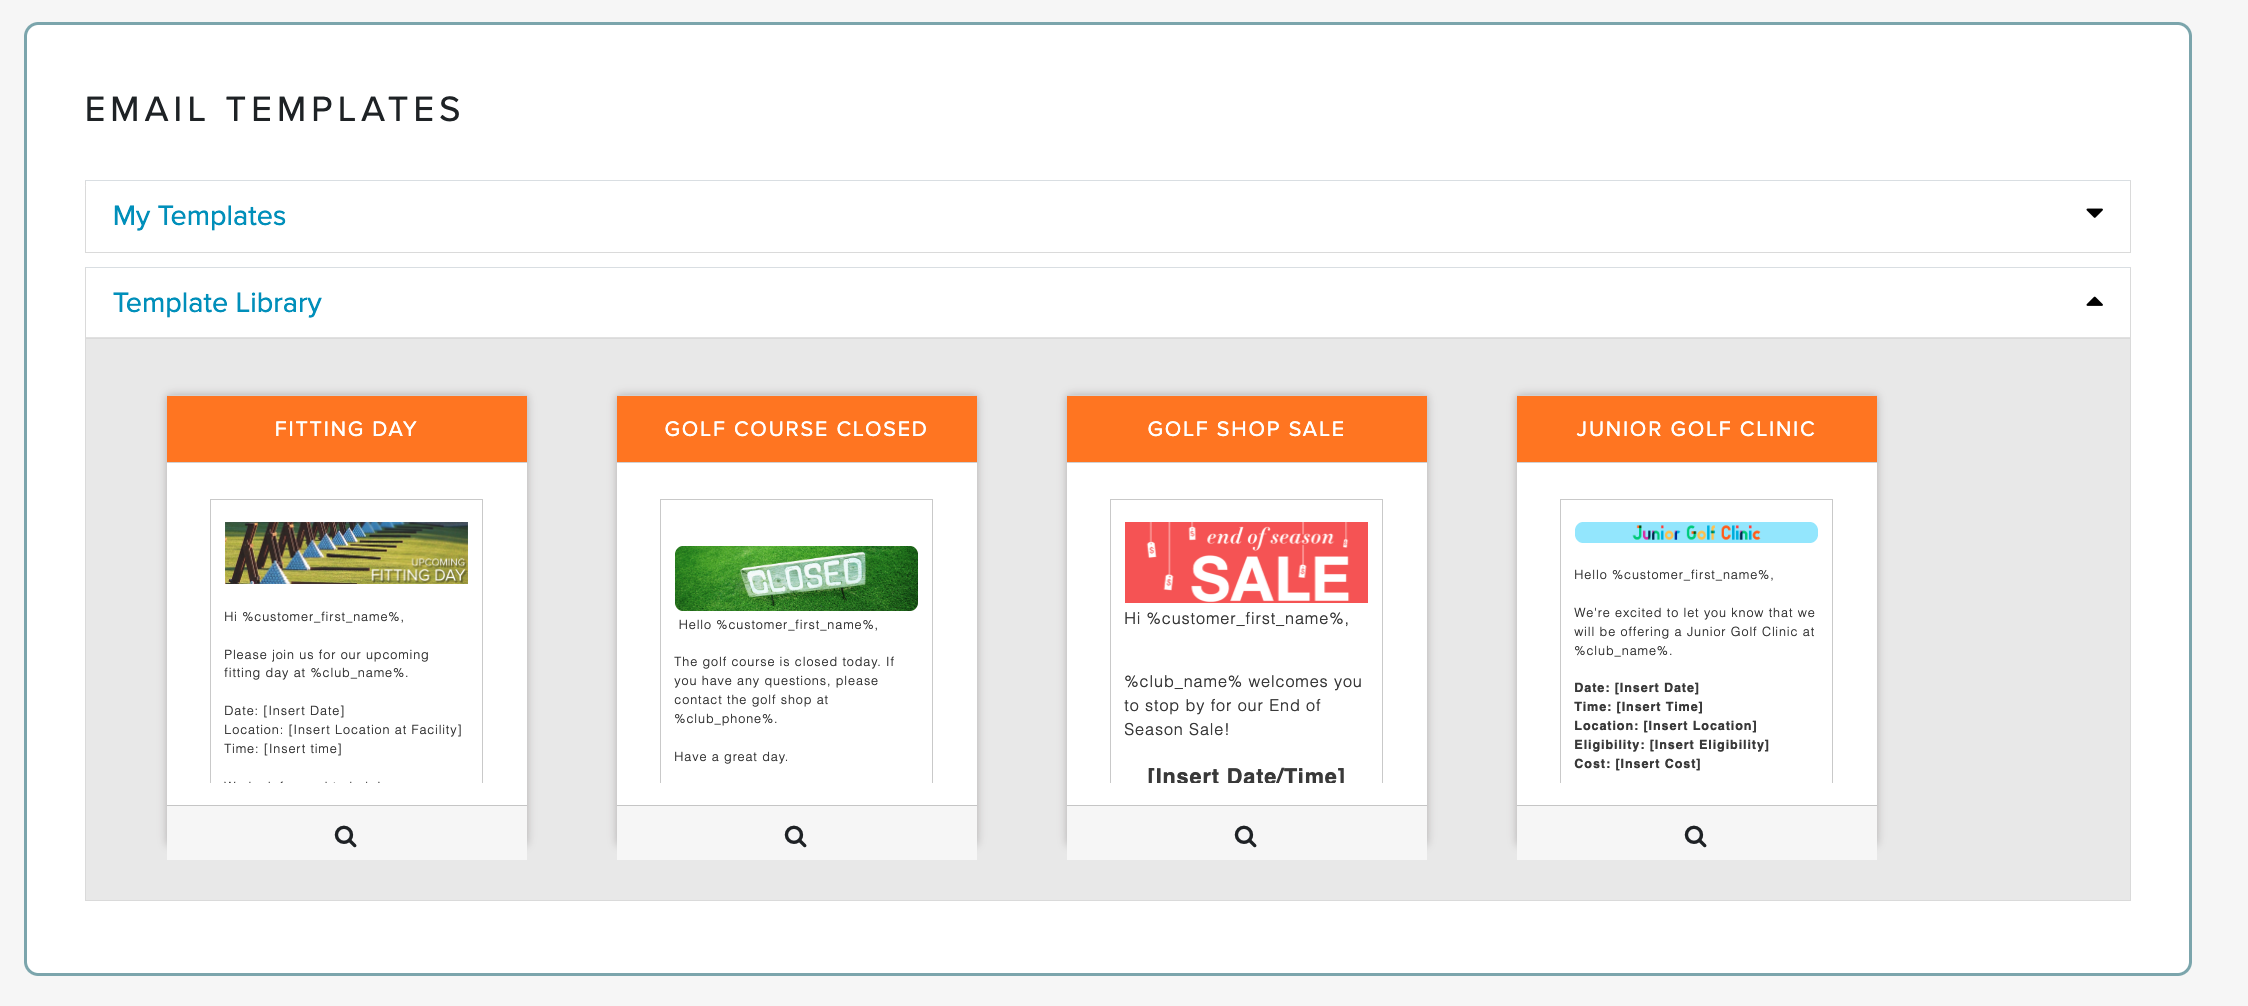
The Email Templates tile has two sections:
My Templates: Any templates you have created or added from the Template Library will be displayed here.
Template Library: In addition to the templates you have created, you can also discover templates from our library. Note: You must add a template from the library to your templates before you can use it. To add a template from the library to your templates, hover your mouse over the template and click "Add to my template."
To send an email using a template, hover your mouse over the templates and select one of the following options:
Create Email: Click "Create Email" to email multiple individuals on your member or guest roster.
Create Single Email: Click "Create Single Email" to email an individual member or guest (as shown below).

The following actions can also be taken on your templates:
Edit: To update any existing template, hover your mouse over the template and click "Edit." Make your update to the template and click "Save," and all changes will be saved to the existing template. Note: To change the name of a template, edit the template, and you will have the option to change the name.
Copy: Hover over an existing template and click "Copy" to make a copy of an existing template.
Delete: Click the trash can icon to delete a template. Note: Deleted templates cannot be recovered.