
When managing your demo clubs with Golf Genius Golf Shop and transitioning to a new season, like many other courses, you are sending the entire demo inventory back to the manufacturer to make room for the new demo inventory.
In this article, we will discuss the necessary steps and best practices that will help you make this transition smoothly into the next season during this process.
Note: Please read through this entire article before starting this process. It is good practice to download and backup the existing inventory since part of the process is to delete the existing inventory.
Clean-up Demo Club Dashboard:
When preparing your demo clubs for the upcoming season, cleaning up your demo club dashboard is one of the first steps you will need to take. This means finalizing demo club orders that have been returned but are still showing on the dashboard if not done so already.
Note: If this step is not taken, a demo club that needs to be removed from inventory will still show as an outstanding demo. Therefore, the club will not be removed from inventory.
To clean up your demo club dashboard, do the following:
Go to Services > Demo Clubs > Dashboard.
Find clubs that should be marked as returned.
Click the action dropdown, and click "Finalize."
Select the appropriate return open.
Make adjustments to the notification settings (if necessary).
Click "Save."
Repeat steps 2-6 as needed.
Replacing the Entire Inventory:
**Golf Genius Important Note**
If you are using demo club labels and you delete the entire inventory, all current demo club labels will no longer be scannable.
During this process your inventory will be deleted. A few items to note:
The club details from the deleted inventory will still be stored in your past demos.
Any outstanding demo clubs will not be deleted from inventory.
If you only need to update a portion of your inventory at this time, please review the other options available to you. For details on the other available options, Click Here.
To replace the entire inventory, follow these instructions:
Go to Services > Demo Clubs > Inventory.
Click "Manage Inventory via Spreadsheet."
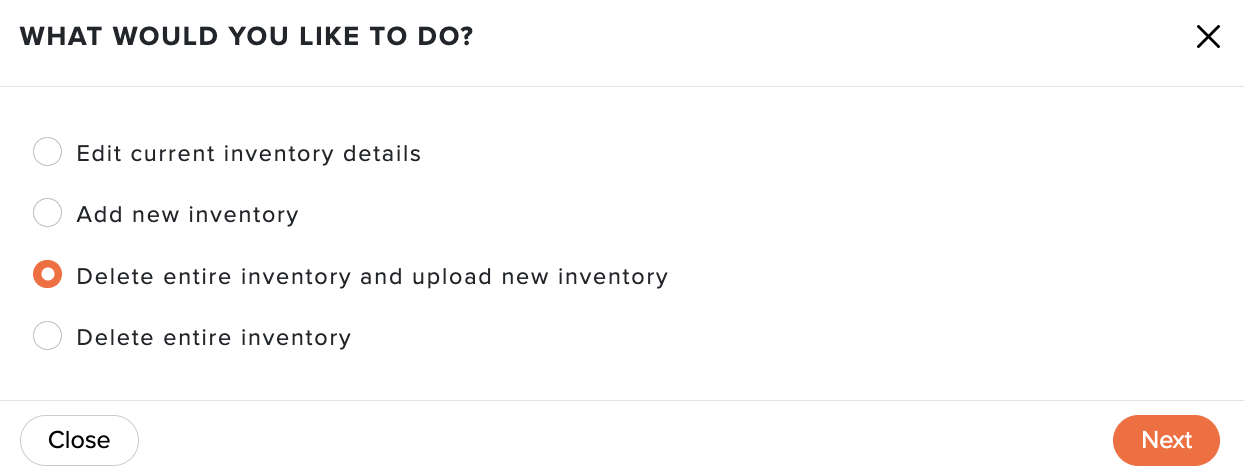
Select the option "Delete entire inventory and upload new inventory" (as shown below).

Click "Next."
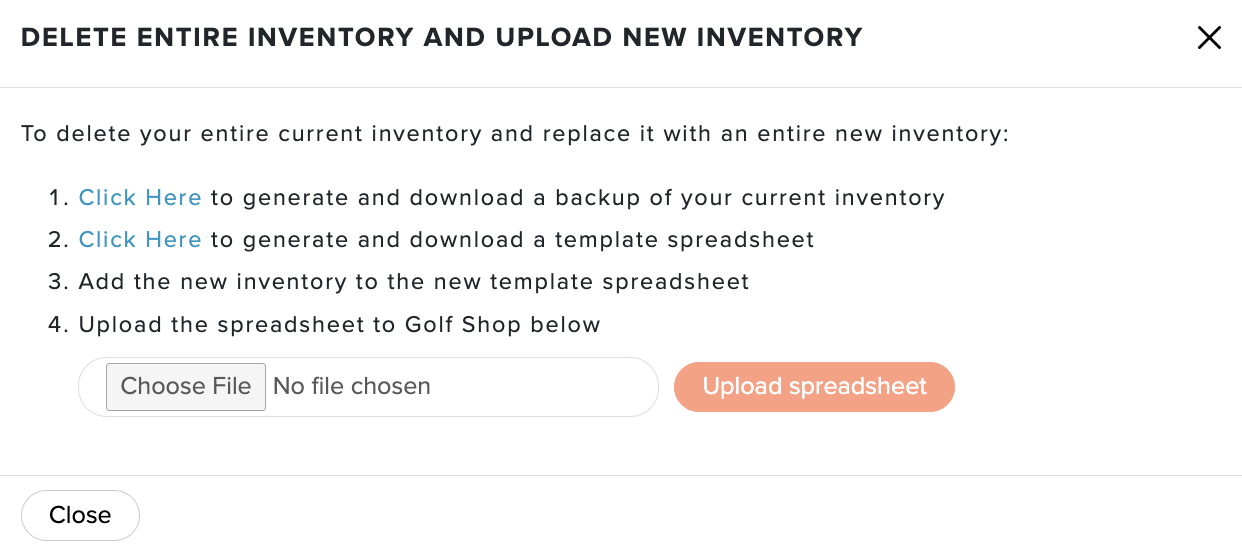
You will be presented with a step-by-step guide to replace your inventory (shown below).

Click the option "Click Here" to generate and download a backup of your current inventory.
Click "Download Current Inventory to Spreadsheet" and the backup excel file will downloaded to your computer.
Click the option second row "Click Here" to generate a spreadsheet template. This spreadsheet template should be used to compile and upload your new inventory.
Click "Download Spreadsheet Template" and the excel file will downloaded to your computer.
Open the spreadsheet and add your inventory. Note: Review the section below titled "Preparing Your Spreadsheet," to prepare the spreadsheet to be uploaded.
Save the spreadsheet.
In Golf Shop click "Choose File" and select the file from your computer.
Click "Upload Spreadsheet".
Match the columns with our system attributes (if necessary). Some (or all) columns will automatically be matched (as shown below).

Below the columns that were automatically matched, you can manually match unmatched columns by selecting our attribute that matches your column. In the example below, the "Lie" and "Loft" columns are being matched with our "Club Lie" and "Club Loft" attributes.

Click "View Summary".
Review the summary of changes.
If you did not assign Tracking ID's and you would like Golf Genius to assign Tracking ID's, at the bottom of the page, click " Automatically generate and assign Tracking IDs to items without Tracking IDs."
After reviewing the changes and they look appropriate, click "Apply Changes." Your demo inventory will be updated.
For more details about replacing your demo inventory via spreadsheet, Click Here.
Preparing the Spreadsheet:
Before uploading the spreadsheet of your demo club inventory, make sure it meets the following requirements:
Utilize the downloaded Template from Golf Shop for best results.
Spreadsheets must be in XLS, XLSX, or CSV format.
The spreadsheet must have only one worksheet.
The first row must have column headings (e.g., Kind, Club Type, Make, Model, Loft, etc).
Each row should only have the data for one demo club.
Below is a screenshot of an acceptable spreadsheet.
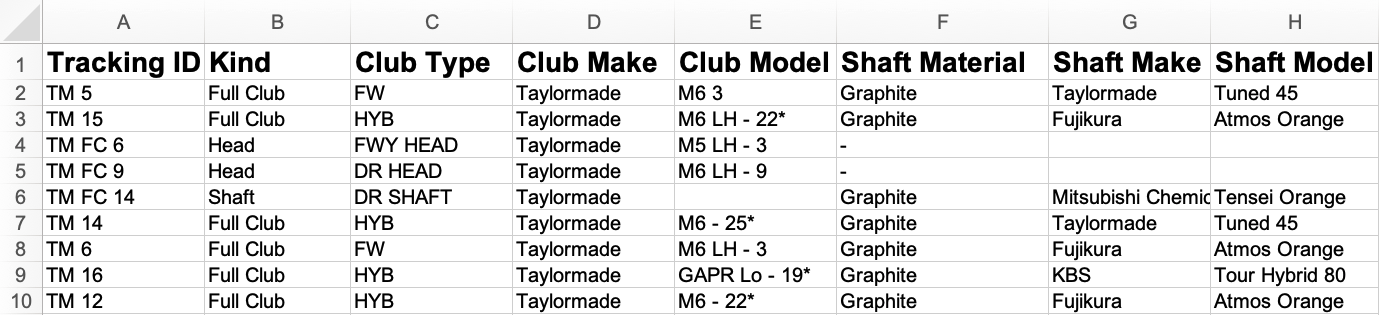
When compiling the spreadsheet, you should include:
Tracking ID: This ID (must be unique) is displayed in the club/component selector when checking out a demo club, so it is important that the club can be easily identified by the Tracking ID. If you do not include Tracking IDs in the spreadsheet, they will be generated for you after the upload.
Kind: If interchangeable club heads and shafts are being entered into the inventory, this field should be included to identify the item as a full club, head, or shaft. The answers to these fields must be "full club", "head", or "shaft". If left blank, they will be considered full clubs.
You can also include any additional club details that you'd like. The details being uploaded will be stored in the demo club inventory.