
Member Portals allow managers to create a single cohesive page with a flexible layout that can include multiple tabs, blocks, columns, and tiles, making it easy for your members to navigate and find the information they are looking for. Each tile includes content from one of the available tile options.
With Member Portals, you can have a single tab or multiple tabs. Each tab can contain one or more blocks. Blocks can have a single column or two columns. Each column can contain one or more tiles (which hold the content).
Below is an example that illustrates the structure:
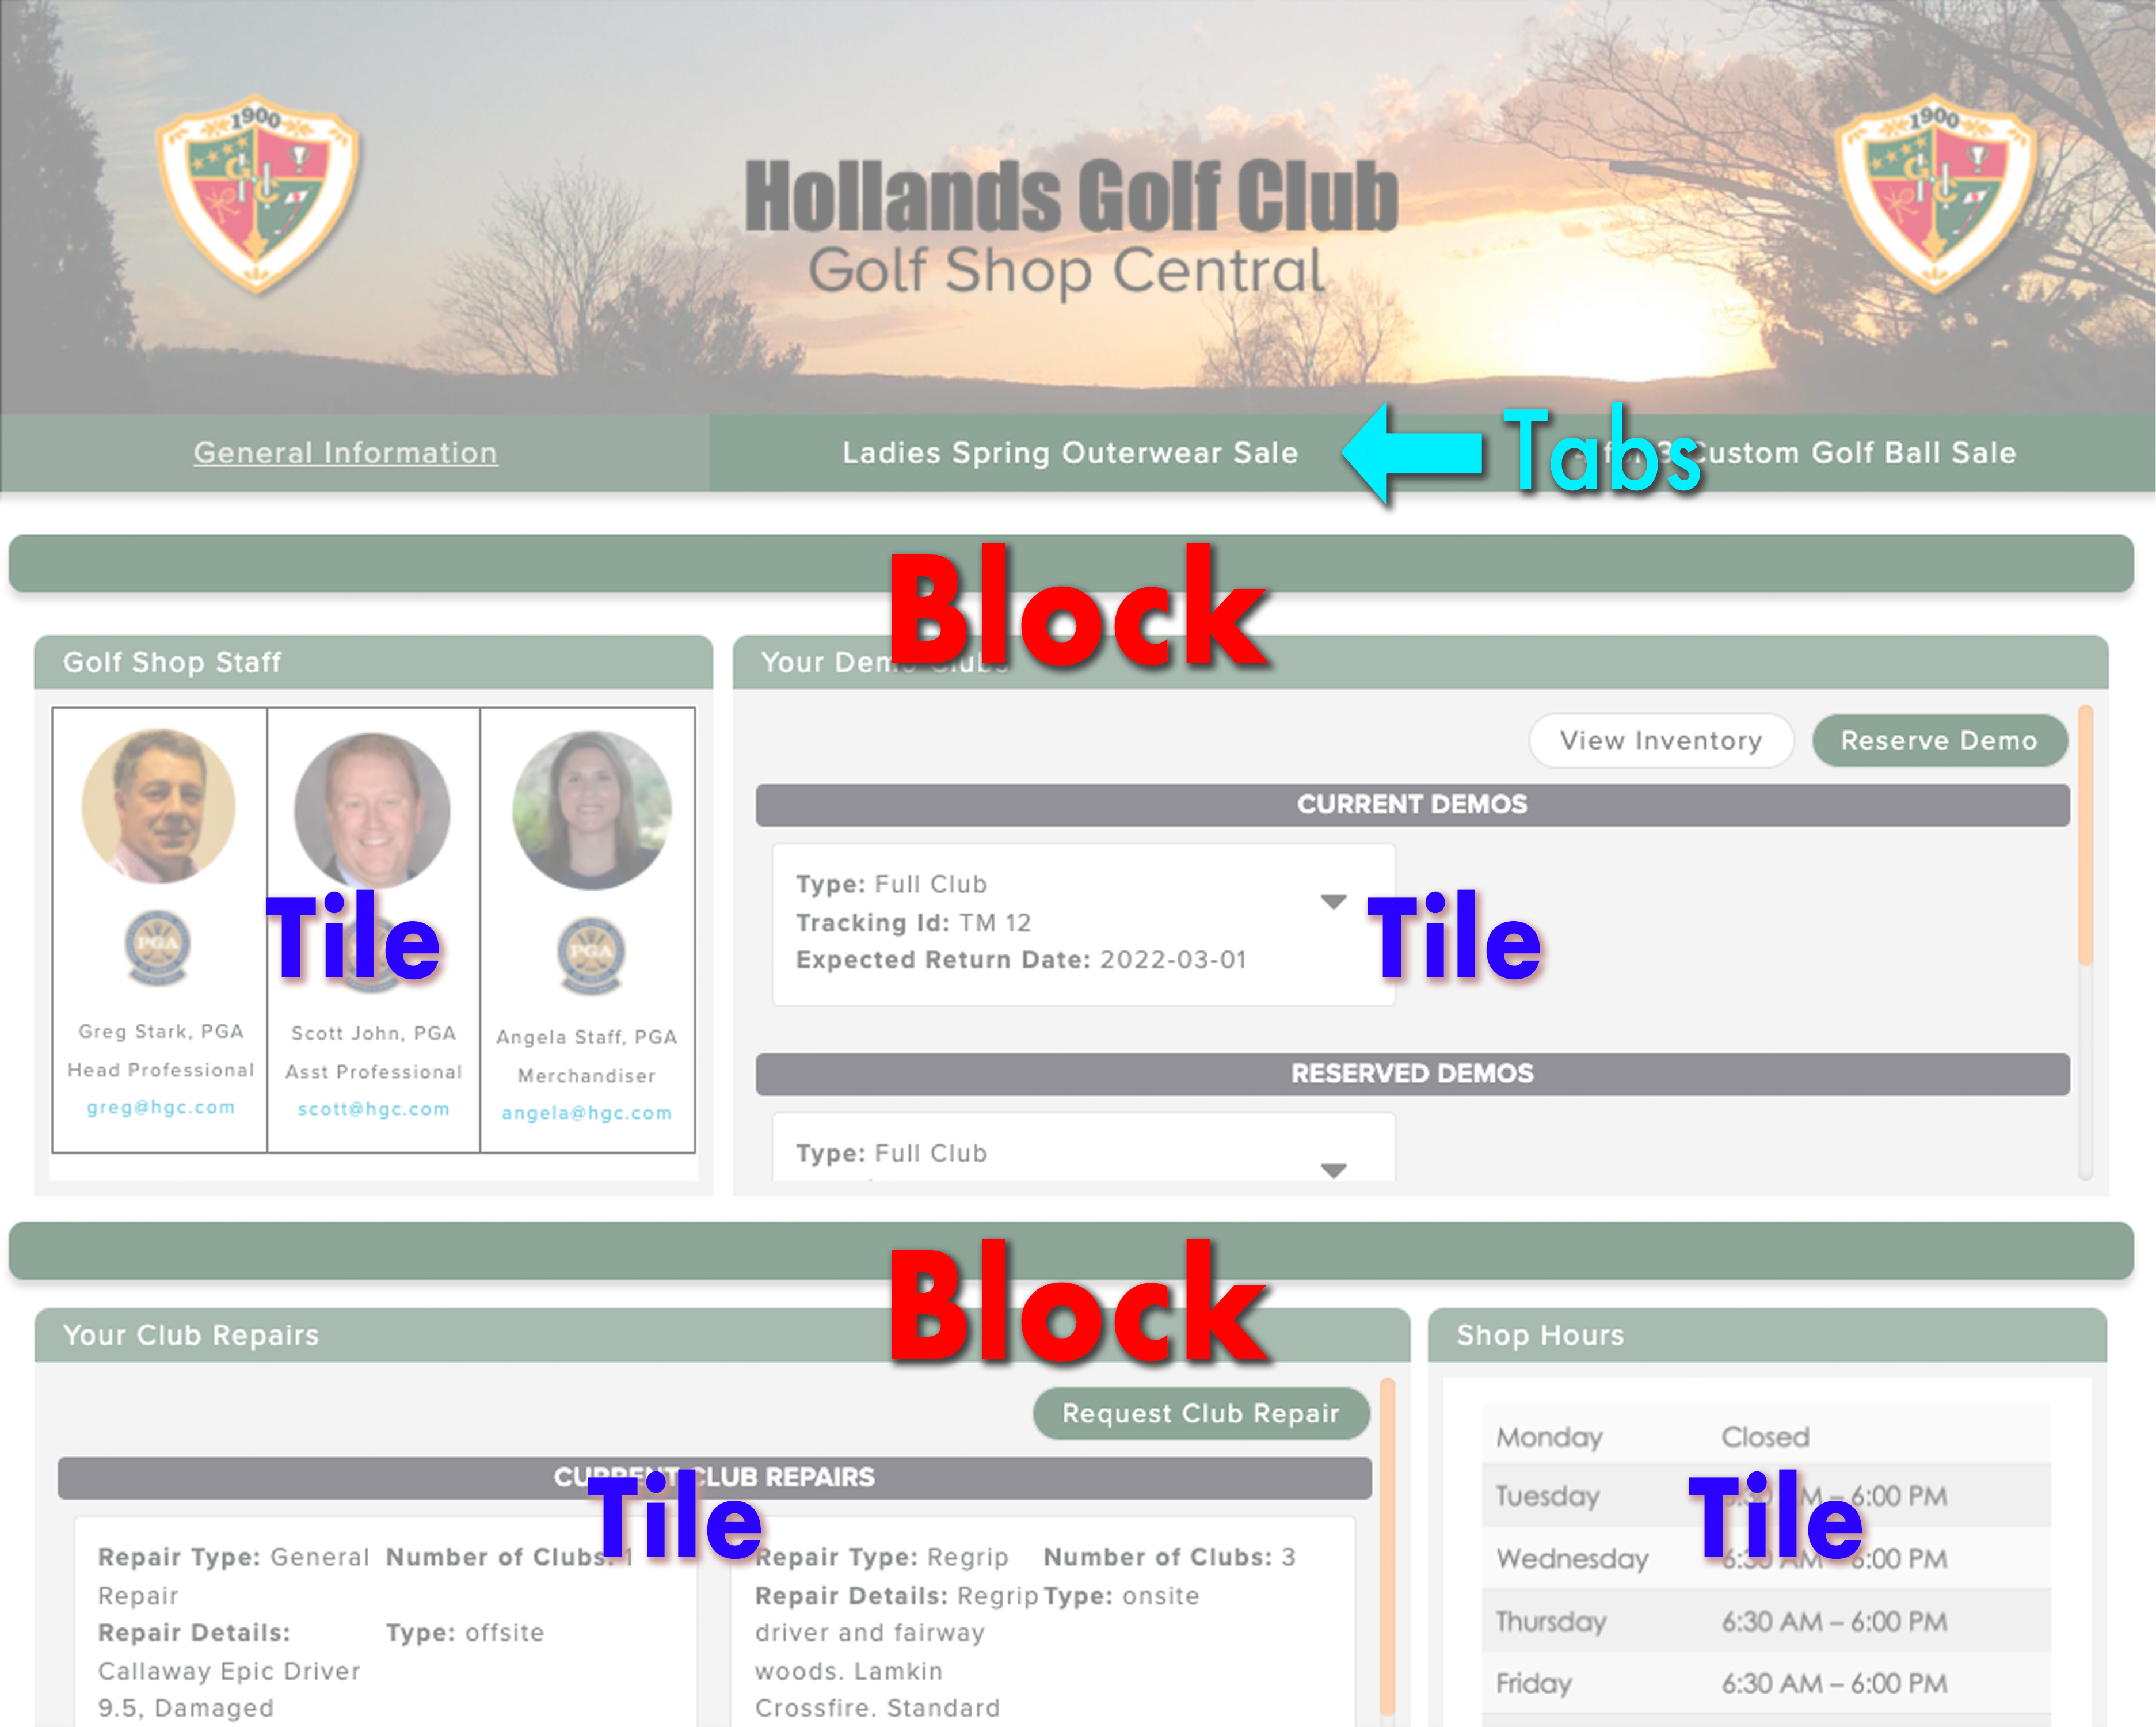
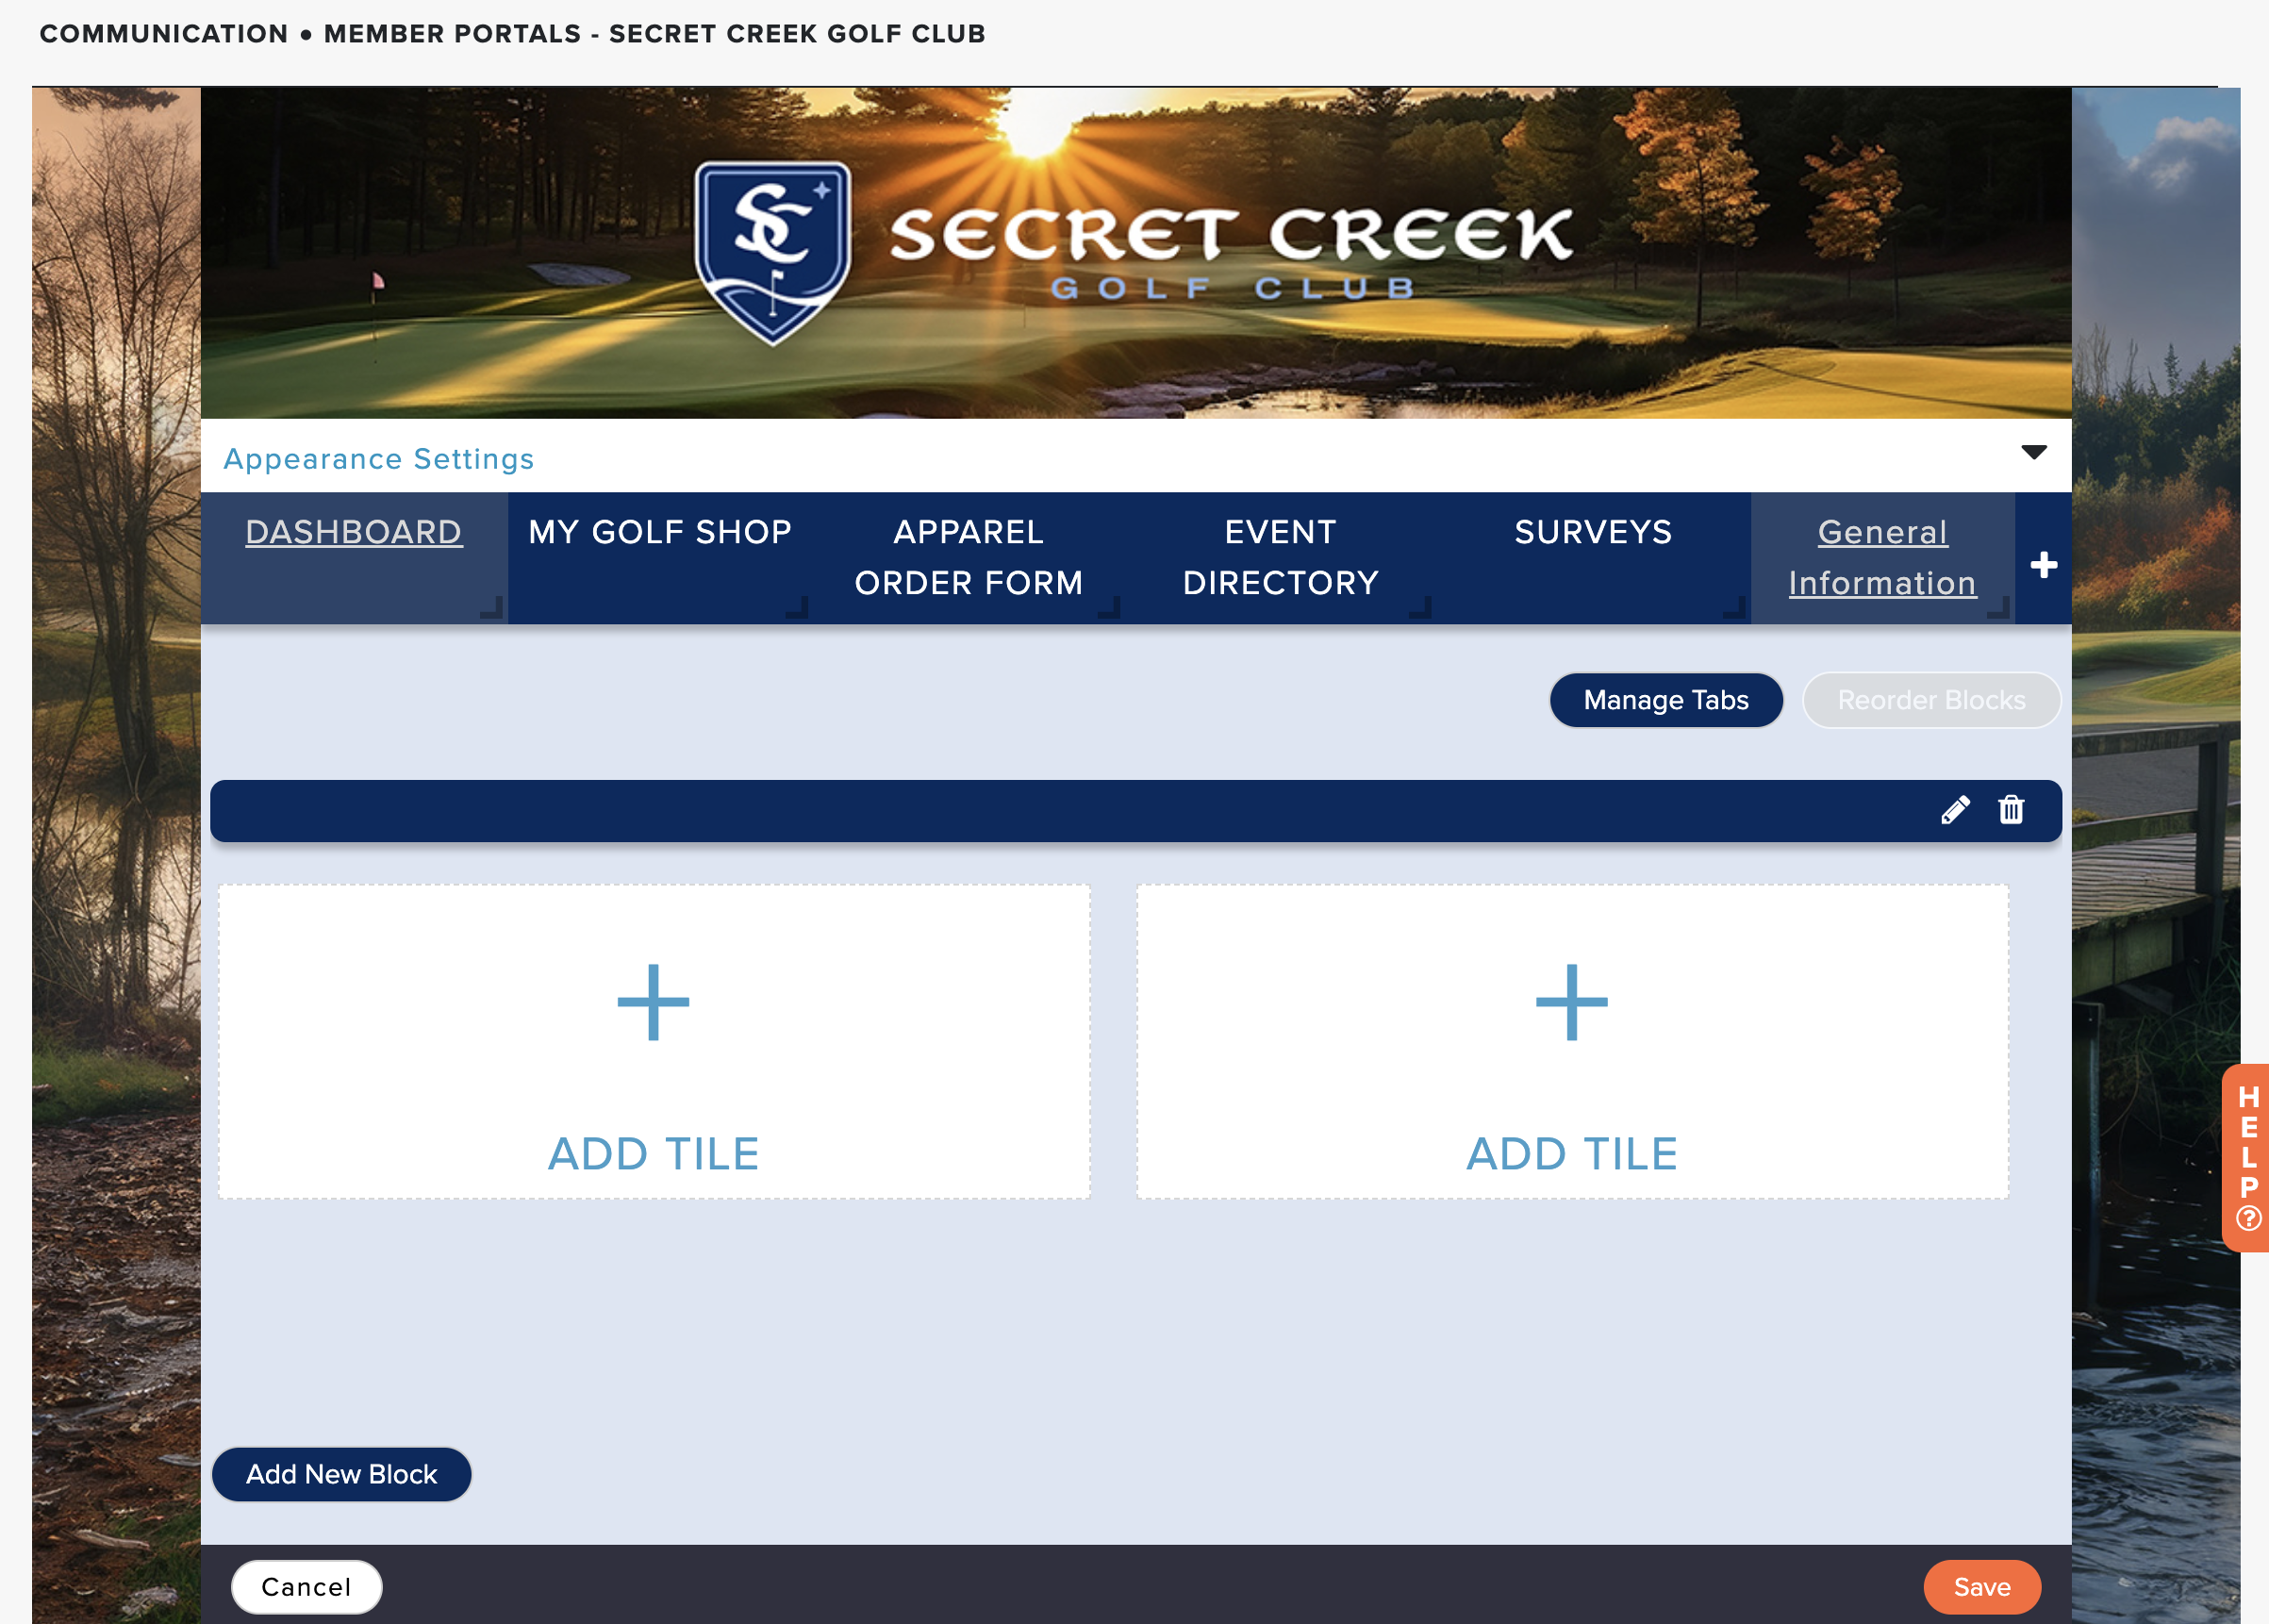
In the example above, there are three tabs (General Information, Ladies Spring Outerwear Sale, and 4 for 3 Custom Golf Ball Sale). Within the General Information tab, there are two blocks. Both blocks contain 2 tiles organized into two columns with slightly different column width bias.
When designing Member Portals, you can organize it into multiple tabs or organize all the content into a single tab. This organization can make navigation quicker and easier, giving it a "one-stop shop" feel.
In this article, we will discuss how to access the editor and the available options for setting your tabs, blocks, and tiles.
Accessing Member Portal Appearance Editor
All the available appearance options in the article can be accessed when creating a new portal or editing any existing Member Portal. To access and edit a portal, follow these directions:
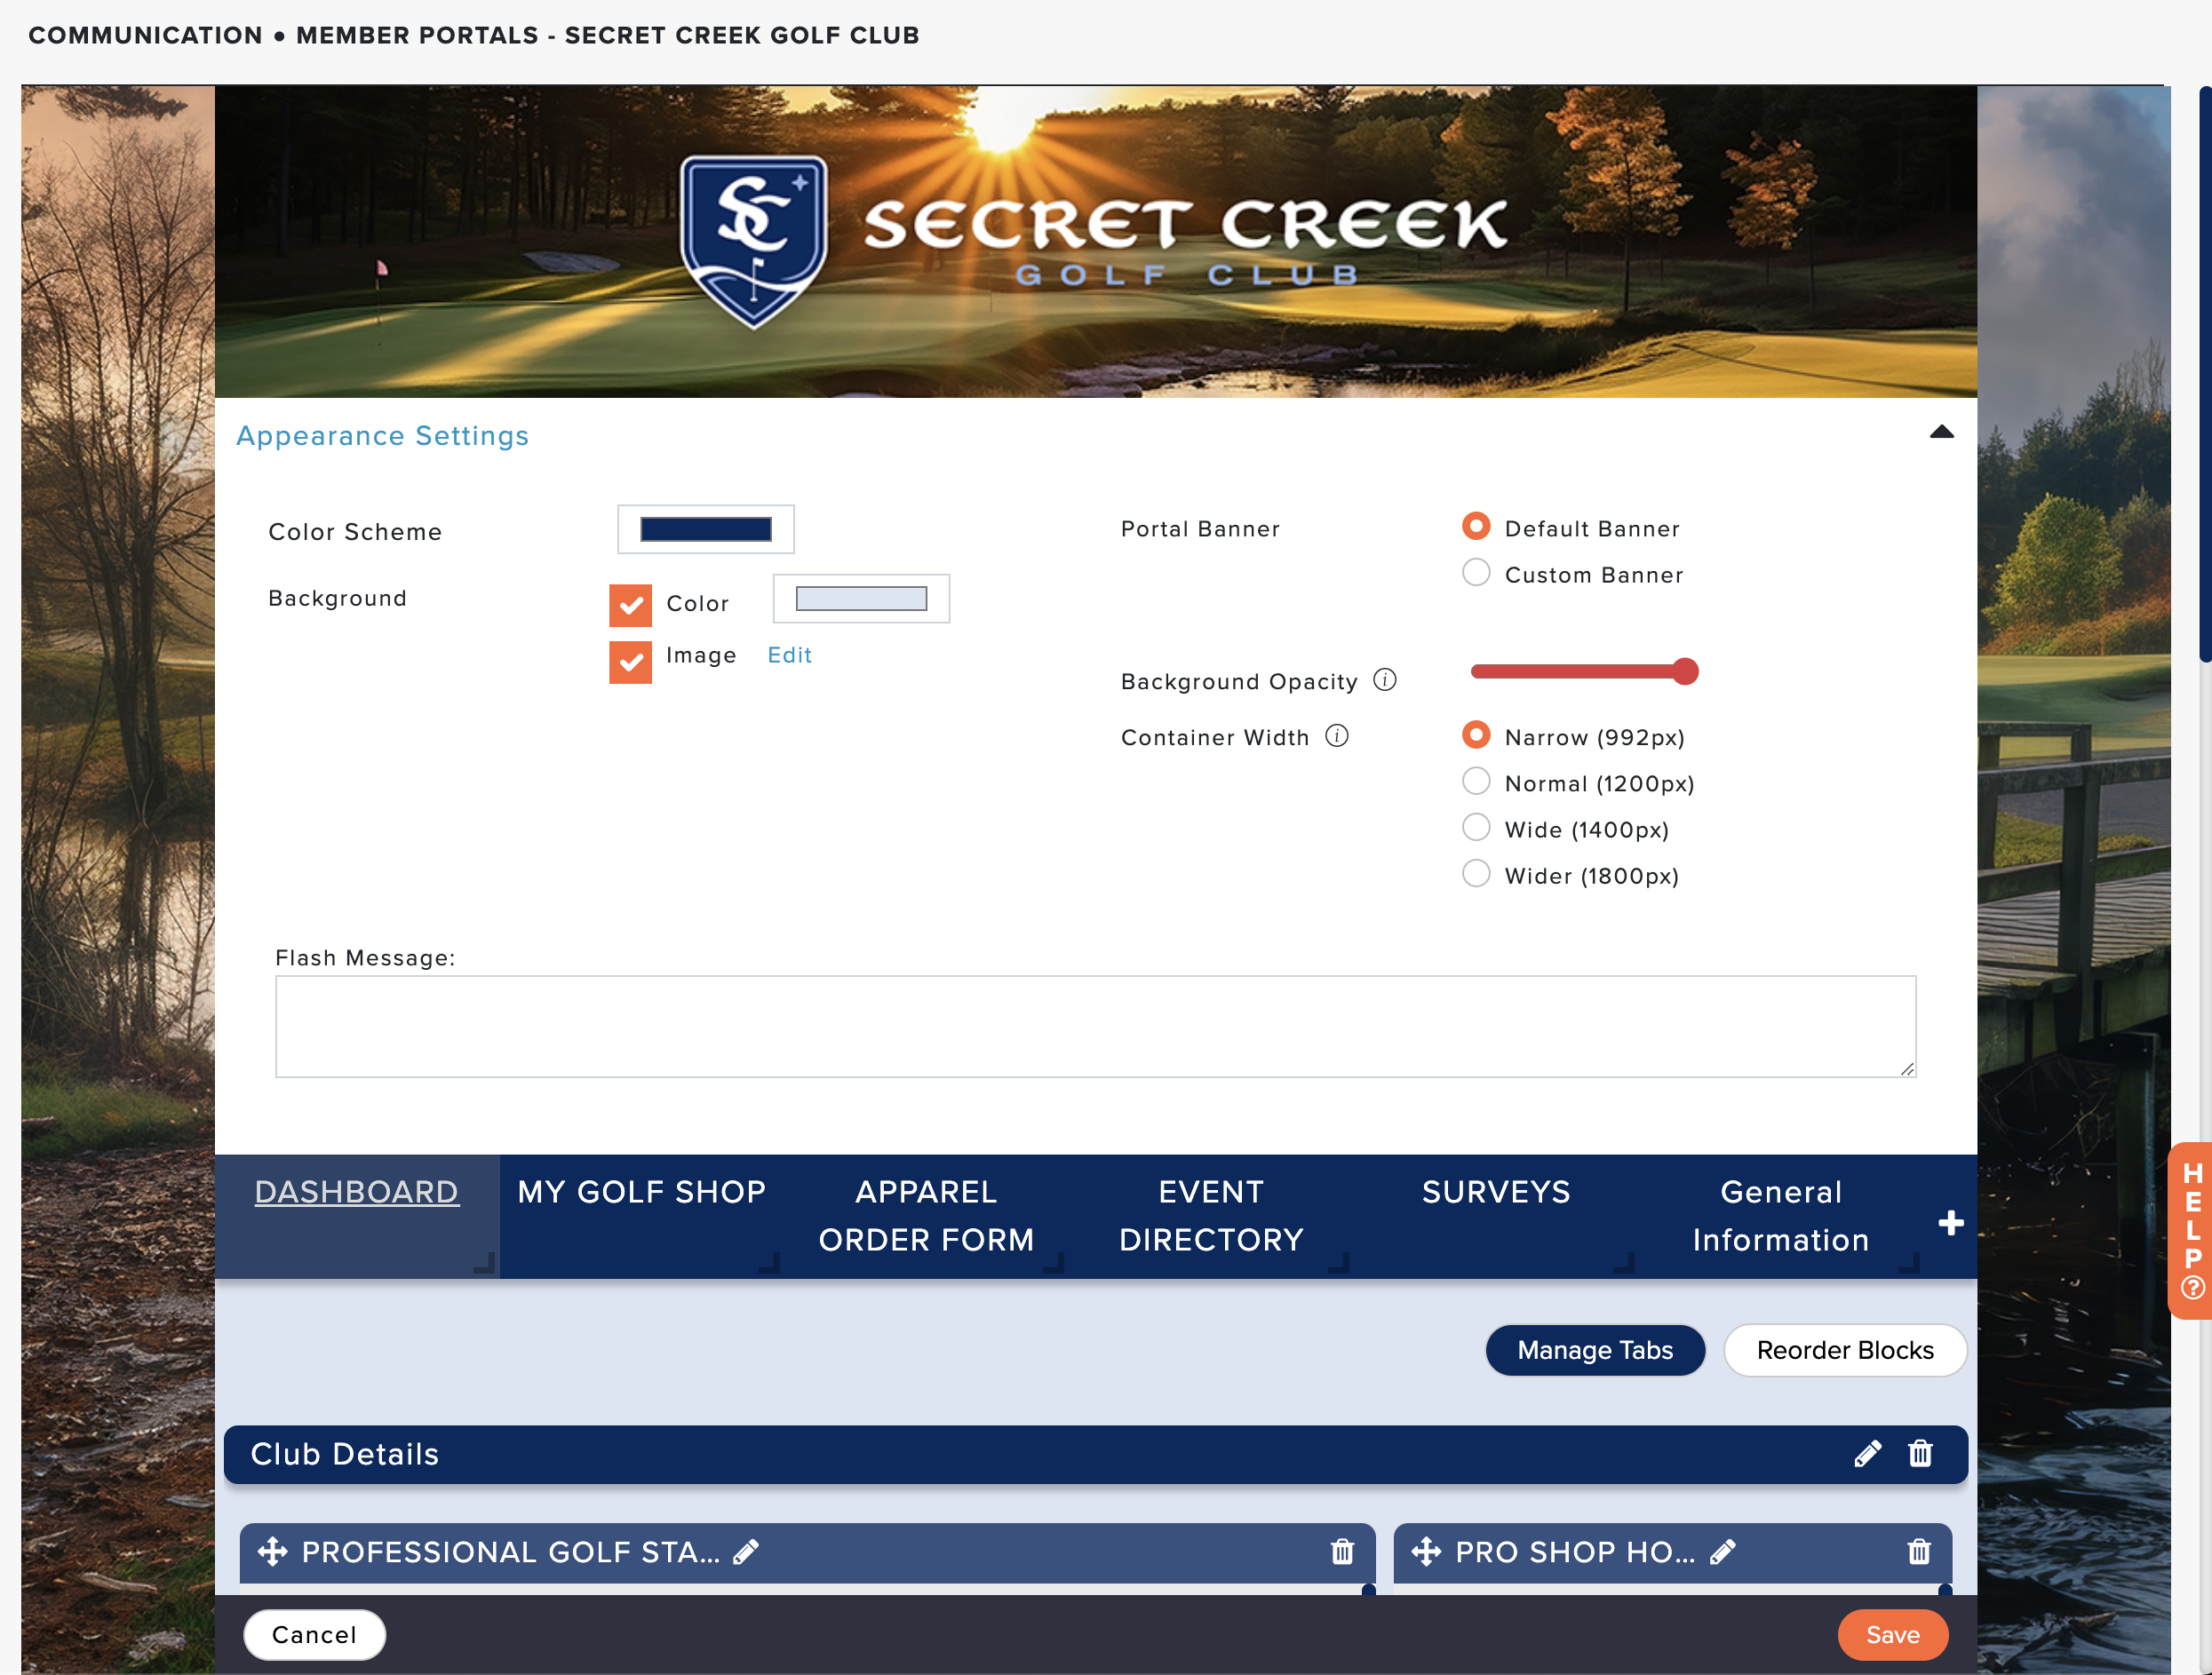
Go to Communication > Member Portals.
Click the action dropdown for the page you wish to edit and click "Edit" (as shown below).

Make the changes as necessary.
Click "Save."
Add Tabs
Depending on how you want to organize your Member Portals, you can start by adding tabs. Tabs allow you to organize so that not all content is listed on one page. You can skip this step if you do not want multiple tabs.
To add tabs, follow these instructions:
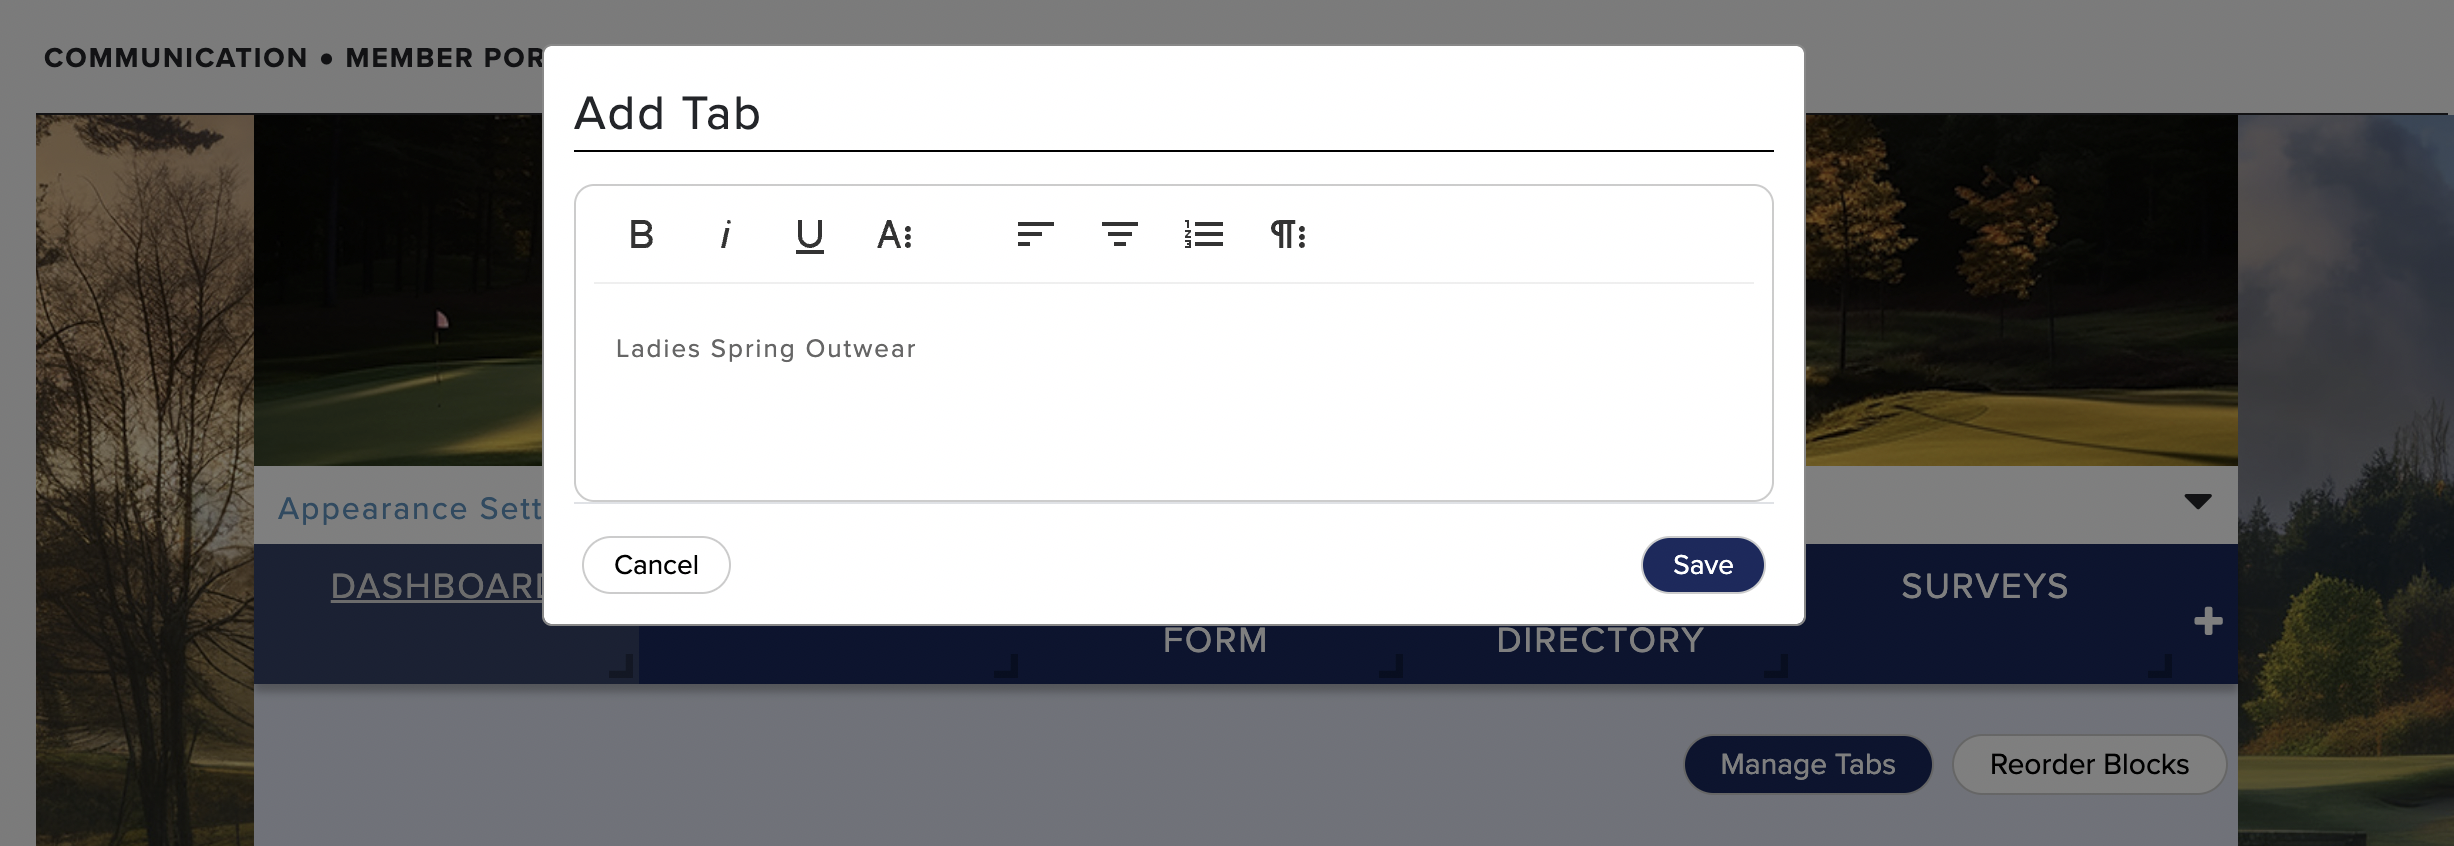
Click "Add Tab."
Name the tab.
Click "Save."
Repeat the previous steps for any remaining tabs (as shown below).

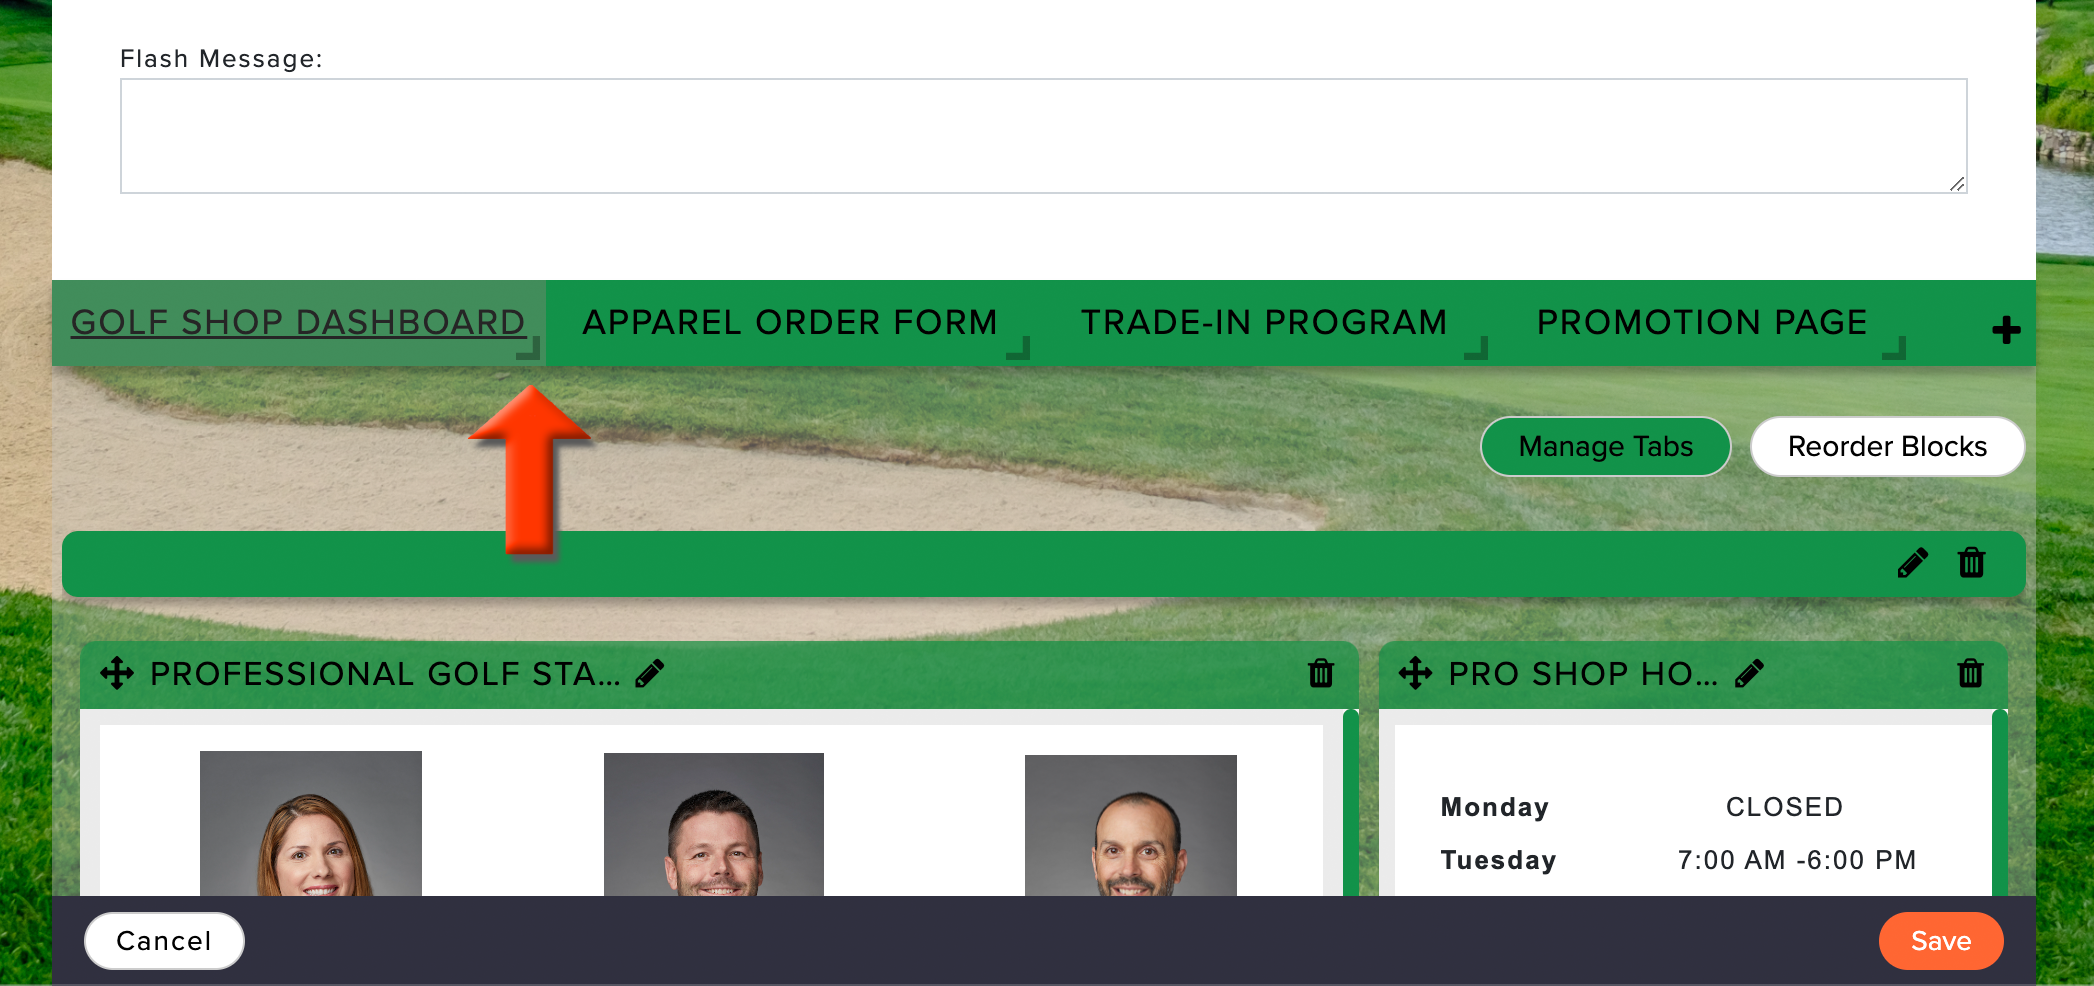
You can also customize the style and width of the tabs. To change the width of a tab, click and drag the tab point left or right (as shown below).
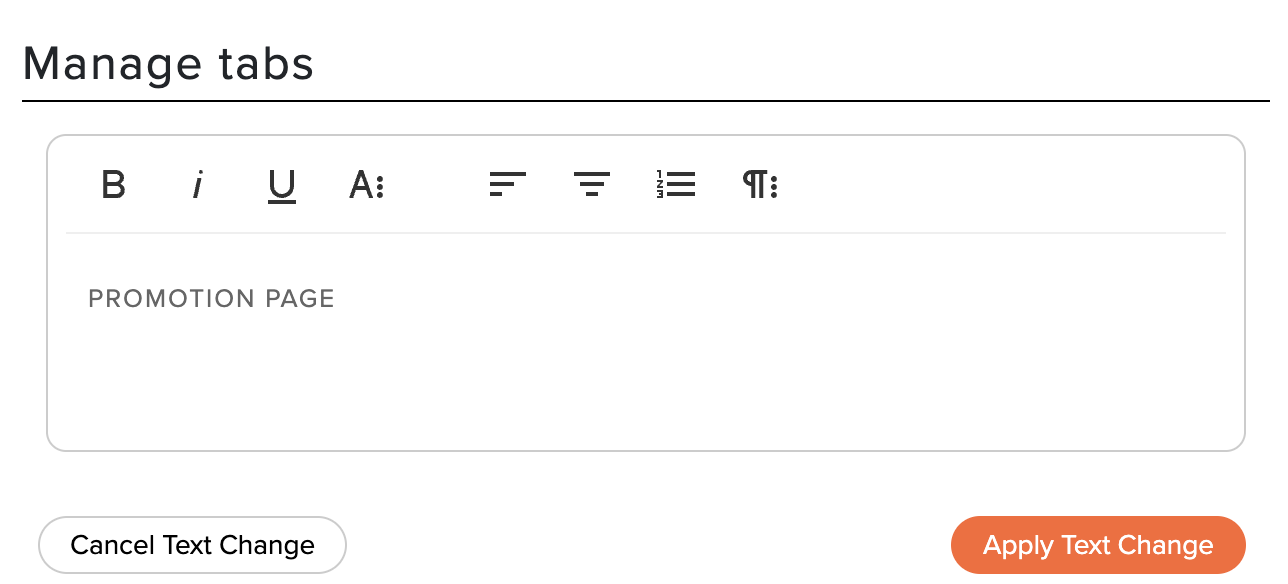
To edit the name and change the style of the tab, click "Manage Tabs" and then click the pencil button for the tab you wish to edit(as shown below).
Add Blocks
After adding your tabs (if necessary), the next step is to add one or more blocks within each tab. These blocks contain one or more tiles (which include the tile content). There is no limit on how many tiles are included in a block. Every block can also have an optional title and be organized into one or two columns.
To add a new block, follow these instructions:
Go to the tab where you'd like to add the block.
Click "Add New Block."
Name the block (optional). A title bar is created for every block, which helps identify each block's content and create some separation between blocks. If adding a block name, the name will be included in the title bar. Otherwise, it will be empty. Block names can always be updated later.
Select the number of columns for the block. If selecting two columns, you can also select one of the split options, which includes an even split and offset splits (as shown below).

Click "Save."

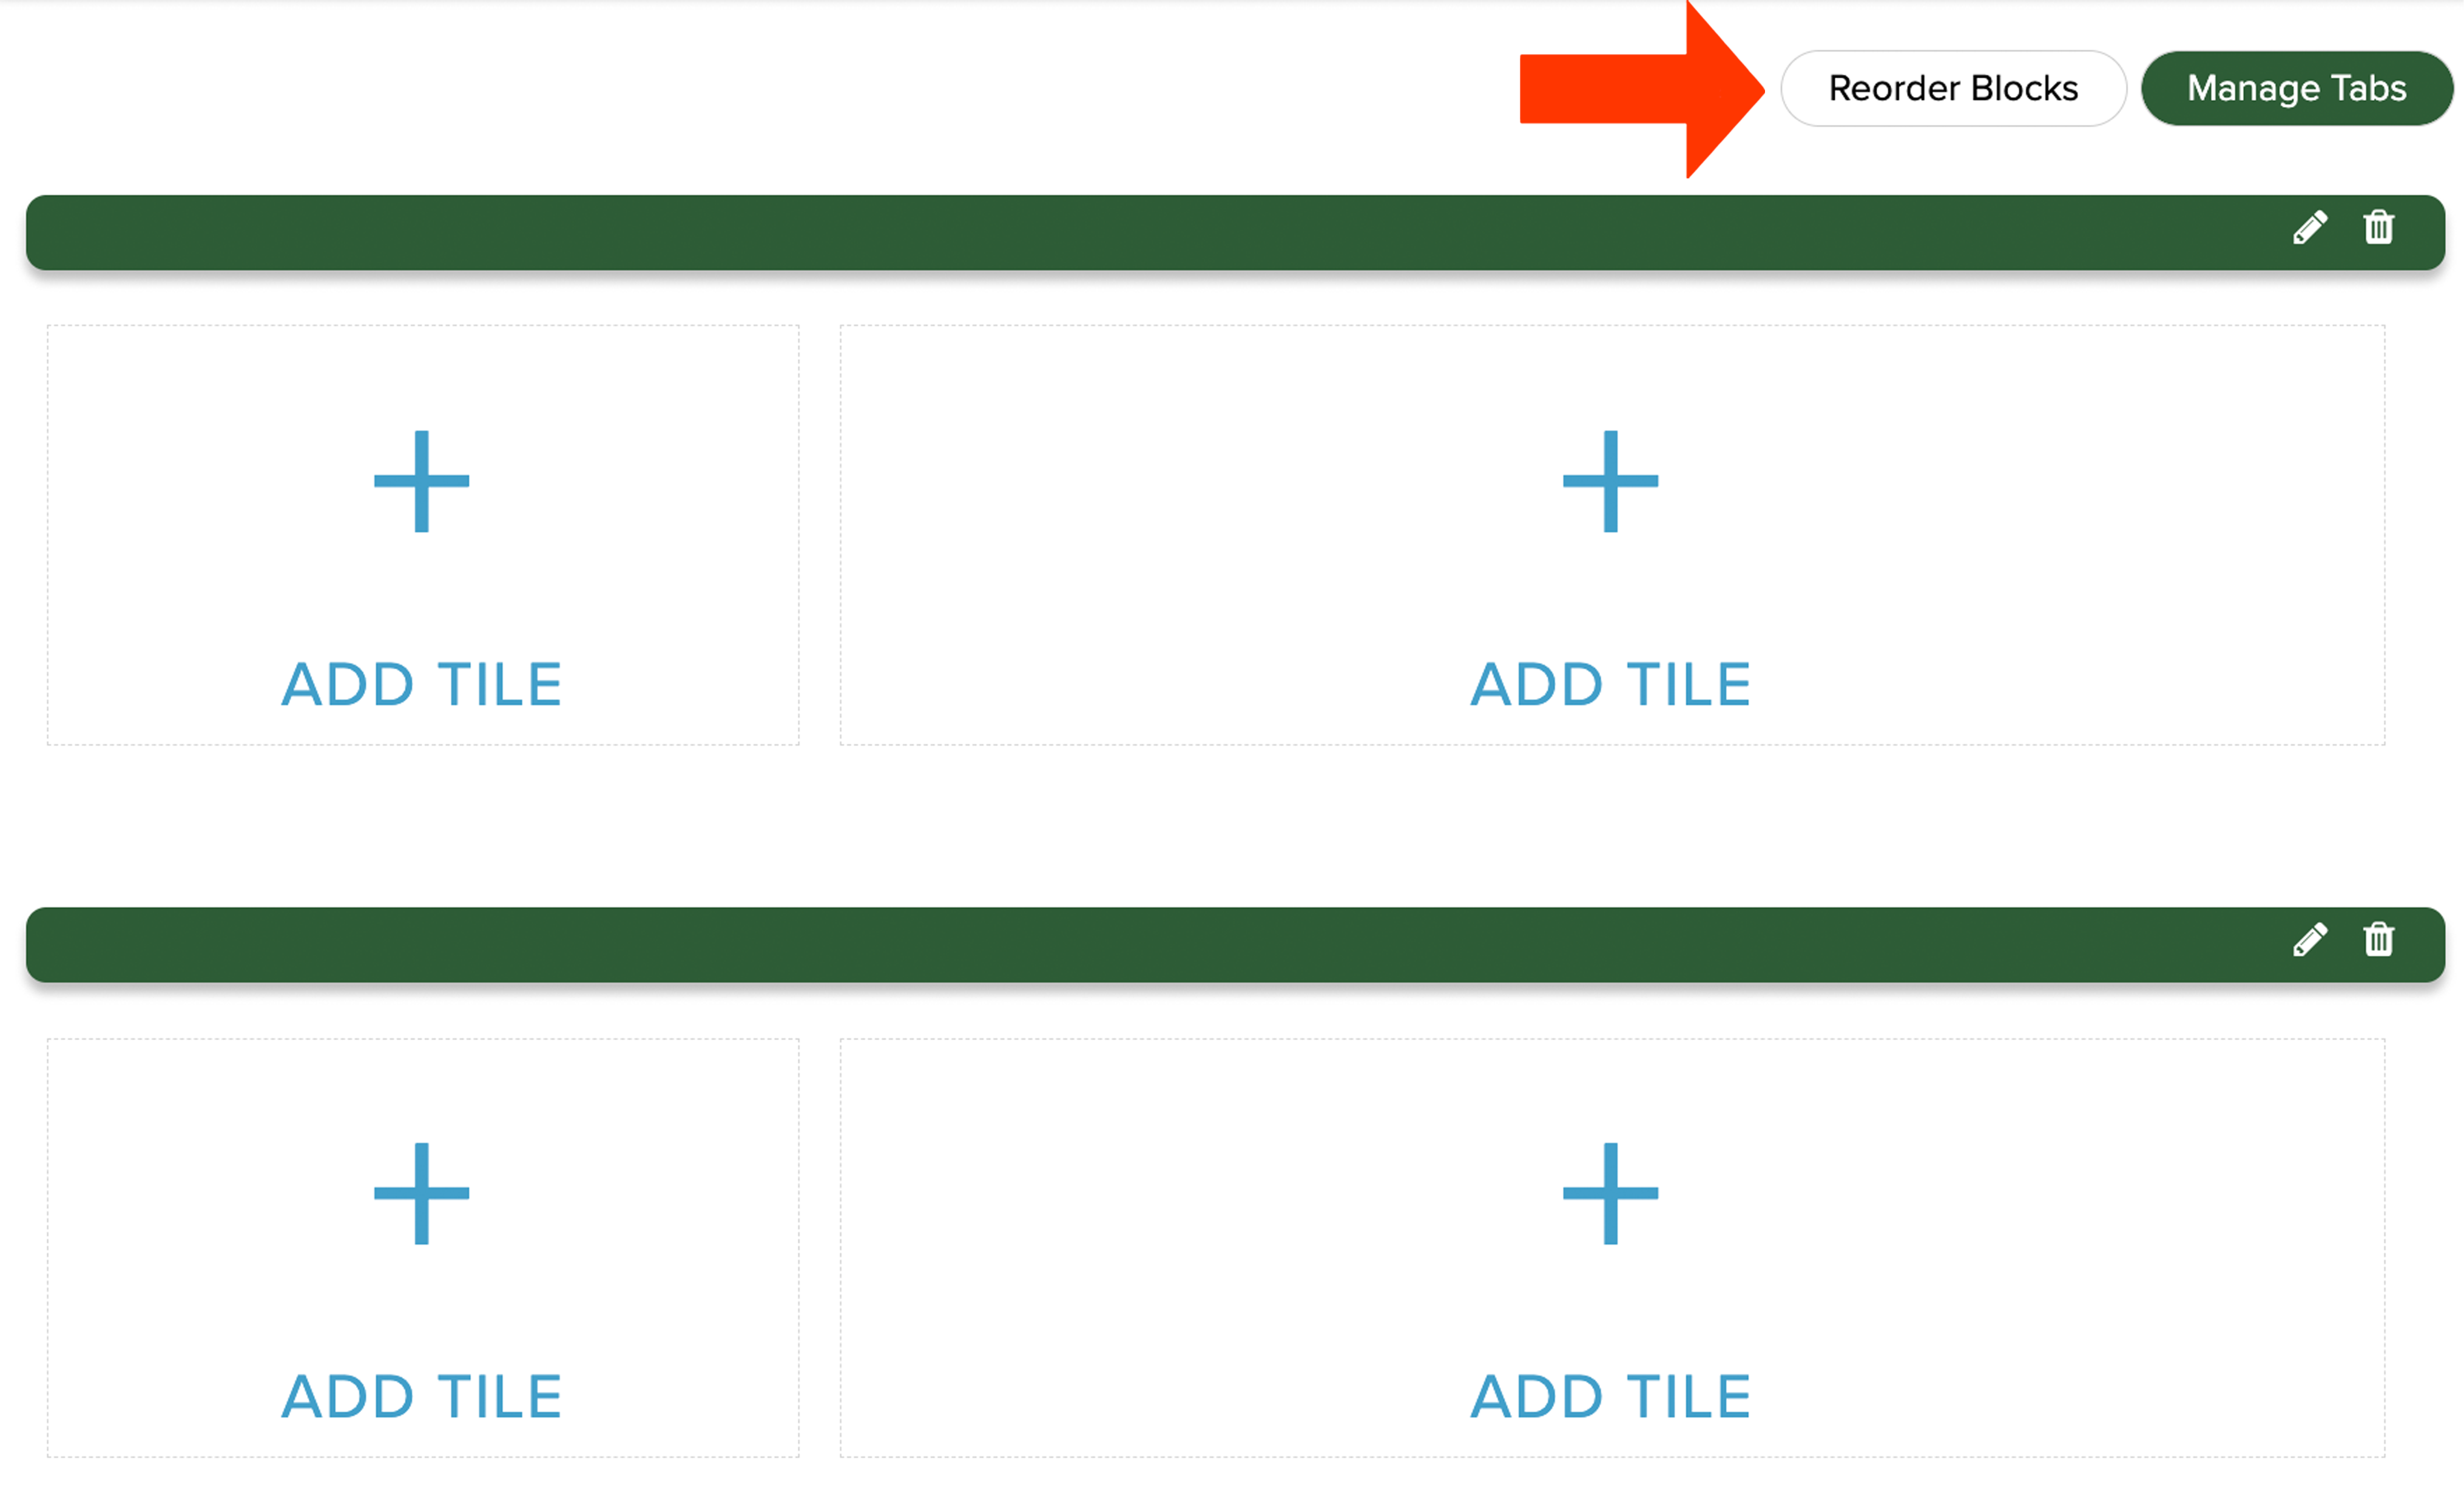
After clicking save, you can see that the new block has been added in the specific column arrangement shown by the "+Add Tile" squares (as shown below).
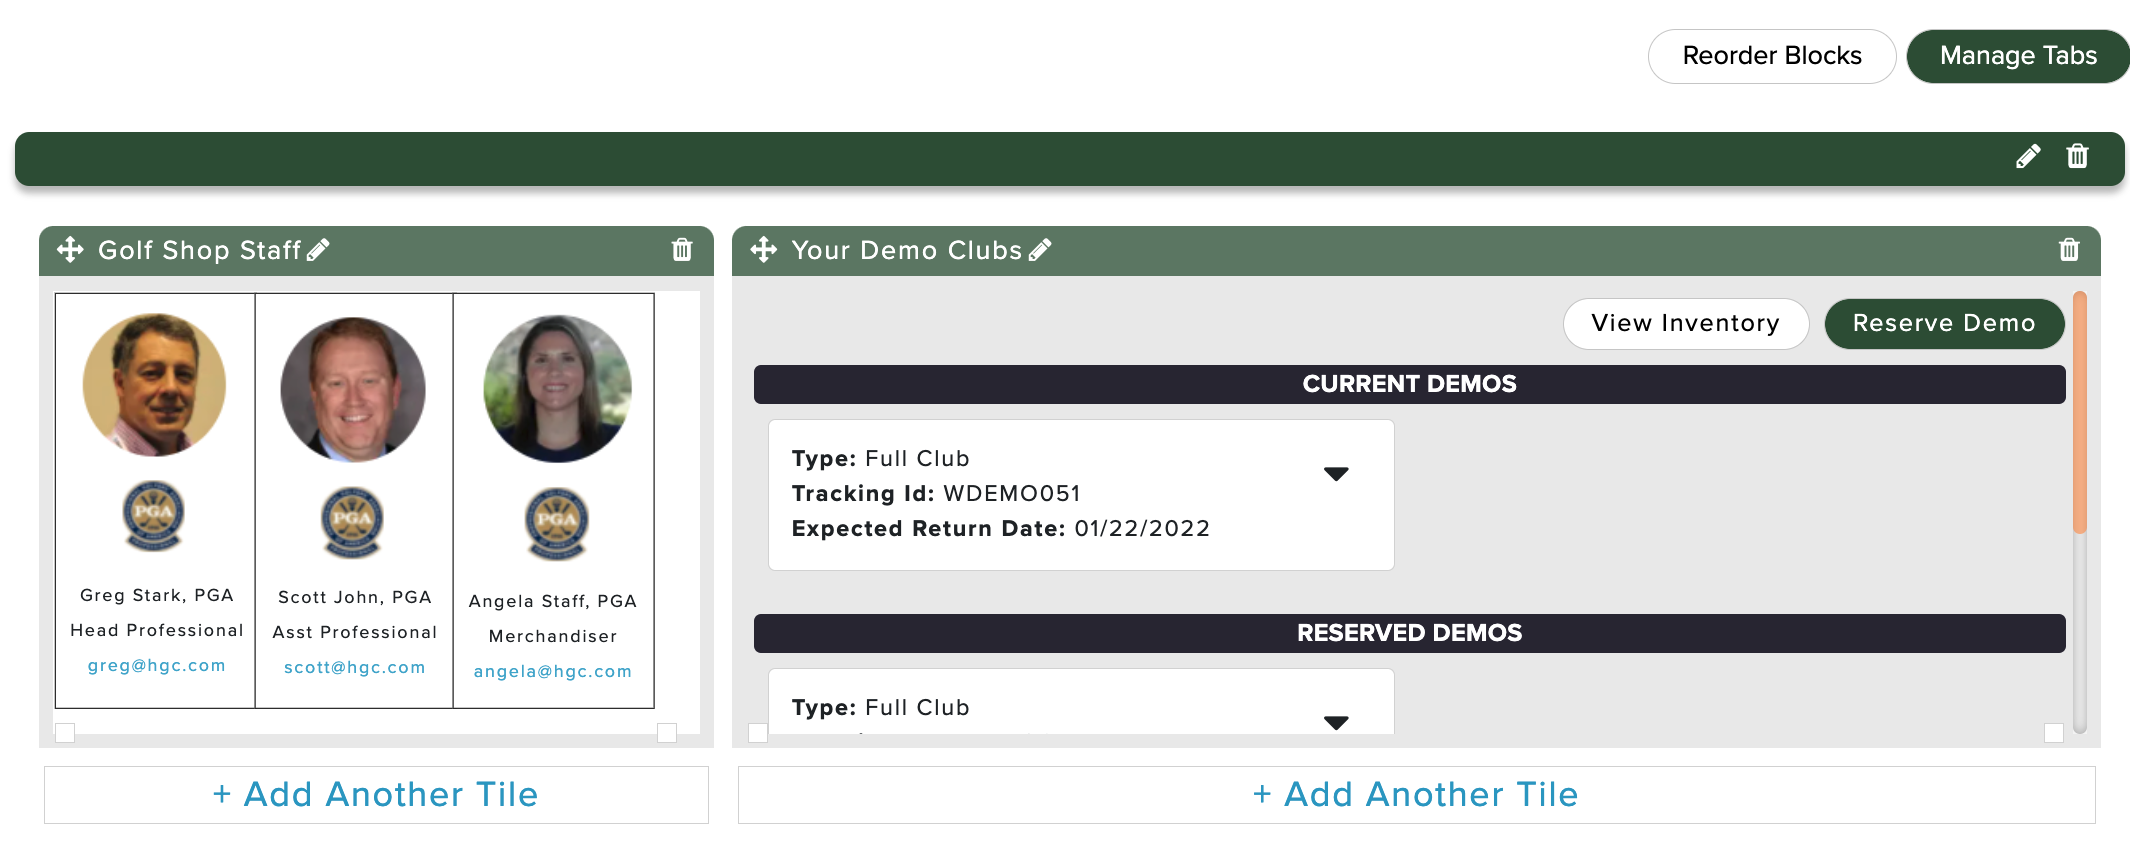
Also, you can edit any block title or delete the block and its content entirely (as shown below).

If you have multiple blocks in a tab, you can also reorder the blocks if necessary (as shown below).
Add Tiles
After adding blocks, you can insert tiles into the blocks. Every "+Add Tile" can hold content from a Member Portal Tile. These tiles are stacked vertically as they are added within a block (as shown below).
To add a tile, follow these instructions:
Click "+Add Tile" in the desired area of the block.
Select one of the following tile options:
Add a title (if needed).
Select the available option to customize the tile (if necessary).
Click "Save."
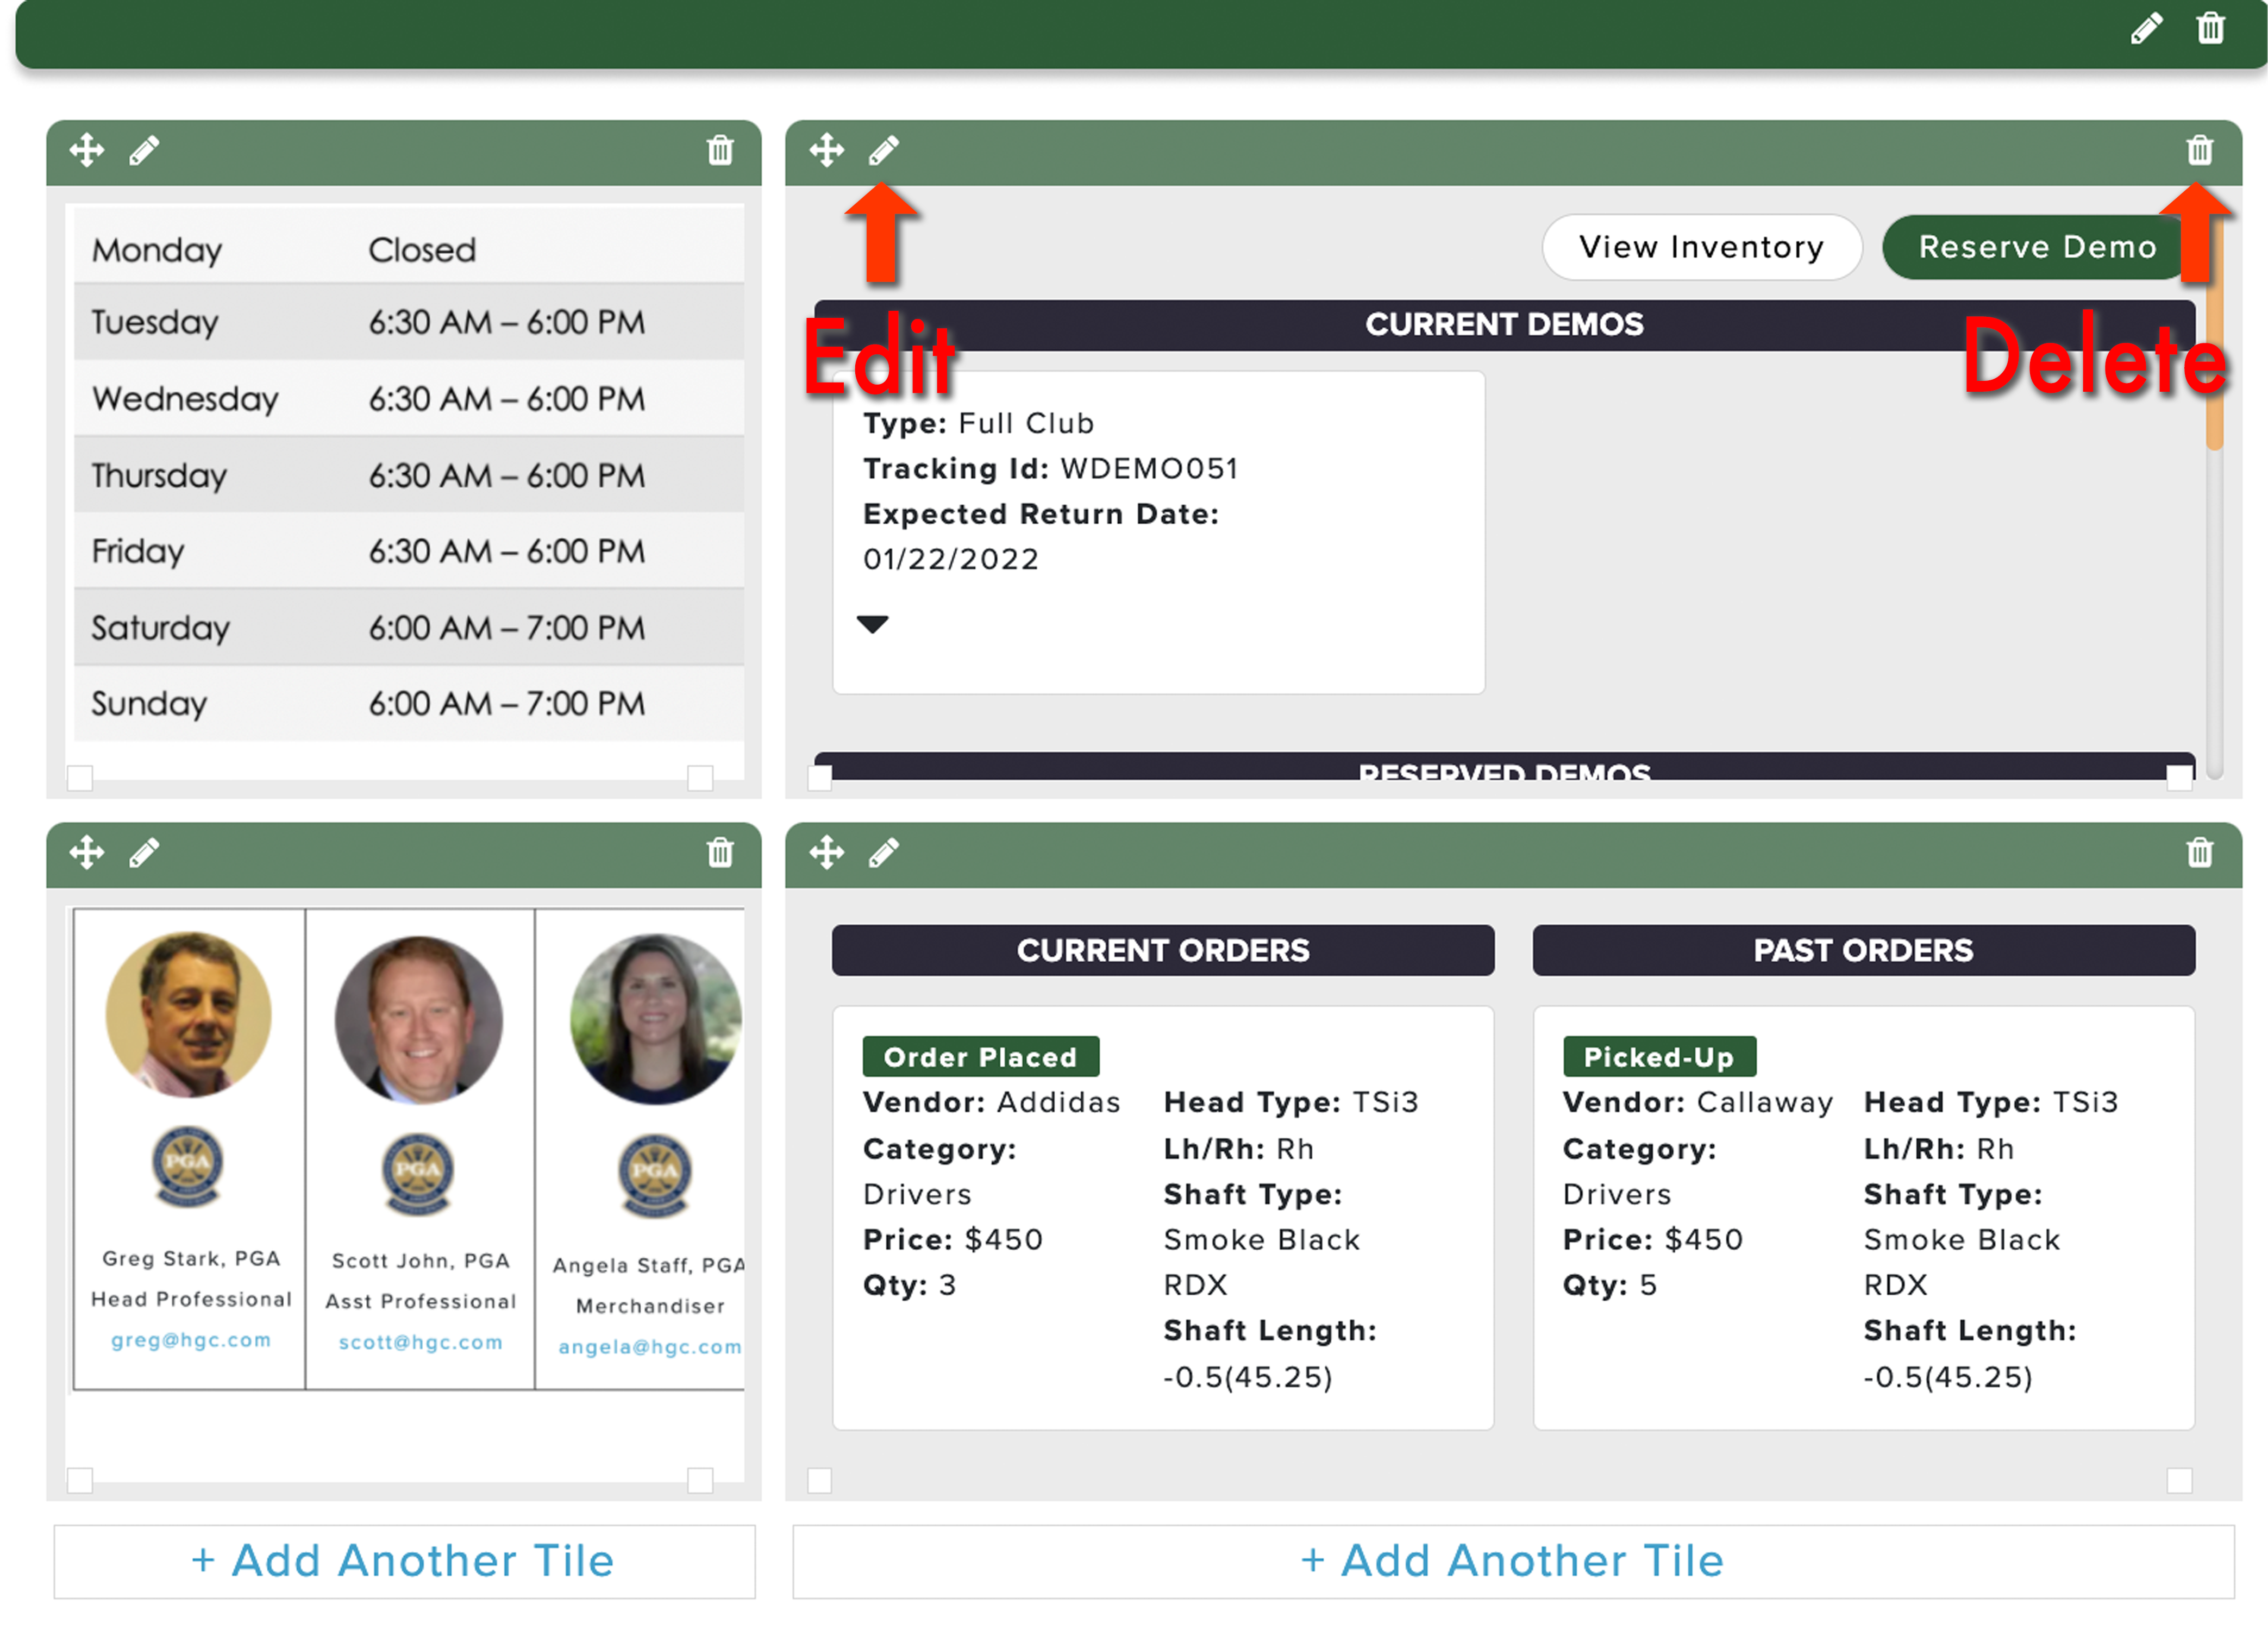
Tiles can also be moved throughout a block by clicking and dragging the "move icon" on the top left of the tile (as shown below).

You can also make the following changes to a tile:
Change the title.
Edit the tile content (e.g., Collage Page).
Change the tile type.
Delete the tile.
Finally, you can increase or decrease the tile height to expand the content area within a tile (as shown below).
