
Upon navigating to the Customer Search, the manager is directed to a screen with a list of all existing members and guests (as shown below).
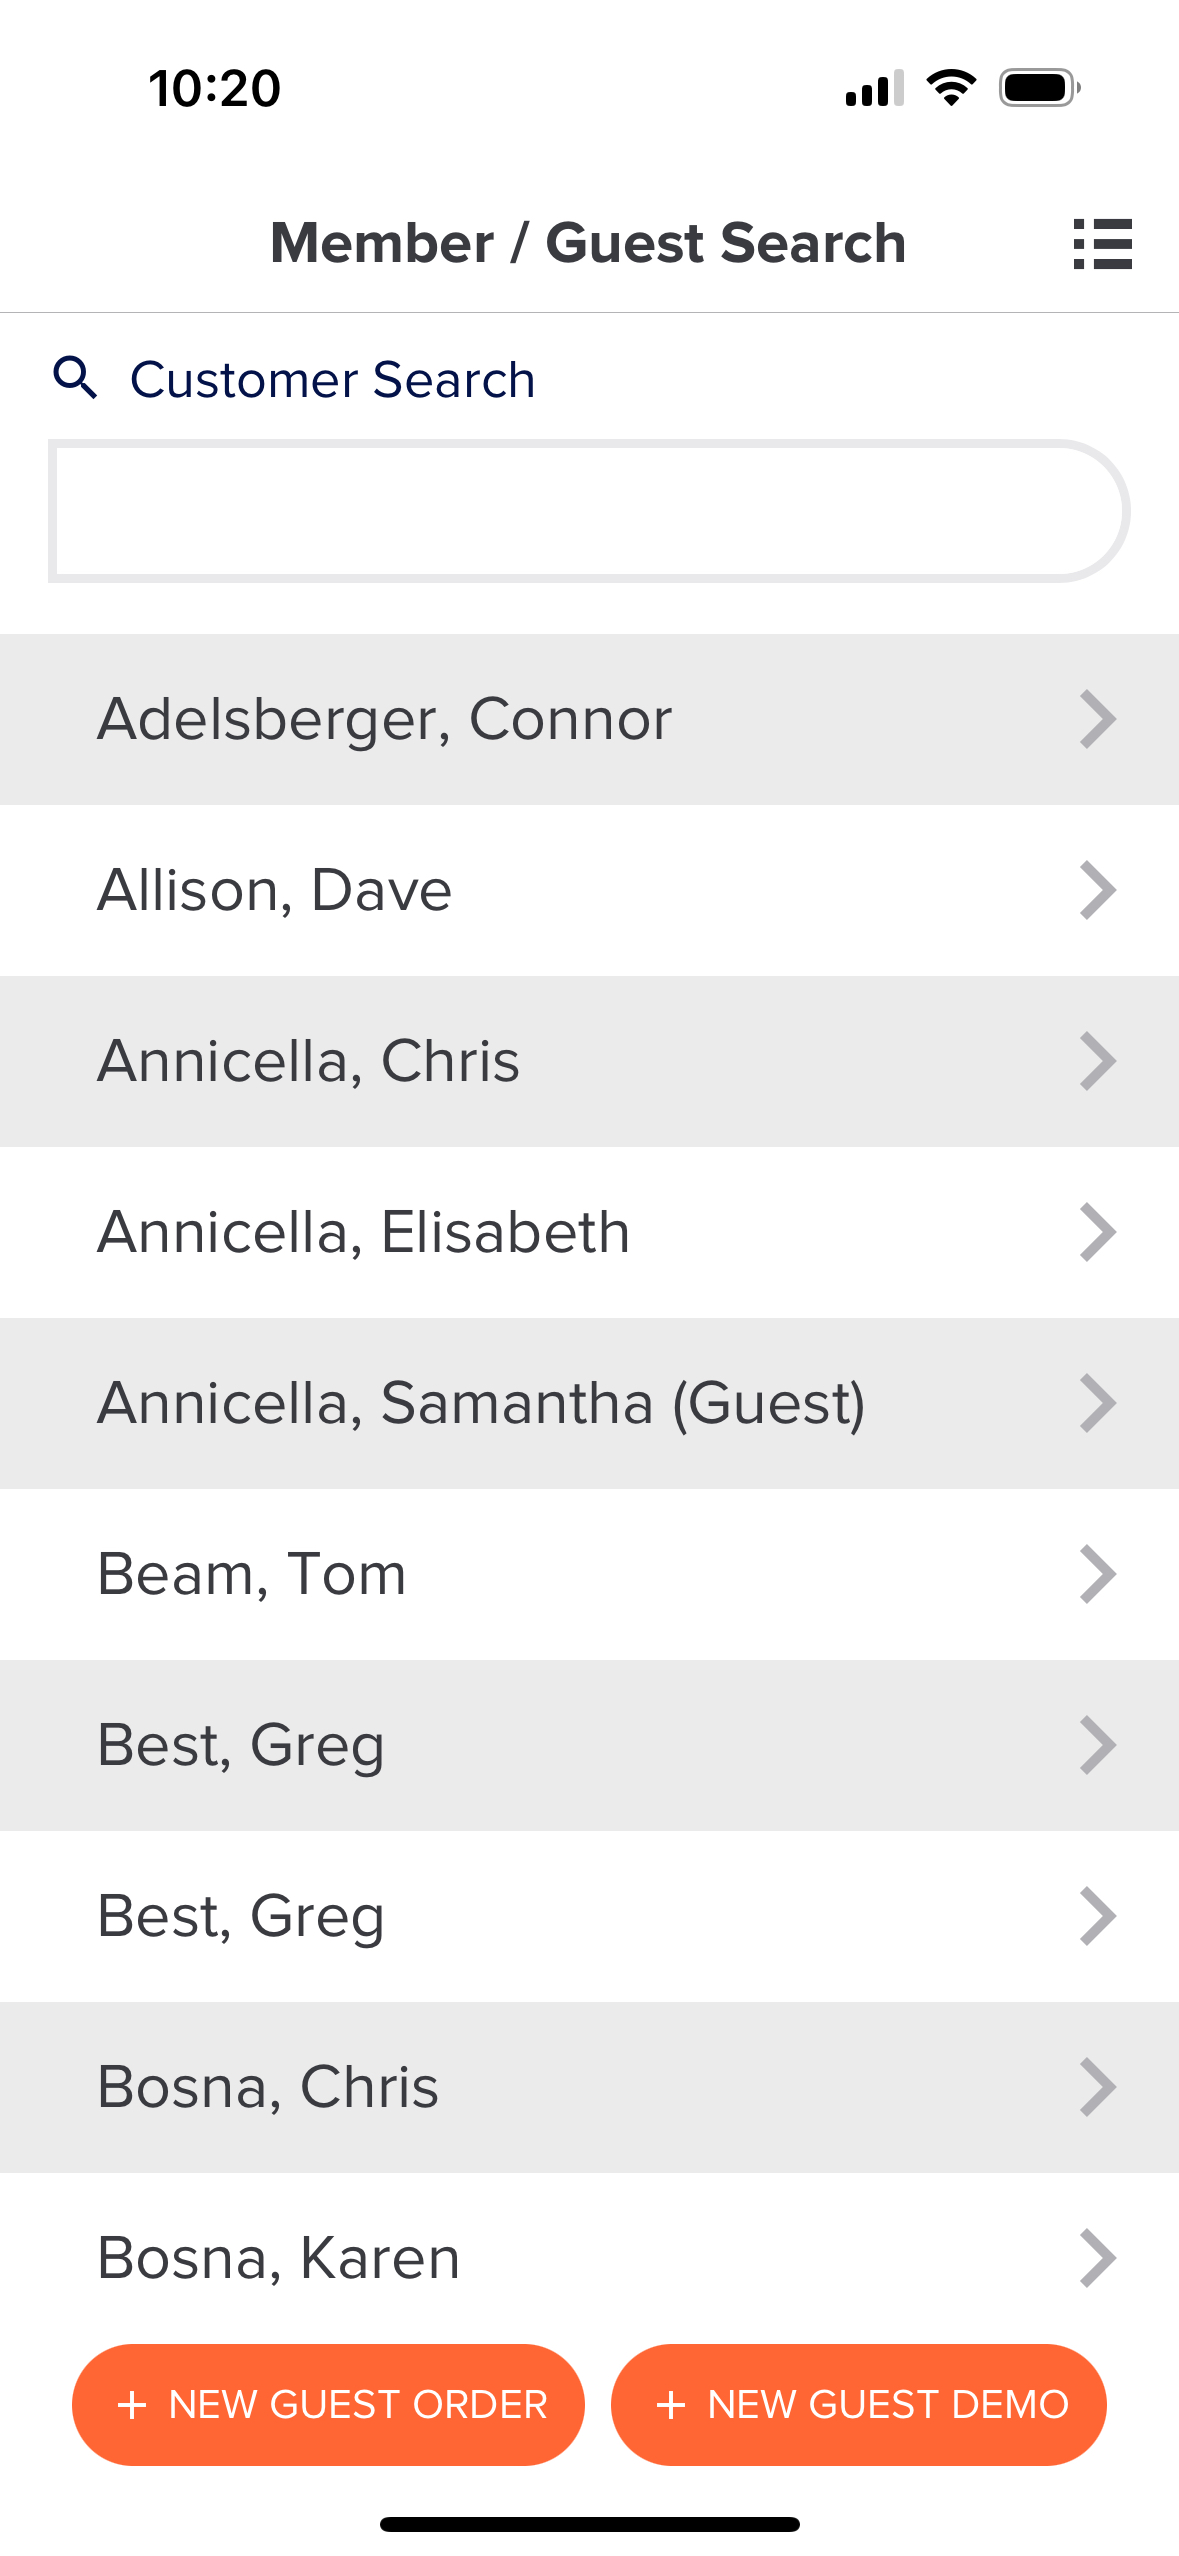
A search bar is available to search the list using the last name and first name for your convenience. You can select a specific member or guest and access their order history, demo club history, profile, and contact details. Once an existing member is chosen, you can create new orders and checkout/return a demo club.
In this article, we will discuss each of the features available in the Member / Guest Dashboard.
New Orders and Demos
Near the bottom of the Member/Guest List, you will have a couple of options:
New Orders: Enter a Special Order on the mobile app.
New Demo: Create Demo Club Orders on the mobile app.
Customer Dashboard
Once you have selected an existing customer from the list, you are taken to the Customer Dashboard. On the customer dashboard, you are presented with the following in tabs near the bottom:
Orders (Special Orders)
Demos Clubs
Club Repair
Profile
On the customer dashboard, you are presented with the following in the customer name banner:
Contact
In this section, we will discuss each of these features in greater detail.
Orders (Special Orders) Tab
After selecting a member or guest from the customer list, you are taken to the special order dashboard for that member or guest. Here you will have a list of current special orders, past special orders, and the ability to create new special orders (as shown below).
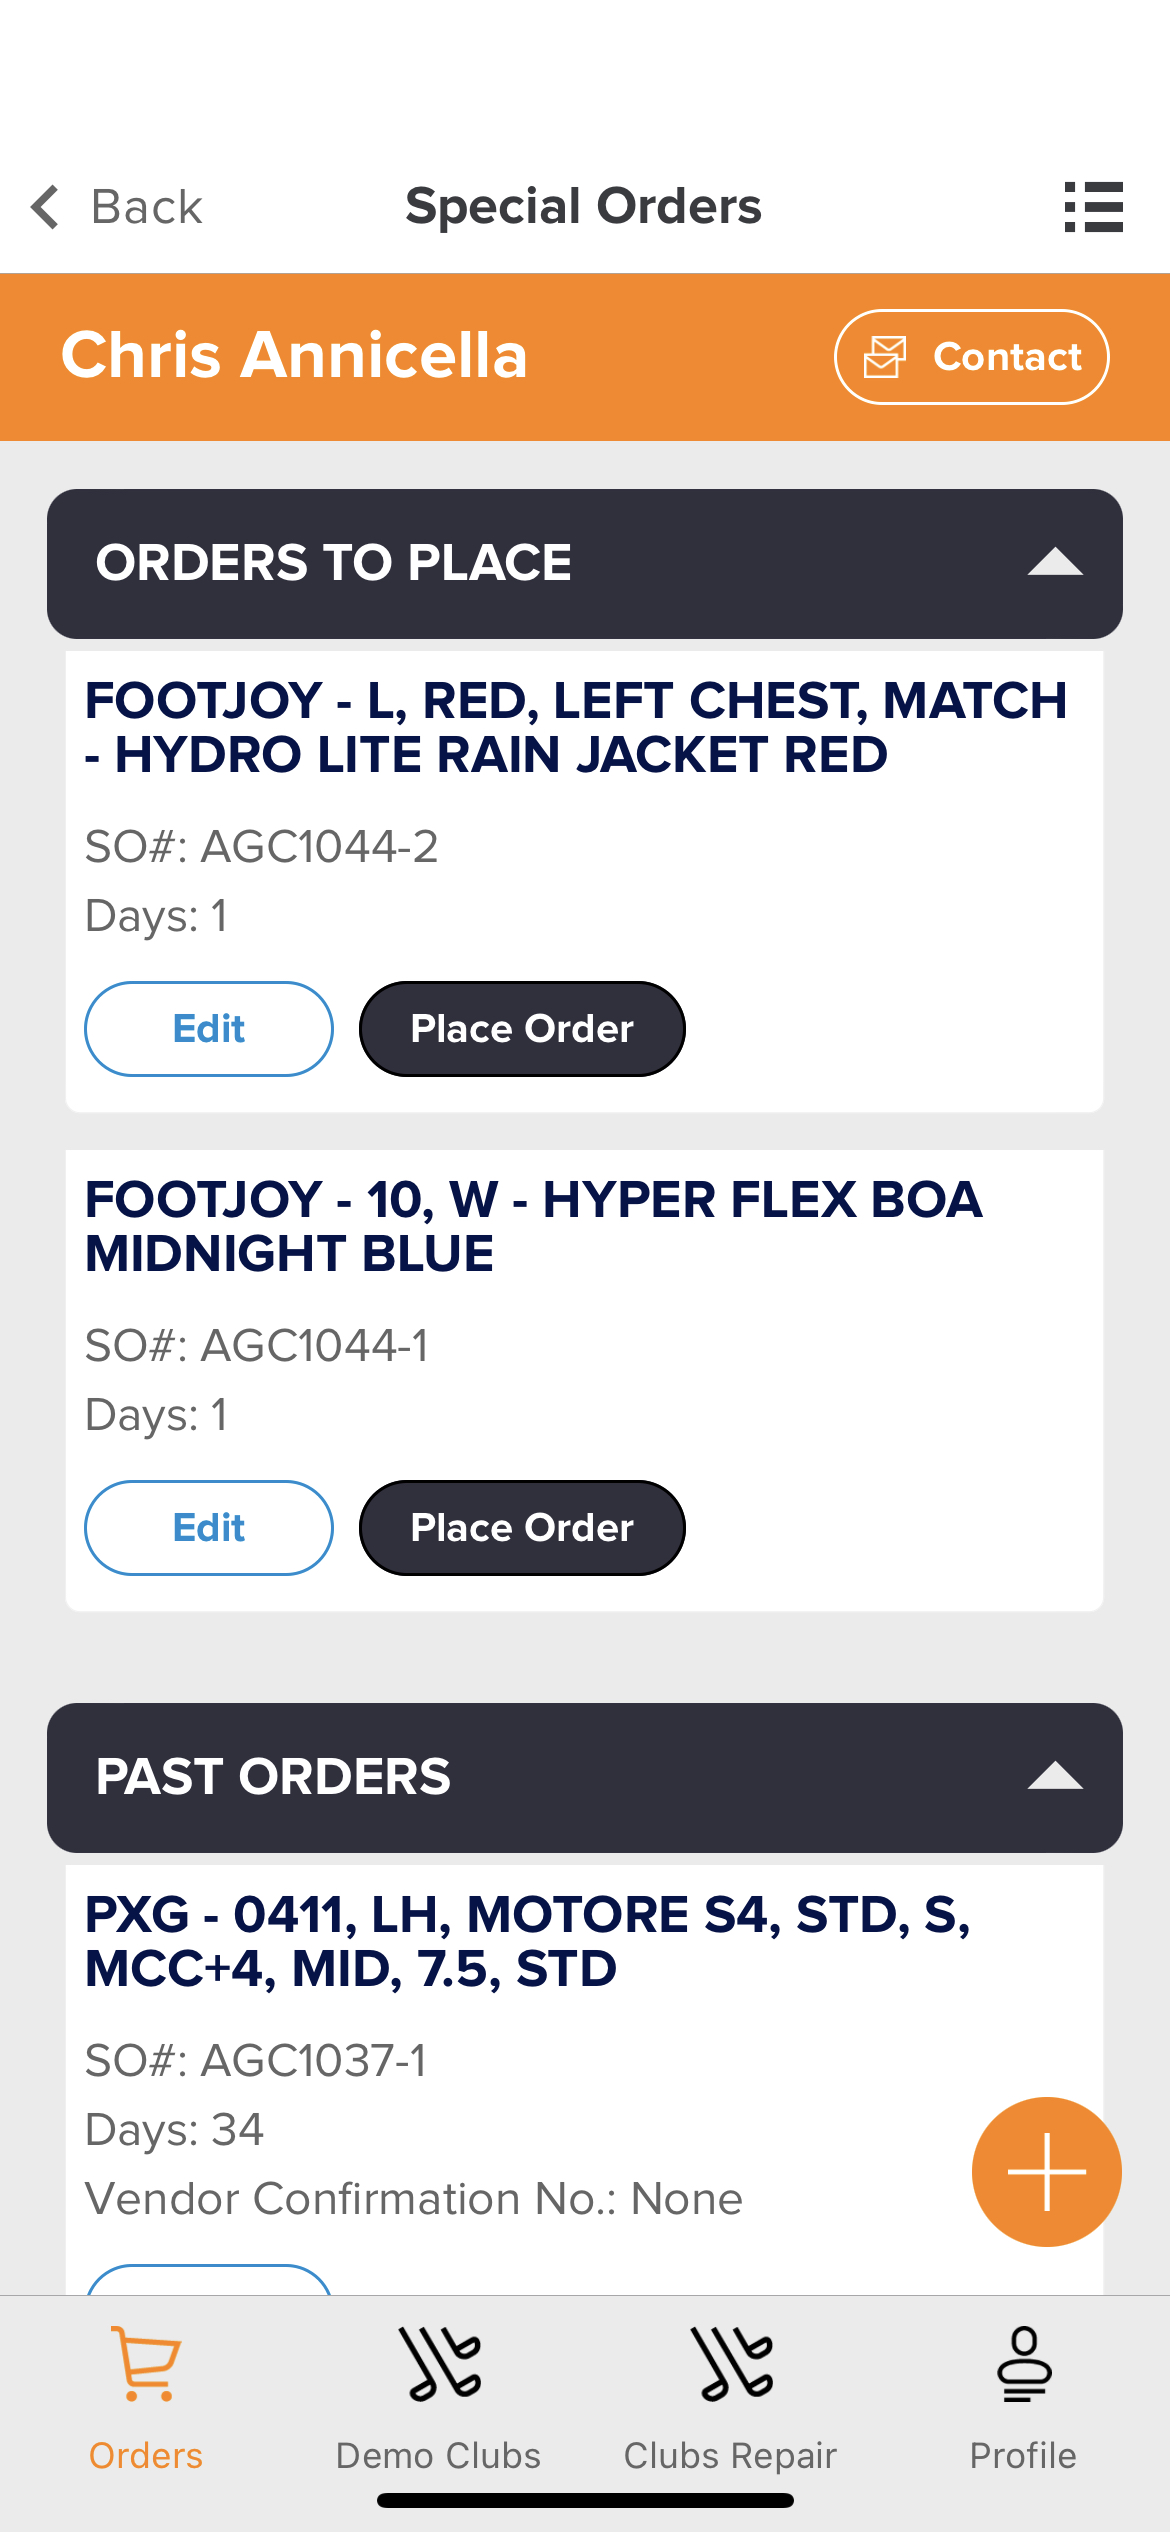
The orders will be grouped and displayed in sections corresponding to the stage (e.g., Orders to Place, Placed Orders, Orders Received) the order is in. An additional section, “Past Orders,” with previously finalized orders may also be displayed. Sections will only be displayed if at least one order is in that stage. Existing orders will display information related to the order, including name, the special order it is associated with, the age of the order, shipping details if applicable, actions (e.g., Place Order, Enter Tracking, Mark as Received by Club, etc.), and alerts (e.g., Shipping Overdue, Shipping Status, Delivery Overdue).
The following is a list of actions that can be taken on an existing special order while viewing the special order from the member/guest profile:
Edit: The edit button allows you to edit the basic details of the special order (e.g., Vendor, Description, Category, and Fields).
Place Orders: For orders in the "Order to Place" stage, there is an action to allow you to place the order and move it to the "Orders Placed Stage." For complete details about placing an order, Click Here.
Next (Mark Order as Delivered): For orders in the "Orders Placed" stage, this action allows you to mark the order as delivered to the club. When pressing the "Next" action, this will mark the special order as delivered to the club. The stage of the order will be updated from "Orders Placed" to "Delivered." If notifications are set up for the order, they are sent to the member or guest, informing them their order is ready for pickup. For complete details on receiving a special order, Click Here.
Enter Tracking: This action allows you to enter tracking details for orders in the "Orders Placed" stage. For more information on entering shipping information, Click Here.
Next (Finalize Order): For orders in the "Delivered" stage, there is an action to allow you to finalize the order. When pressing the "Next" action, you will be able to mark the required steps, as defined in your Special Order General Settings, to finalize the order or mark it as returned. For more details about finalizing a special order, Click Here. For more information about marking an order as returned, Click Here.
Entering New Special Orders: The “+” button allows you to create a new special order for that specific member or guest. When placing an order, you will be able to enter order details (as shown below).
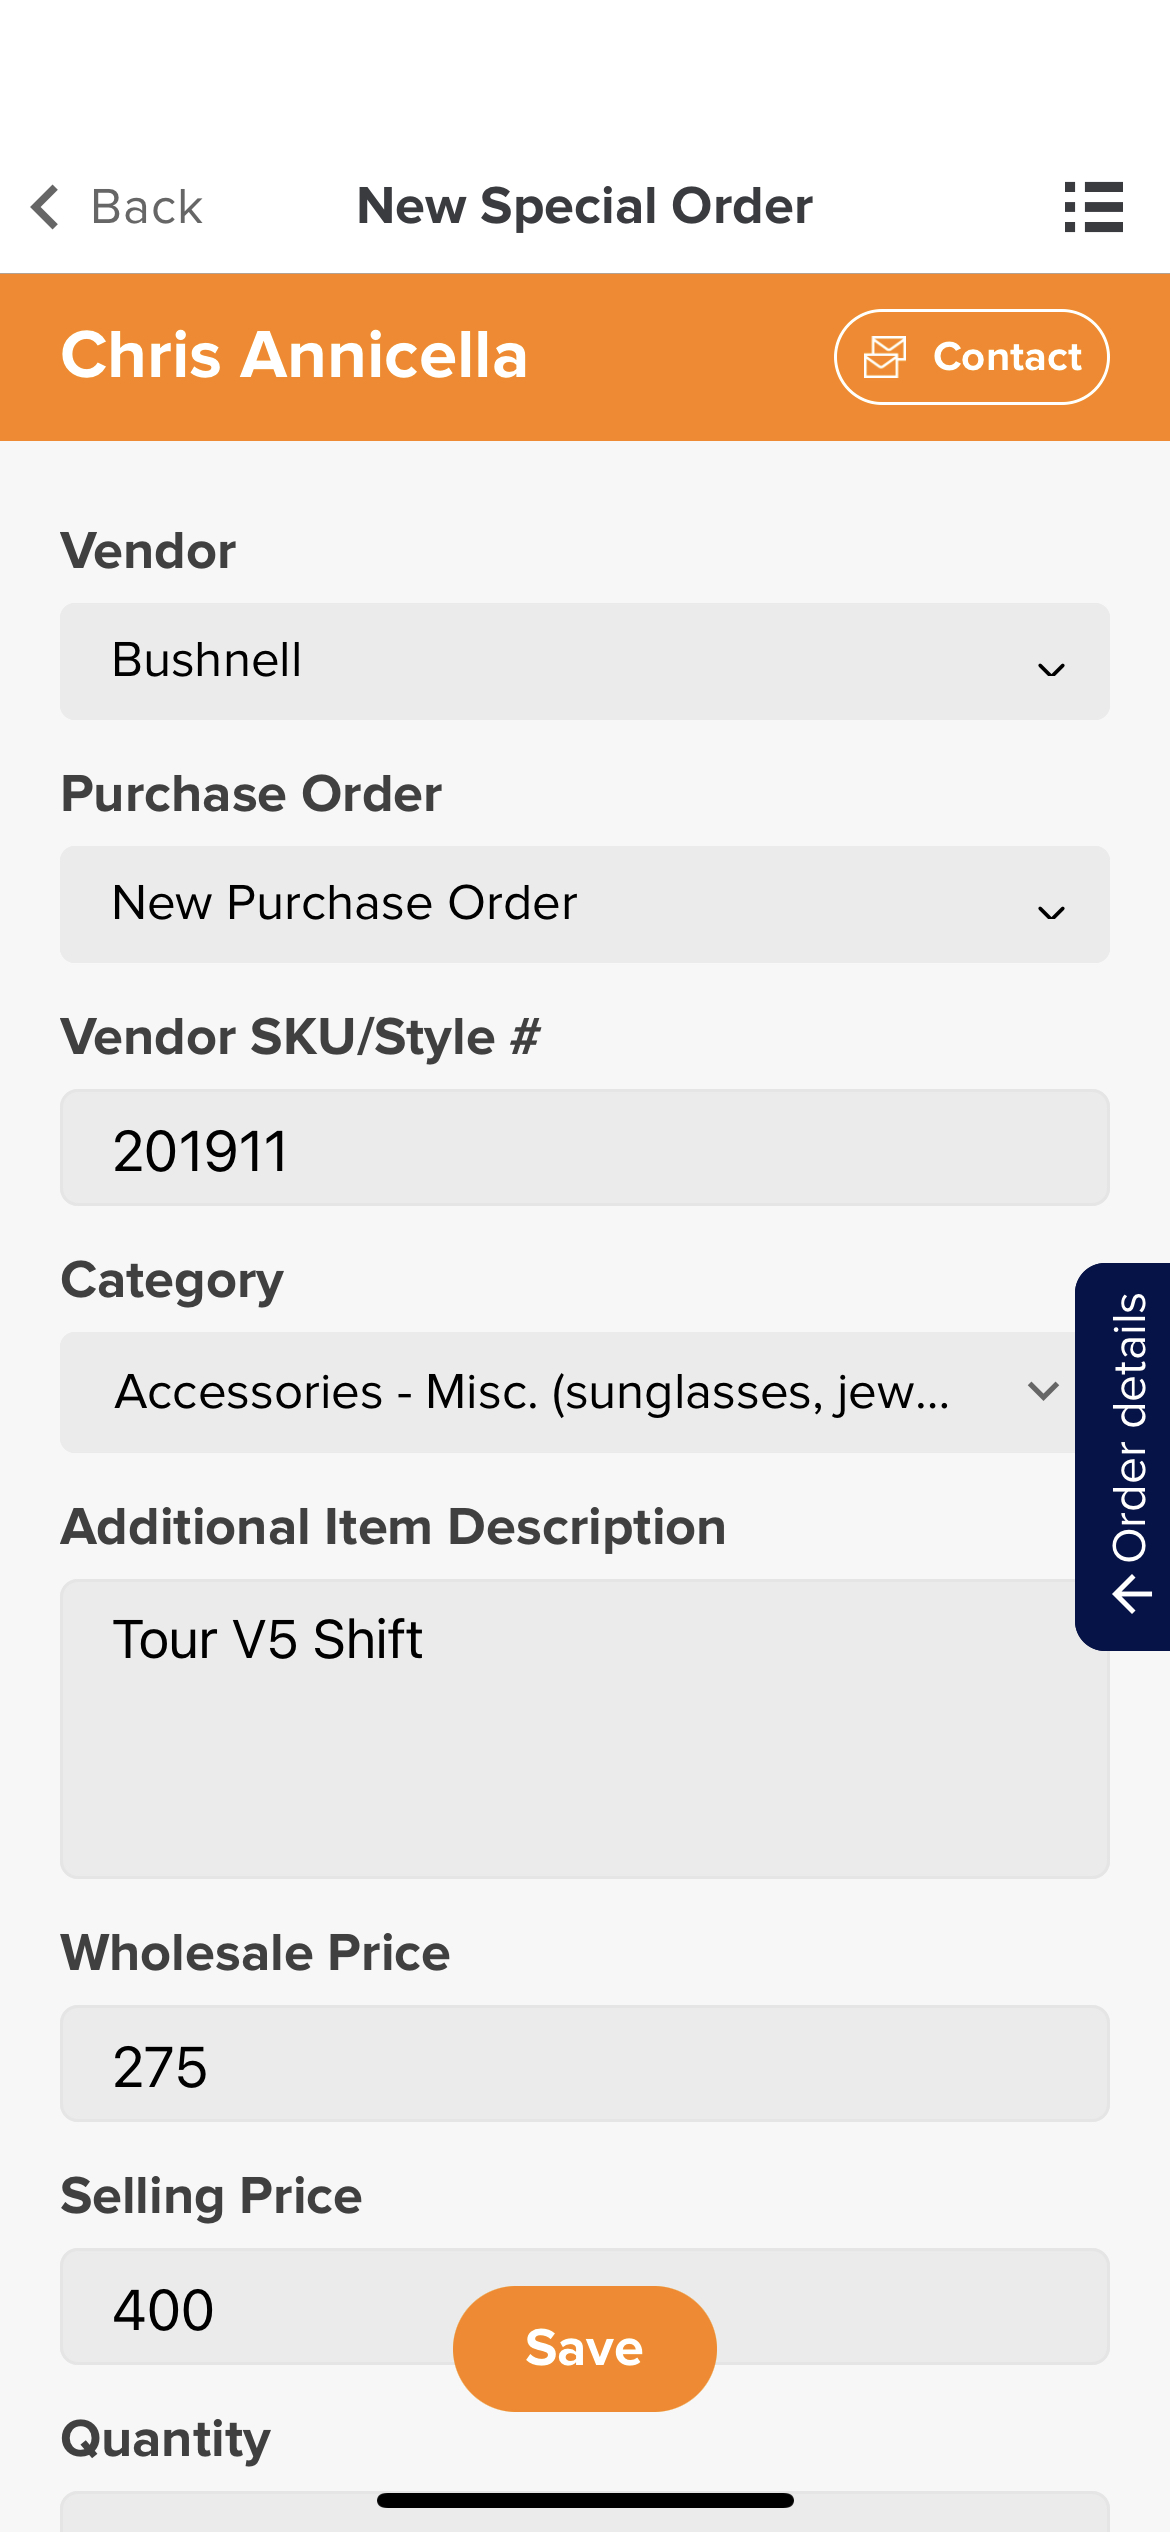
The mobile app will allow you to enter the necessary details related to the order (e.g., Vendor, Customer, Description, Category Field, Logos, etc.) and further update the order from a computer. For more details on this step, Click Here.
When entering or editing an order, click on "Order Details" (as shown below) to see logo options (if checked), customer details, vendor details, upload files, and activity logs.

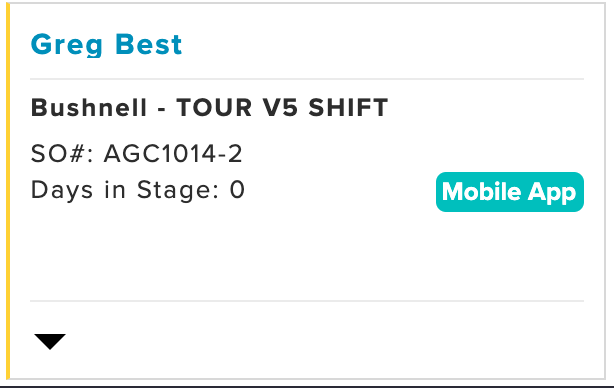
Note: Special orders created from a mobile device will show a “Mobile App” tag when looking at Special Order Dashboard on a web browser (as shown below). This tag will only show when the order is in the stage, “Orders to Place,” to let managers know that the order details may need to be verified before being placed.
Demo Clubs
The demo club tab will provide you with a list of current and past demos and the ability to create new demos for the selected member or guest (as shown below).
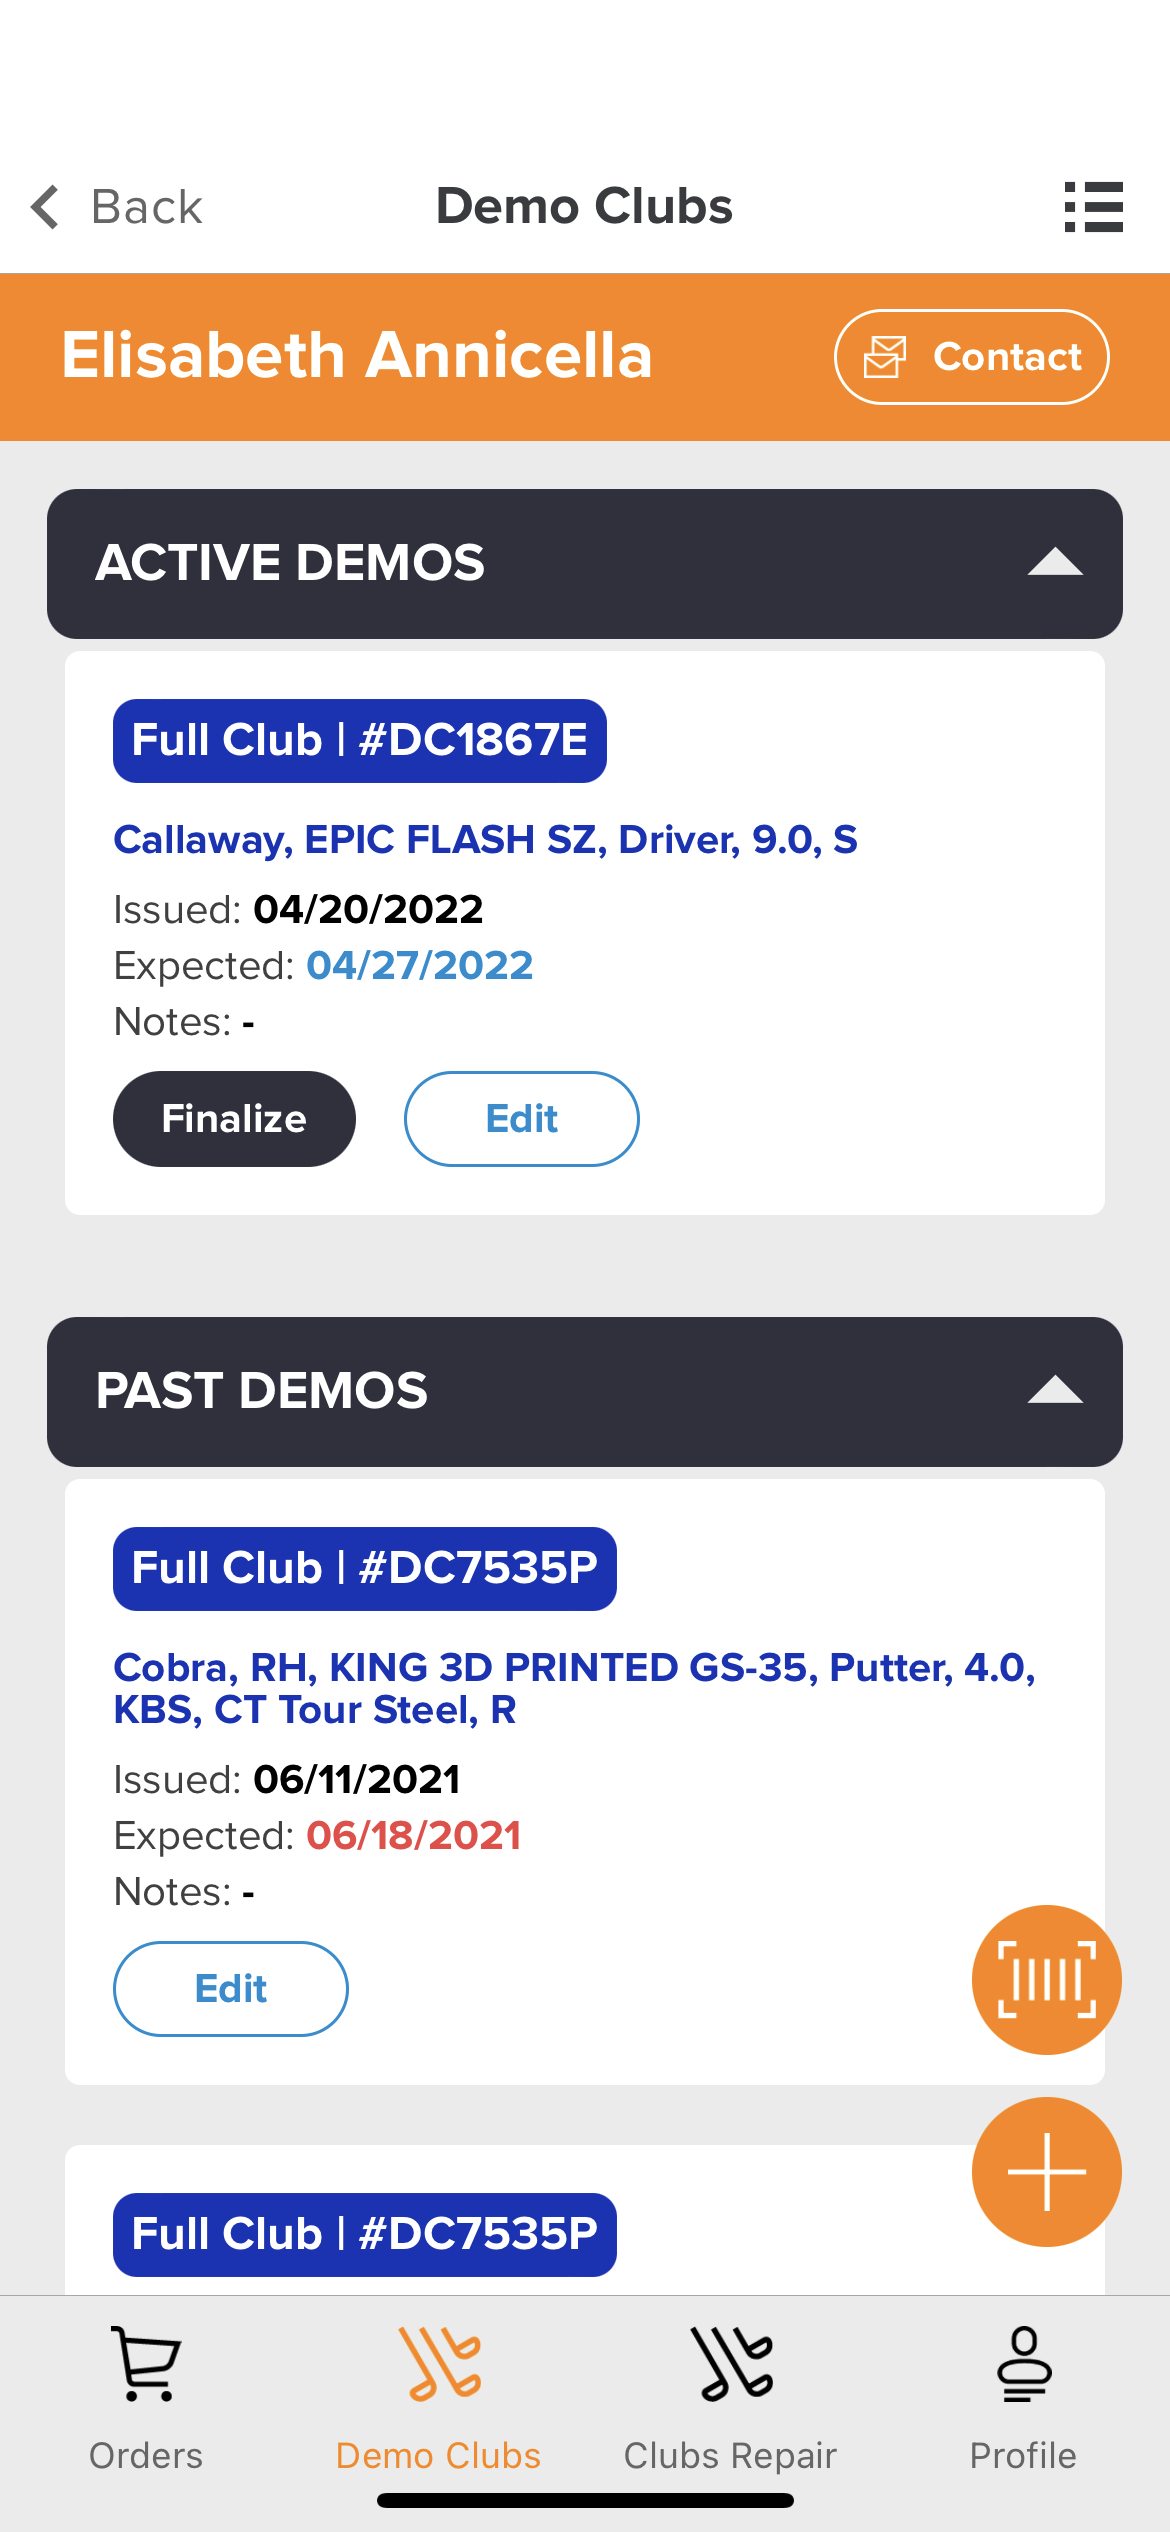
The demos will be grouped and displayed in the section corresponding to their status (e.g., Active Demo or Past Demo). The Section will only be displayed if at least one demo meets that status. The demo tiles will display information related to a demo, including demo tracking #, demo details (e.g., Model, Type, and more), issue date, expected date, action (e.g., Finalize), and the ability to edit the demo.
The following is a list of actions that can be taken on a demo while using the mobile app:
Edit: This will allow you to edit the demo club details (e.g., Club Type, Inventory, Notes, and Return Date).
Finalize: There will be a button to finalize the order for Active demos. When a member or guest returns a demo club, click "finalize," and the demo will be marked as returned, and any applicable notification will be sent out.
Placing a New Demo from the Customer Dashboard Demo Tab: The “+” button allows you to create a new demo manually for that member or guest. Click the barcode button to create a new demo for that specific member by scanning the barcode on a demo club. Using barcodes for checking in and returning demo clubs will be discussed later in this article.
When placing a demo, you can enter complete details about the demo (e.g., Club Type, Notes, Expected Return Date). This will allow you to enter and return a demo without visiting a computer (as shown below).

Returning a Demo from the Customer Dashboard Demo Tab: On any active demo item, click "Finalize" to return the item. If you have accidentally returned the item, click "Edit," and you will be able to remove the Returned Date.
Note: All demo clubs and components should be uploaded through the web first. For more details about uploading your demo club inventory, Click Here.
Club Repair
The club repair tab will provide you with a list of current club repairs and the ability to create new repair orders for the selected member or guest (as shown below).

The repair orders will be grouped and displayed in the section corresponding to their status (e.g., Repairs Entered, Repairs in Progress, Repairs Complete). The Sections will only be displayed if at least one repair meets that status. The repair order tiles will display information related to a repair, repair type, technician, completion date, and action.
The following is a list of actions that can be taken:
Edit: This will allow you to edit the demo club details (e.g., Club Type, Inventory, Notes, and Return Date).
Next: For active repairs, there will be a next button. Depending on the stage the repair is in will determine the action of the button, as outlined below:
Repair Entered: Move the repair to in progress.
Repair in Progress: Move the repair to completed.
Repair Completed: Finalized a demo club.
Issuing a New Club Repair Order from the Customer Dashboard Club Repair Tab: The “+” button allows you to manually create a new club repair order for that specific member or guest (as shown below).

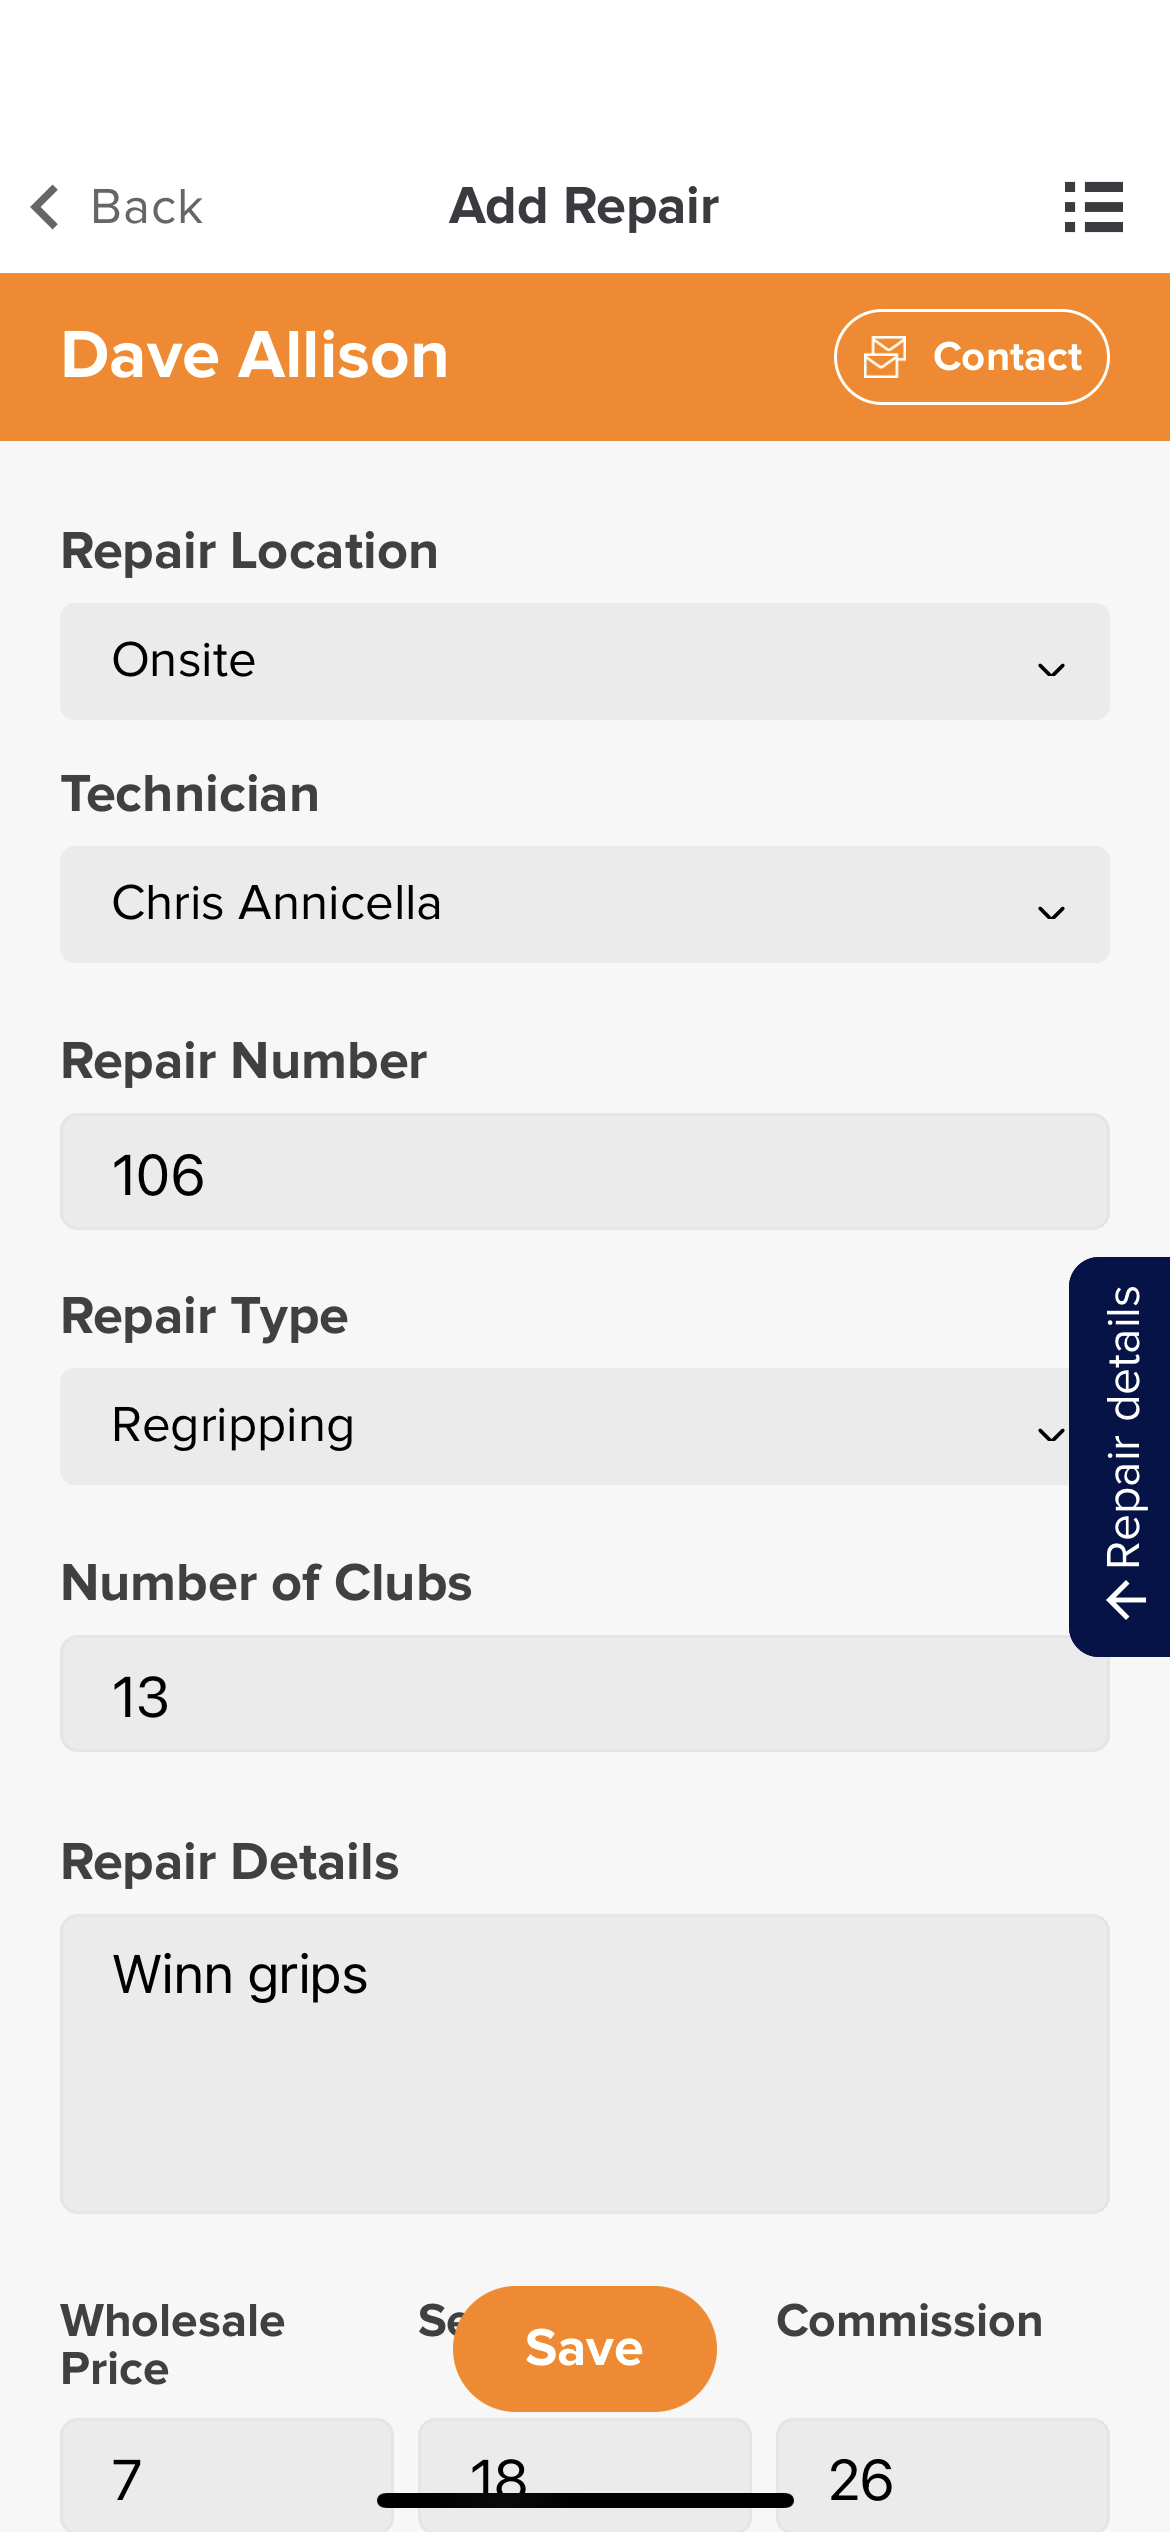
When entering an order on the mobile, you can enter the full club repair order details (e.g., Repair Location, Technician, Customer Details, Rep Detail, etc.). For more information about this step, Click Here.
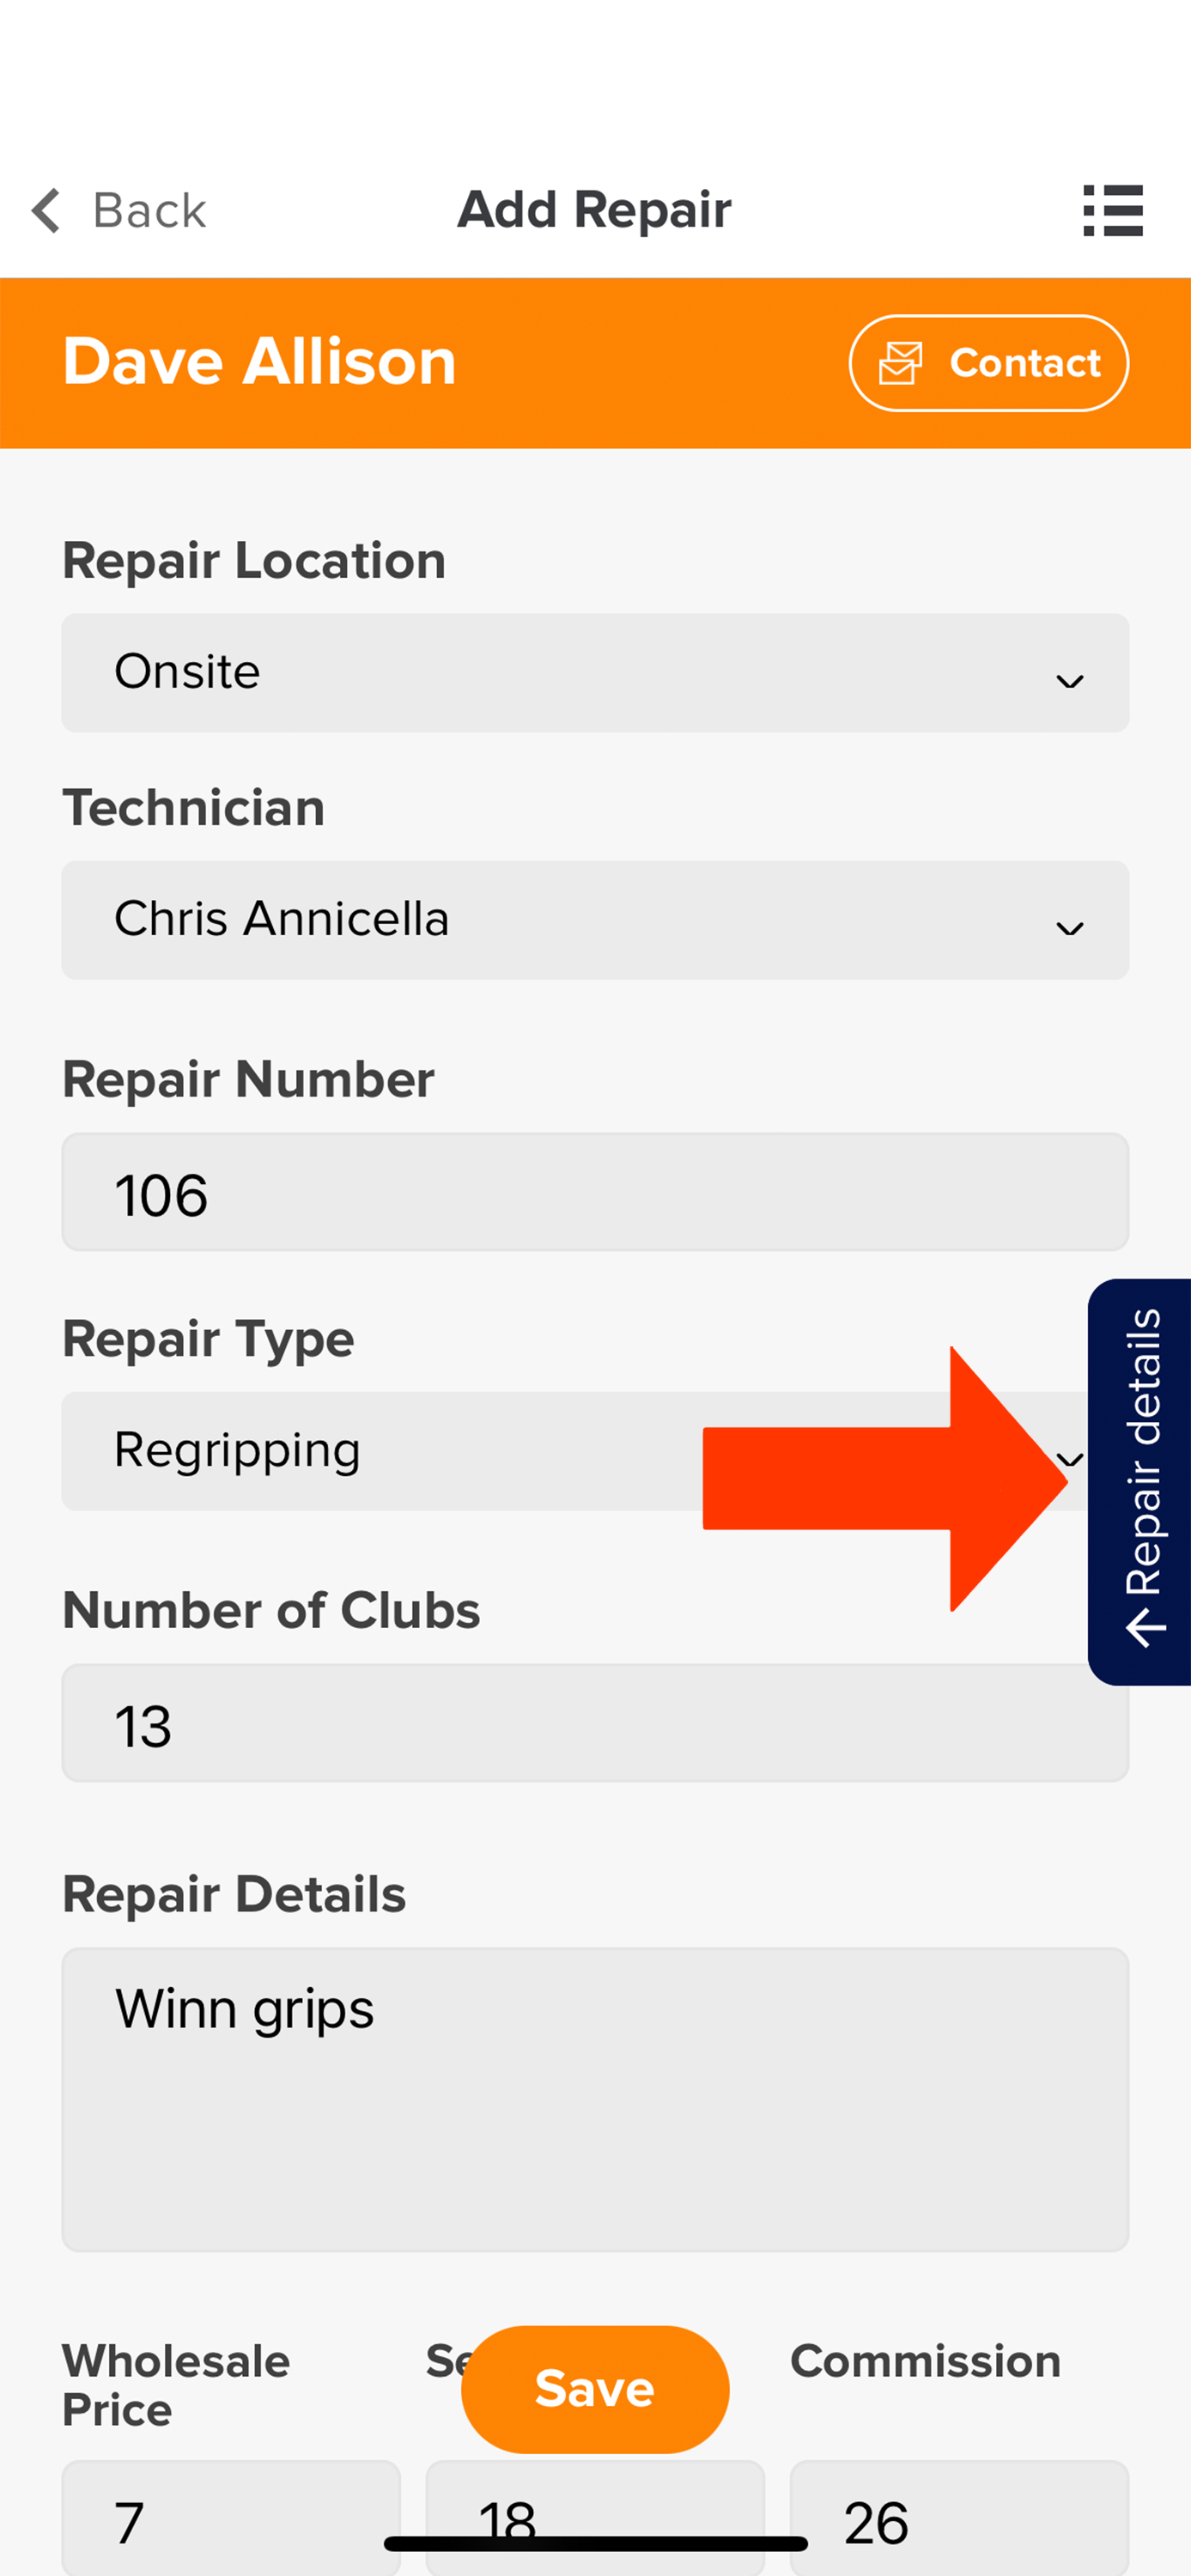
When entering or editing an order, click on "Repair Details" (as shown below) to see notification options, upload files, and activity logs.
Note: All demo clubs and components should be uploaded through the web first. For more details about uploading your demo club inventory, Click Here.
Profile
The Profile tab allows you to see your members and guest complete profiles, including standard fields (last name, first name, email, cell phone) and custom fields (e.g., shirt size, shoe size)(as shown below).
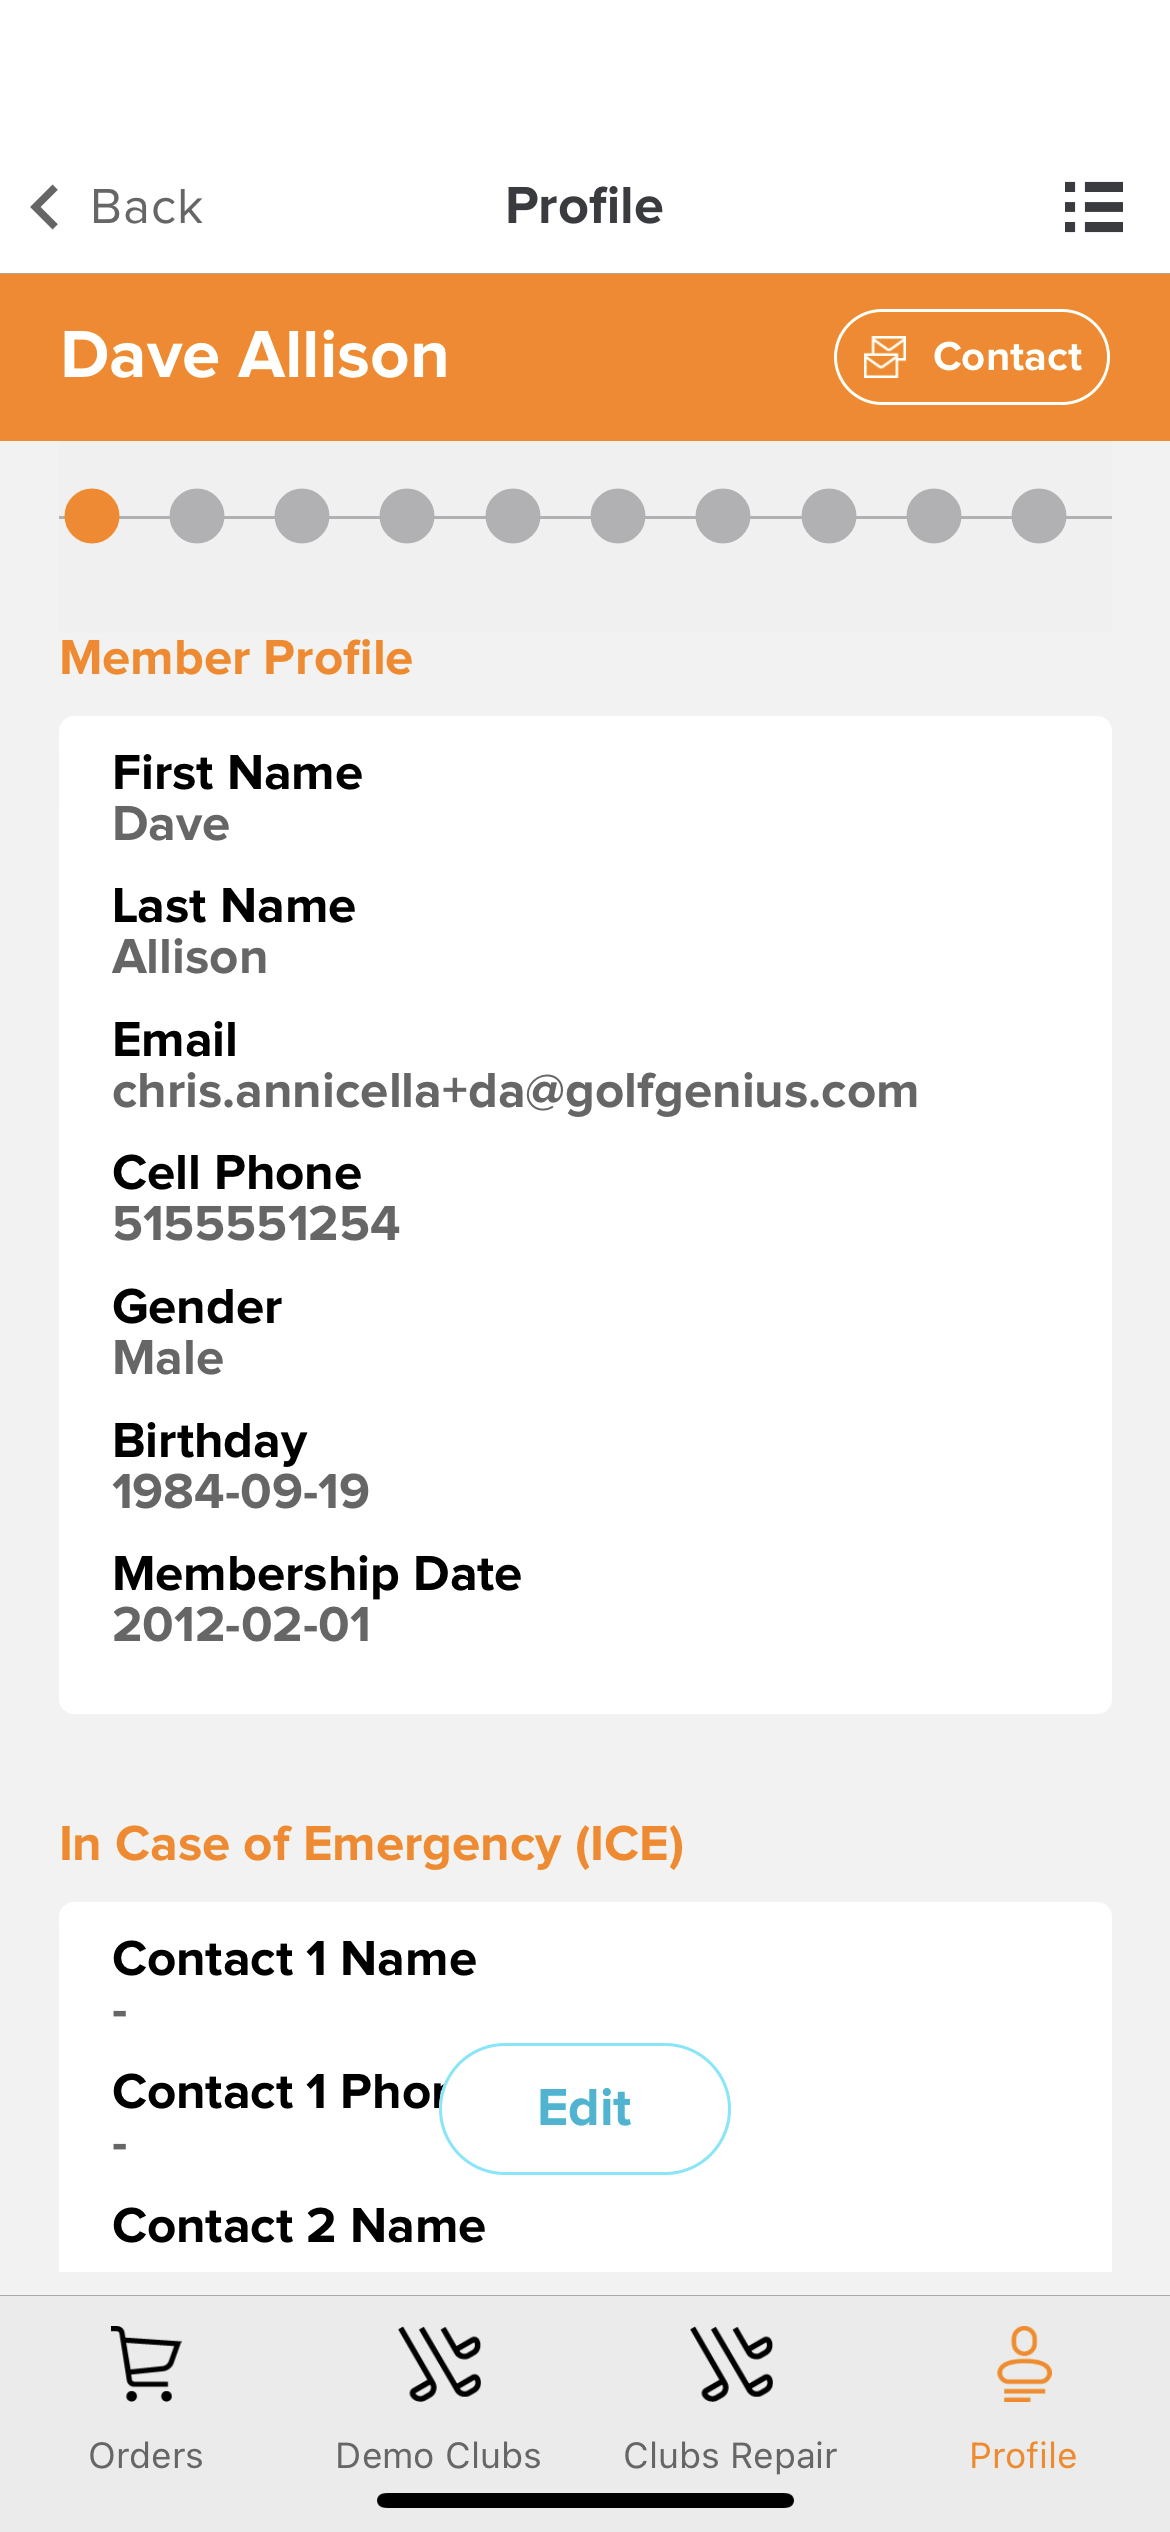
To edit any existing information in the member or guest profile, click "Edit." Click Here for complete details on managing the member roster.
Contact
The Contact tab makes connecting with a member straightforward. Managers can send emails, call or text the member or guest (as shown below).
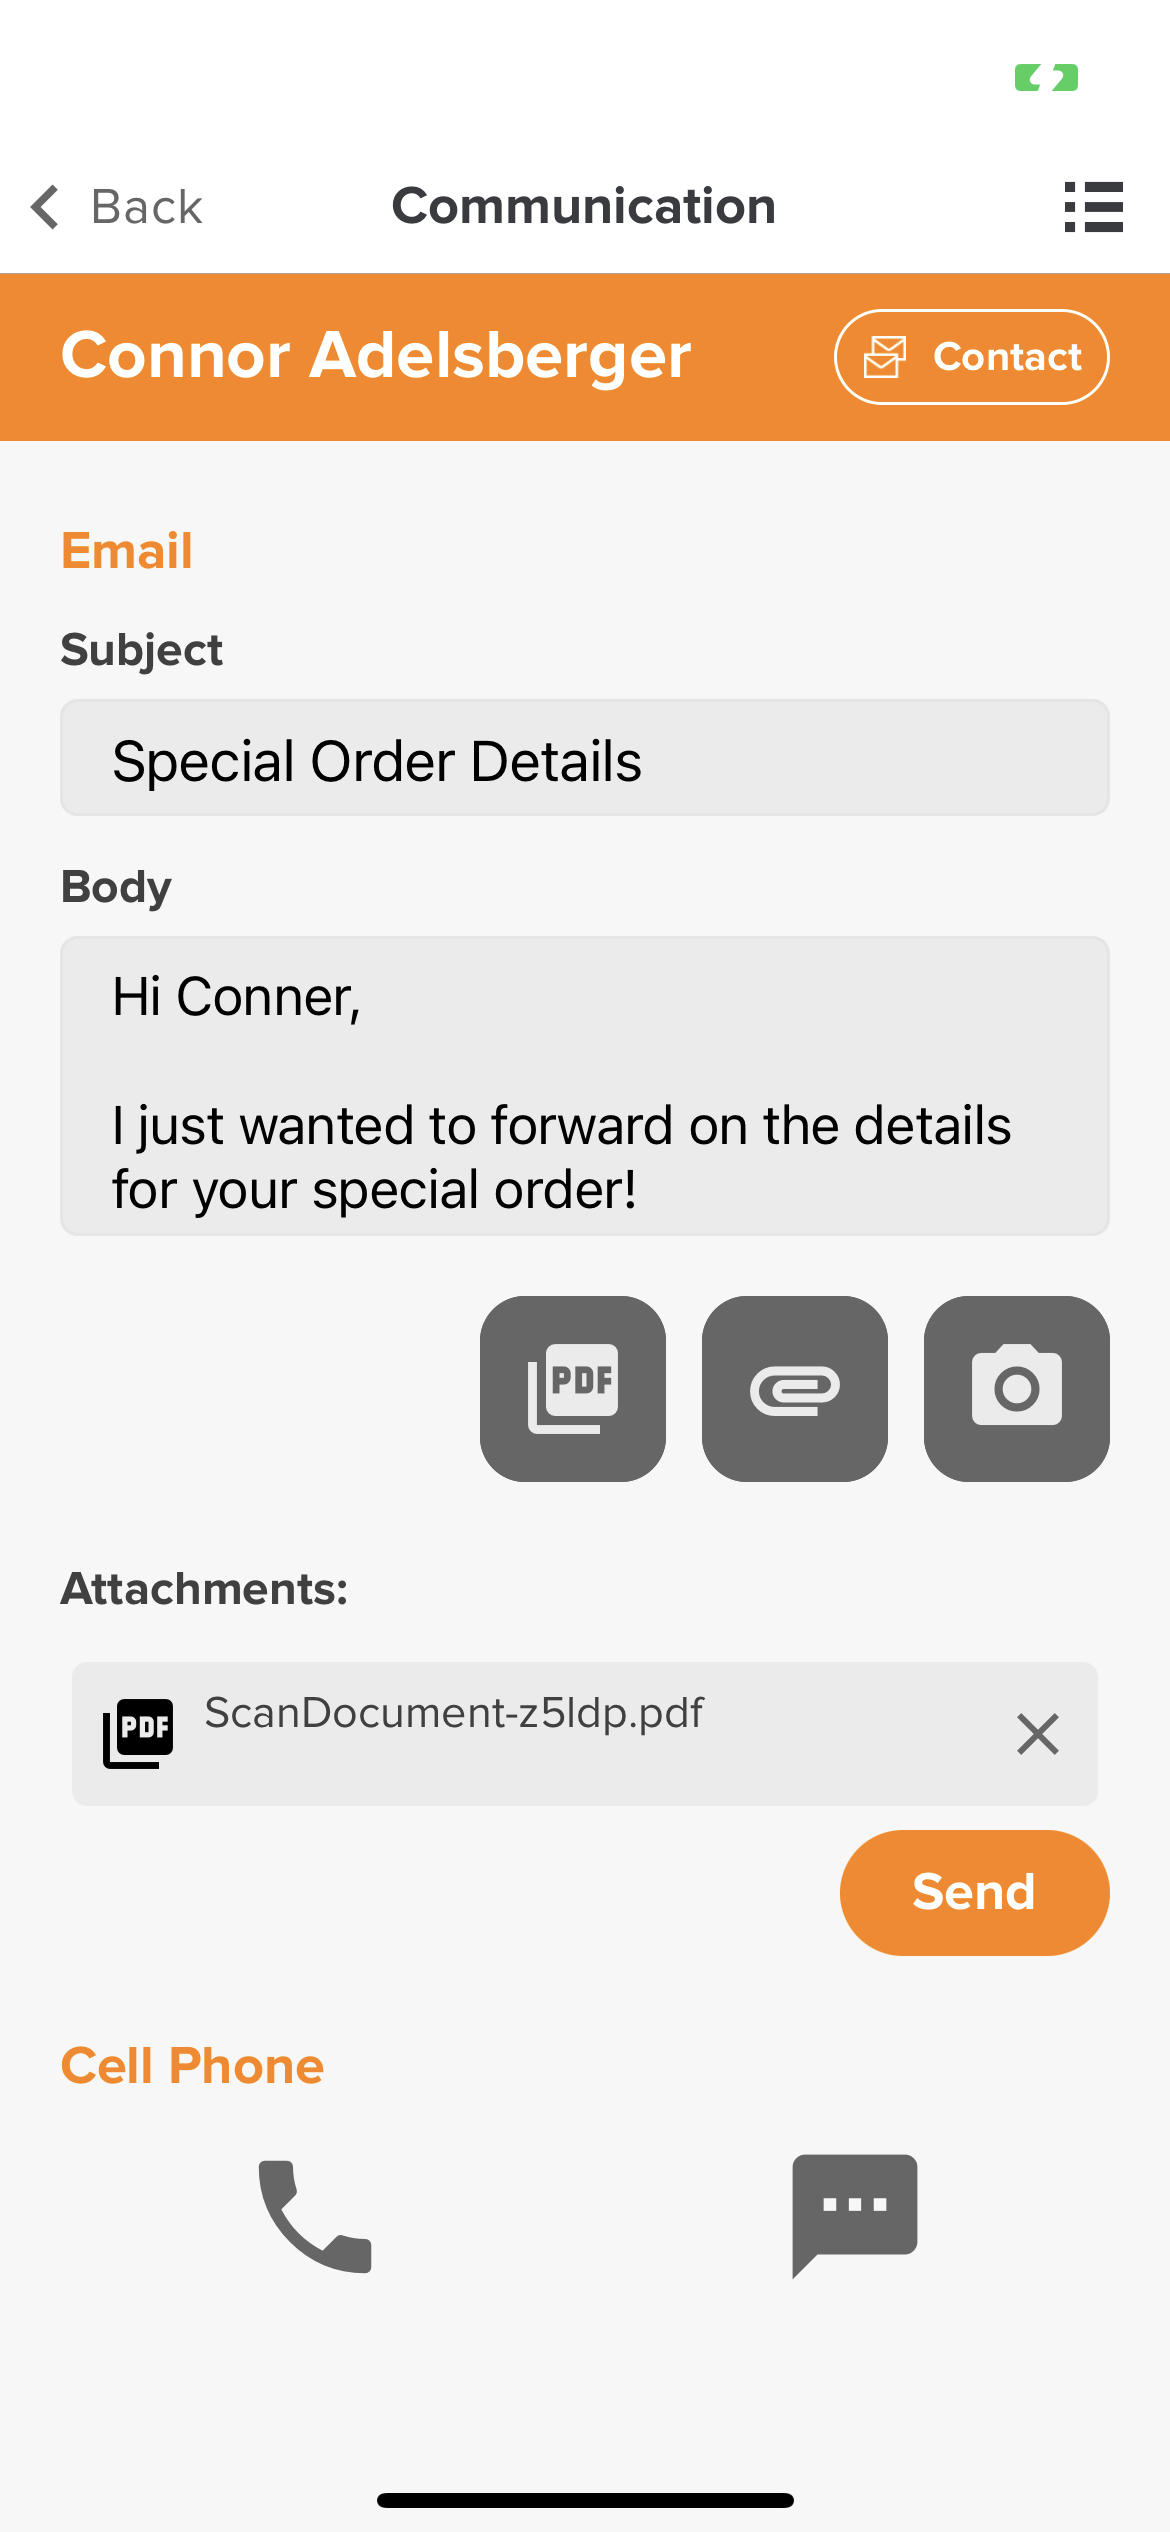
If you wish to send the member or guest an email, type the subject line, body, include a scanned pdf, attachment for your device documents or a photo, and click send. This will send that member or guest an email from the logged-in user.
If you would like to call the member using the number in their profile, press the phone icon. If you would like to send a text message to the member using the number in their profile, press the message icon. When clicking on the phone or message icon, this will open up the mobile device's default app for talk or text.
Note: Standard talk, text, and data rates may apply. Please get in touch with your carrier for more details.