Note: This feature is currently only available to North American Customers.
Callaway Connect, is Callaway Golf's wholesale B2B eCommerce platform that makes the transaction process easier for buyers and is trusted by golf shops all over the world. This integration has two major benefits:
Special Orders: Automates the Special Order process by eliminating the need for double entry, reducing mistakes, and providing timely updates to your members. To check out our introductory video to see how it works, Click Here.
Seasonal Golf Ball Promotions: Further, you will be able to utilize the Promotions feature to simplify the Callaway Golf Ball Order promotion programs like the Buy 3 Dozen Get 1 Free with customization.
In this article, we will discuss setting up the following for your Callaway Connect Integration:
Callaway Connect Accounts
Connecting a Callaway Connect Account
Automatic Updates for Orders in "Orders Placed" Stage
Disconnecting your Callaway Connect Account
Mapping Callaway Connect Categories to Golf Shop Categories
Mapping Callaway Connect Item Fields to Golf Shop Custom Fields
Callaway Connect Account:
Before establishing the integration between Golf Genius - Golf Shop and Callaway Connect, you must have a Callaway Connect Account. Important Note: Only one Callaway Connect account/login can be connected to your Golf Shop account.
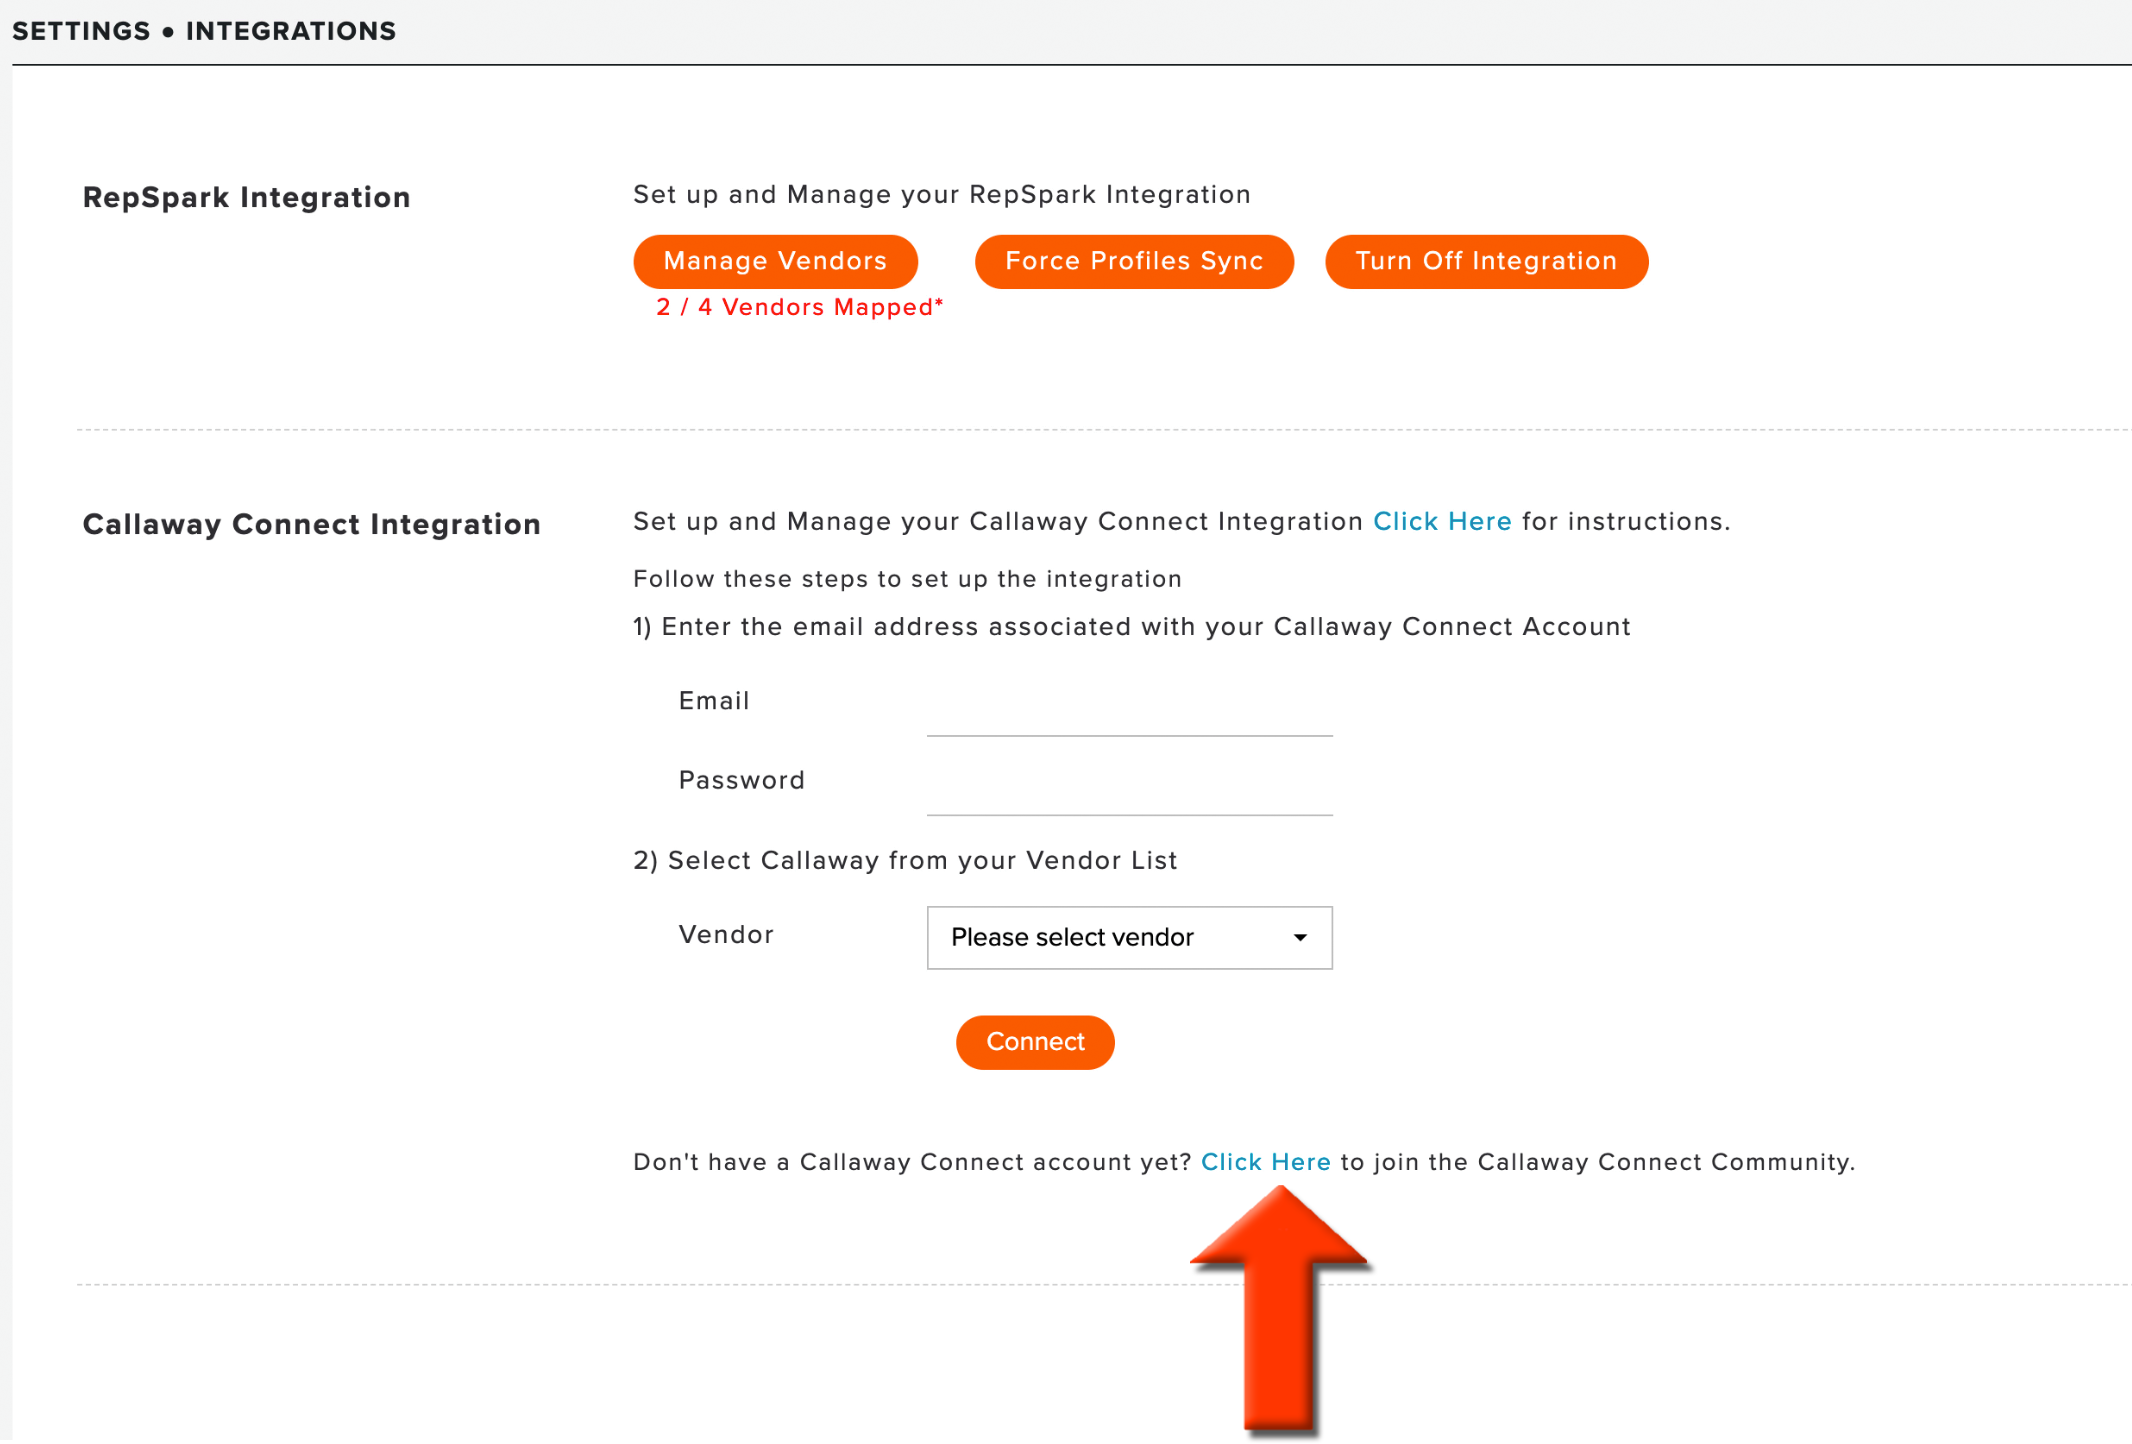
If no one at the club has an established Callaway Connect account, please Click Here to register for an account or connect with your local Callaway Representative to have one established for you. Alternatively, you can go to Club Details > Integration > Callaway Connect Integration, and there is a link you can follow to register for an account (as shown below).
Connecting a Callaway Connect Account:
Once an account is created, or if you already have an account, you can connect your Golf Shop Account to your Callaway Connect Account. (Note: Only one Callaway Connect account can be connected per Golf Shop Customer. The one account will then be used for all Golf Shop managers for that Customer.) To connect the integration, follow these directions:
Go to Club Details > Integration > Callaway Connect Integration.
Enter your Callaway Connect credentials (email and password).
Select "Callaway" from your vendor list.
Click "Connect."
Note: If you receive a error when attempting to connect your Callaway Connect account, check the following:
The email used is the primary one associated with your Callaway Connect account, and not a secondary email address.
Email is case sensitive, ensure the email entered is identical to the one associated with your Callaway Connect account.
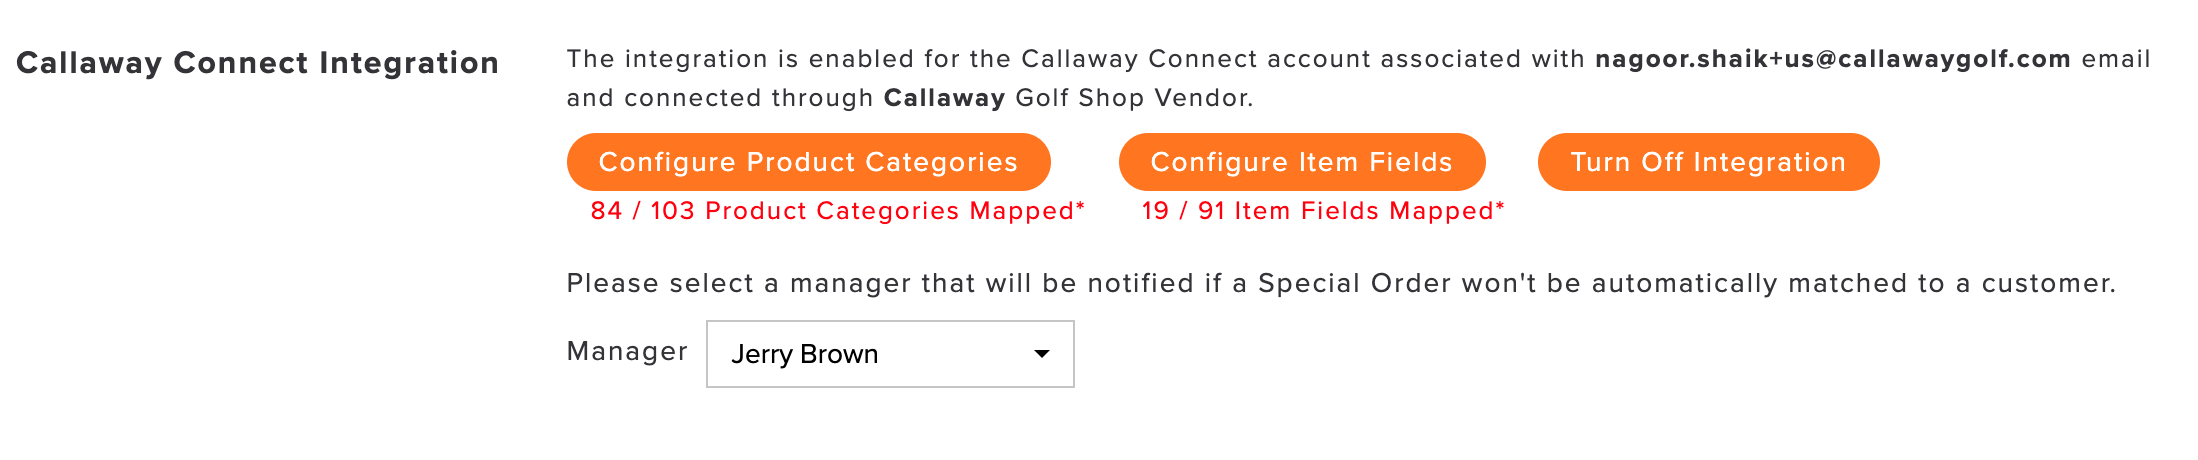
Accept the terms that Golf Shop would like access to your Callaway Connect Account. After accepting the terms, you will be redirected back to Golf Shop, and your account will be connected (as shown below).

Select a manager that should be notified if a special order will not be automatically matched to a customer.
Automatic Updates for Orders in "Orders Placed" Stage:
Callaway Connect can provide additional information, allowing automatic order updates.
Expected Ship Date: When an expected ship date is available with the shipping information from Callaway Connect, the expected ship date will populate in the respected respective Golf Shop special orders.
Shipping Information: When shipping information is entered into Callaway Connect, the carrier and tracking number will populate in the respective Golf Shop special orders, triggering member notifications (if enabled).
Further, if the enable automatic order transition option is enabled for shipping updates in your Special Order General Settings, the order will automatically move from the "Orders Placed" stage to the "Delivered" stage once it arrives at its destination. When the order moves between stages, the customer will receive an email notification (if enabled) and text message notification (if enabled) confirming that their order has been delivered.
Disconnecting your Callaway Connect Account:
If you wish to disconnect your Callaway Connect account, you can do that from the integration dashboard. To turn off the integration, go to Club Details > Integration > Callaway Connect Integration > Turn Off Integration.
Mapping Callaway Connect Categories to Golf Shop Categories:
For Golf Shop orders to automatically populate the appropriate product categories when an order is placed, the Callaway Connect Product Categories need to be mapped with Golf Shop Product Categories.
When a customer connects their Callaway Connect account, Golf Shop will automatically attempt to map categories by name. However, it should be noted that since customers can customize their Golf Shop Categories, it may be necessary to customize some of the mappings.
To view the mappings and customize (if necessary), follow these directions:
Go to Club Details > Integrations > Callaway Connect Integration > Configure Product Categories.
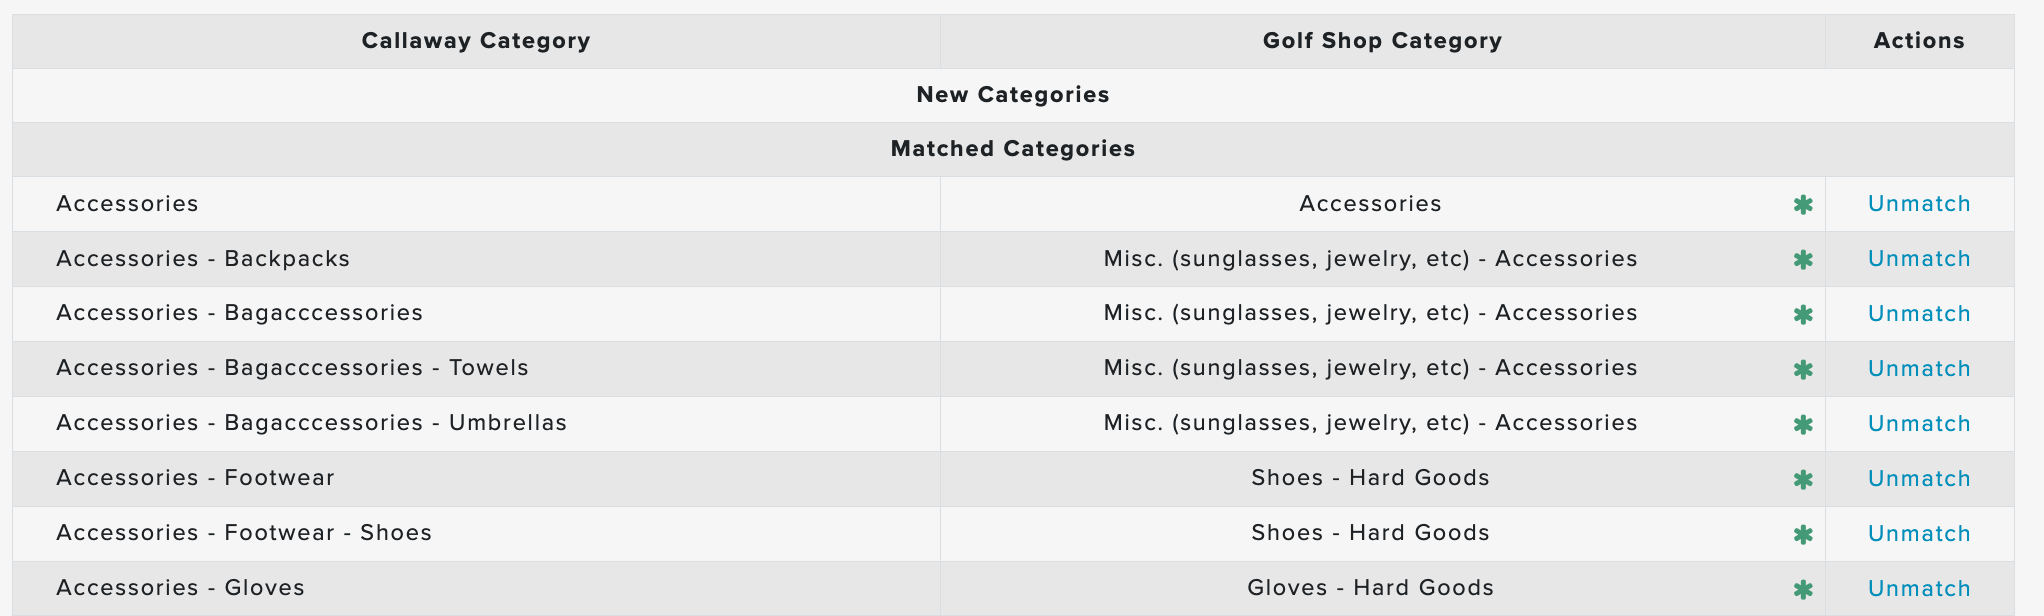
Match the Active Callaway Connect Categories with the Golf Shop Categories.
You will see the Callaway Connect Categories sorted as:
Matched Categories: Some (or all) rows will automatically be matched (as shown below).

Unmatched Categories: Below the rows that were automatically matched, you can manually match unmatched rows by selecting your Golf Shop category that matches the Callaway Connect Category.
Note 1: If your row does not have an appropriate attribute to match with, you can create a new category (by going to Orders > Merchandise Settings > Product Categories) or leave it blank.
Note 2: Any Callaway Connect categories left unmapped will not be imported to Golf Shop.
Once your rows have been matched, click "Save Configuration."
Mapping Callaway Connect Item Fields to Golf Shop Custom Fields:
For Golf Shop orders to automatically populate the appropriate custom field when an order is placed, the Callaway Connect Item Fields need to be mapped with Golf Shop Custom Fields.
When a customer connects their Callaway Connect account, Golf Shop will automatically attempt to map fields by name. However, it should be noted that since customers can customize their Golf Shop custom fields, it may be necessary to customize some of the mappings.
To view the mappings and customize (if necessary), follow these directions:
Go to Club Details > Integrations> Callaway Connect Integration > Configure Item Fields.
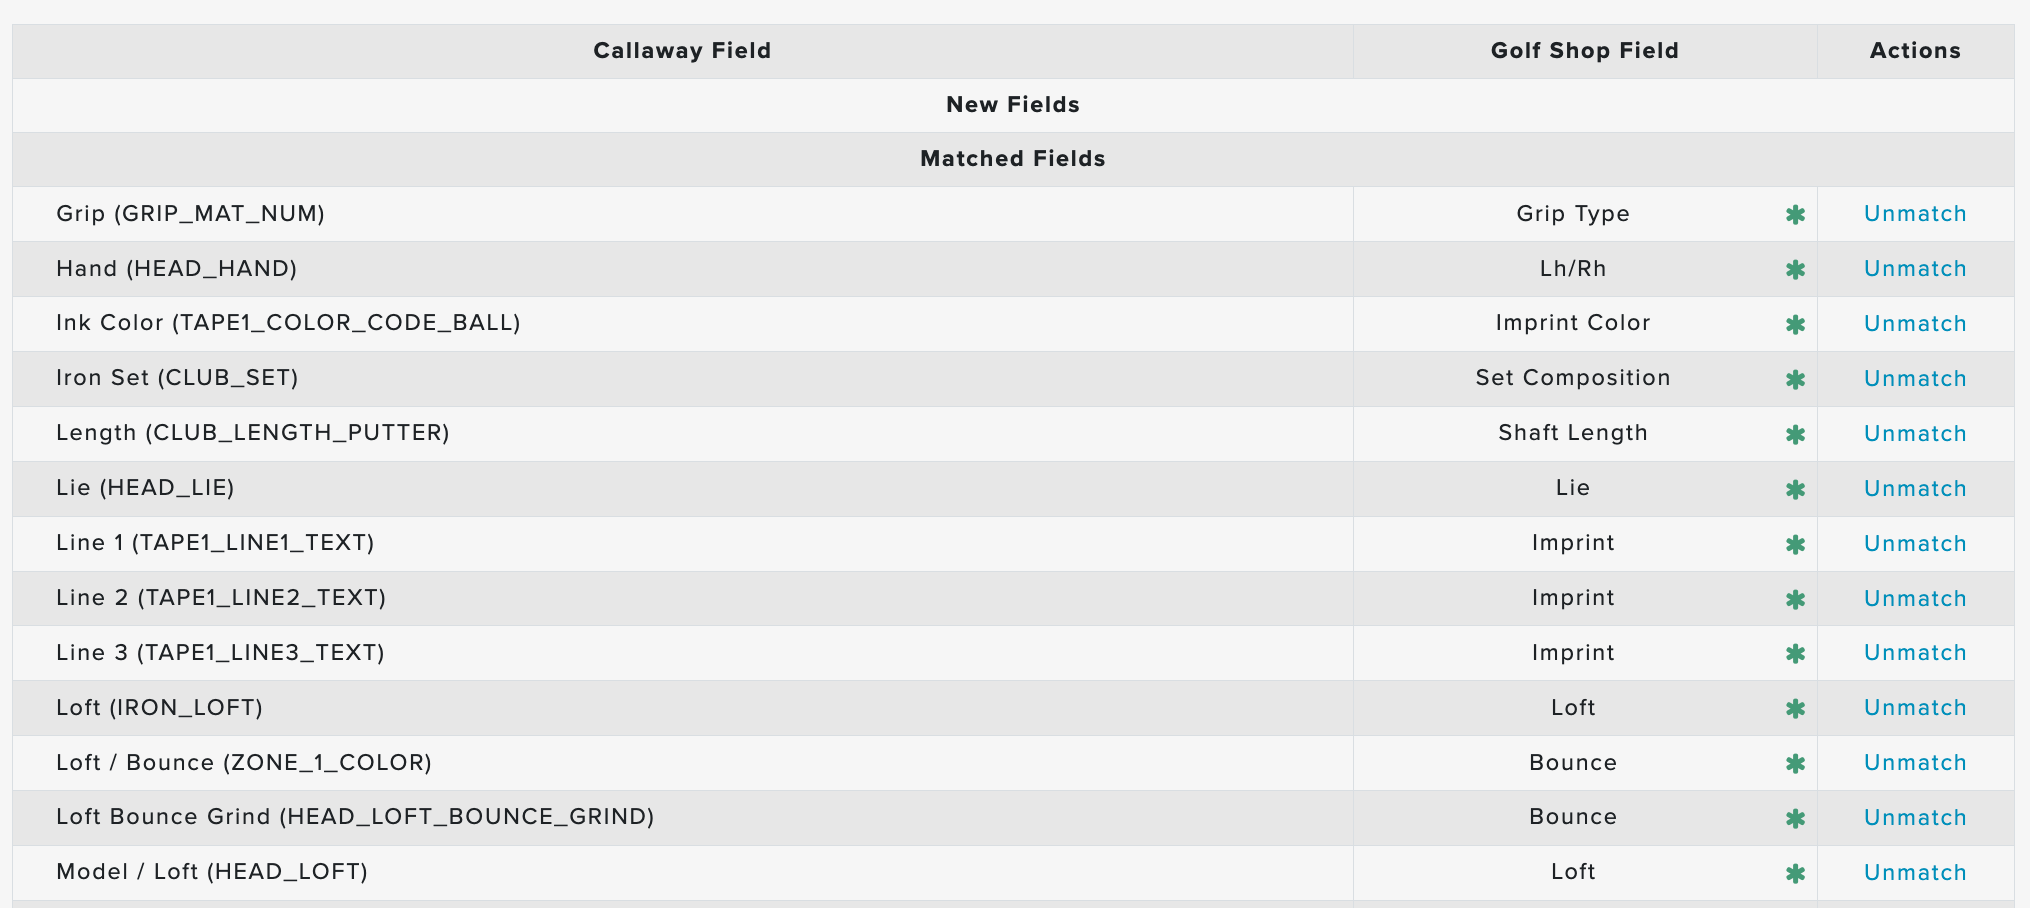
Match the Active Callaway Connect Item Fields with the Golf Shop Custom Fields.
You will see the Callaway Connect Item Fields sorted as:
Matched Fields: Some (or all) rows will automatically be matched (as shown below). These are fields that will pull data from Callaway Connect into Golf Shop custom fields and the additional description field.

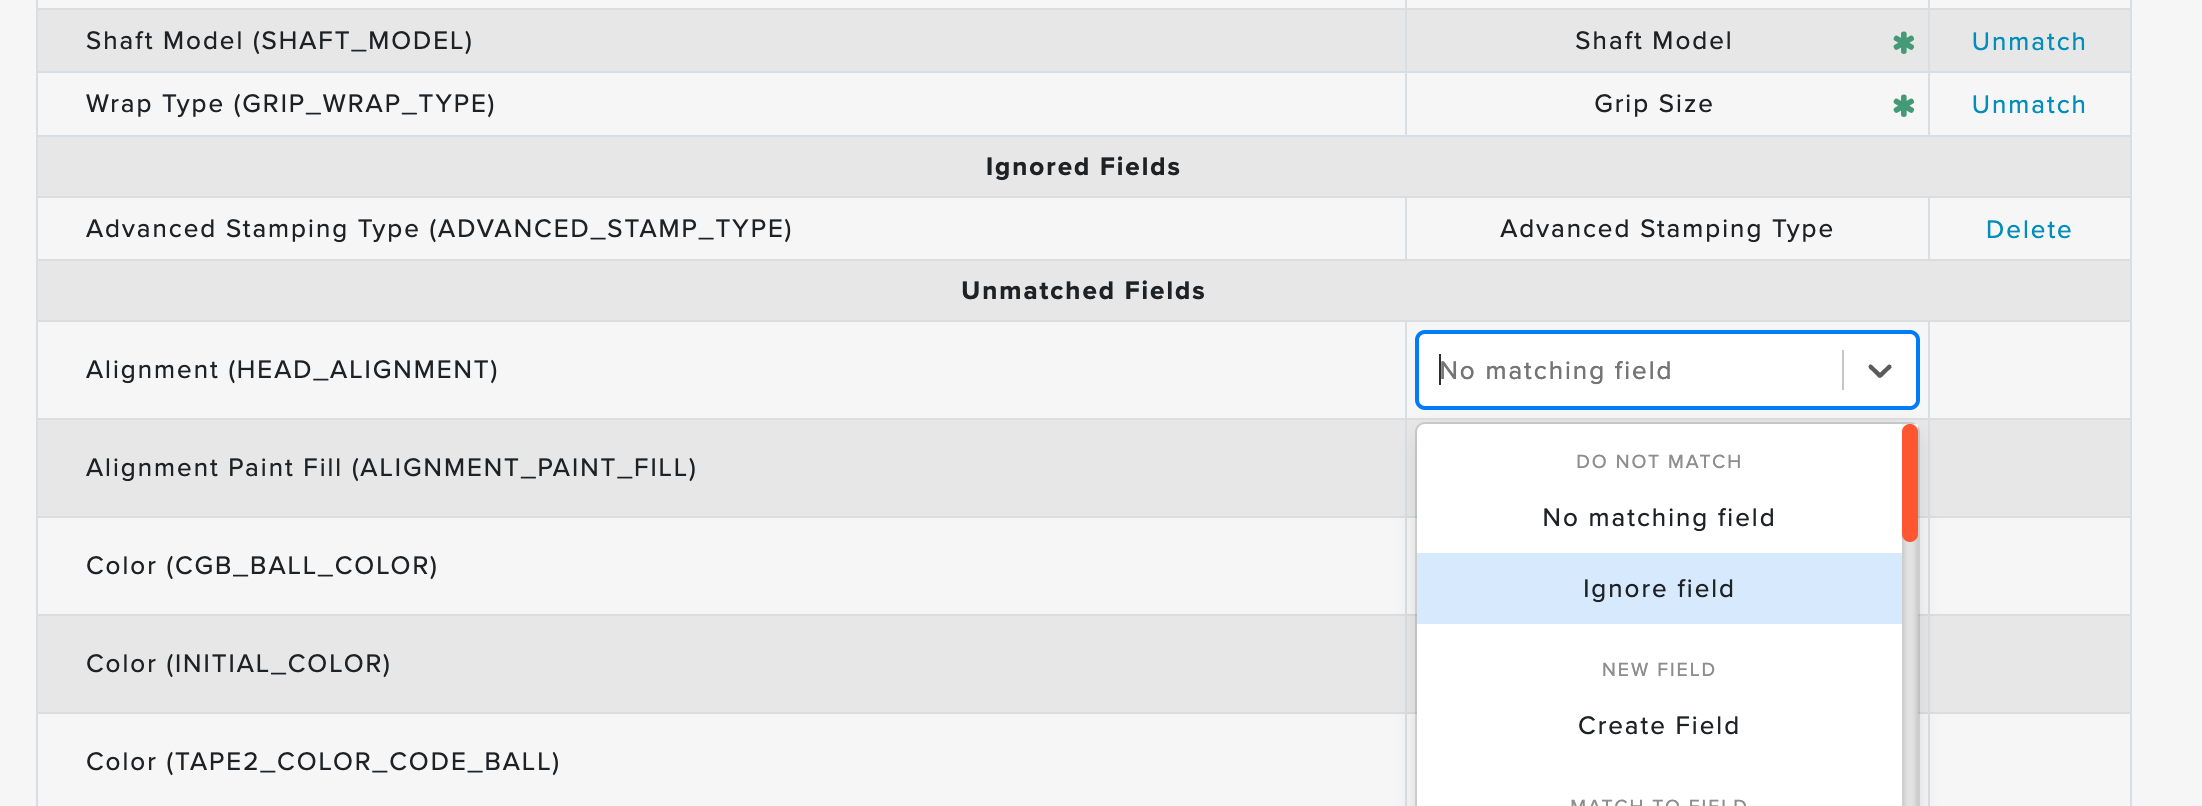
Ignored Fields: Ignored fields will not be pulled into Golf Shop from Callaway Connect. These fields will not show in the custom fields or additional description fields. Note: If you wish to ingore a matched field, unmatch it first, and then update the field to "Ignor Field" (as shown below).

Unmatched Fields: Below the rows that were automatically matched, you can manually match unmatched rows by selecting your Golf Shop custom fields that match the Callaway Connect Item Fields. Note 1: If your row does not have an appropriate attribute to match with, you can select "Create Field" from the dropdown or leave it blank. Note 2: Any Callaway Connect field left unmapped will not be imported to Golf Shop.
Once your rows have been matched, click "Save Configuration."