
One great benefit of using Golf Shop is managing your rentals (e.g., rental sets, shoes, pull carts, etc.) within the software or mobile app. By entering your rentals into your inventory, you can easily track and maintain them from season to season.
In this article, we will discuss the following items for getting started with and managing rentals with Golf Shop:
Rental General Settings
Rental Kinds
Rental Forms
Adding Rentals to the Inventory
Rental Process (i.e., Reserving, Issuing, Finalizing, Follow-up)
Viewing reserved and issued Rentals
Editing reserved and issued Rentals
Viewing Past Rentals
Rental General Settings:
The Rentals General Settings comprise the default settings for Rentals. When issuing or reserving a new rental, these settings are used as the defaults:
Set Default Expected Return Date.
To define these defaults, go to Services > Rentals > Settings. For more details, Click Here.
Rental Kinds (Types):
By default, two rental kinds are available for your account:
Rental Set: Typically, sets of clubs that are rented to members/guests. Note: This is the only KIND to utilize the dexterity, flex, and set composition fields.
General: A general rental category that can include any other type of rental you may have. Note: Additional general rental categories can be created (e.g., Push Cart, Golf Car, Rnage Finder, Umbrella, etc.). For details on creating more general rental types, Click Here.
You can add additional rental kinds to allow for more variation in your rentals by going to Services > Rentals > Rental Types. For instructions on creating additional rental kinds (types), Click Here.
Rental Forms:
The details for every rental in your inventory are contained in your rental form. There are two types of rental forms:
Rentals Set: Used specifically for Rental Sets, this form allows you to set a tracking ID, dexterity, flex, add set composition, and additional details (as shown below). Note: This is the only KIND to utilize the dexterity, flex, and set composition fields.

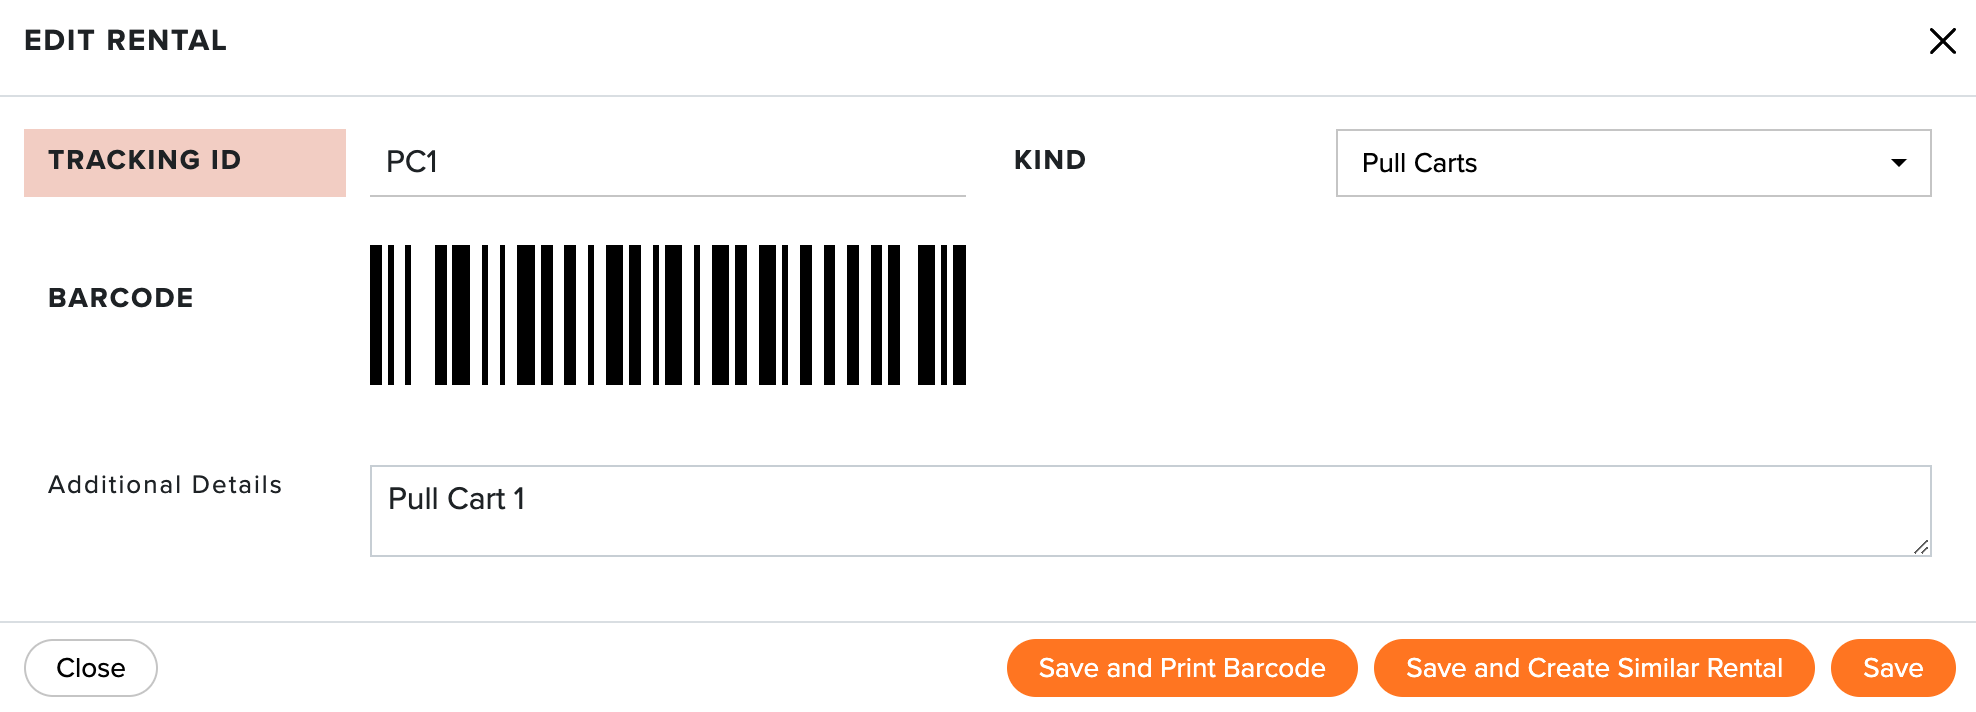
General: This form is generic and used for all rental inventory besides Rental Sets (i.e., range finder, push cart, etc.). It allows you to define a tracking ID, kind, and additional details (as shown below). Note: Additional general rental categories can be created (e.g., Push Cart, Golf Car, Rnage Finder, Umbrella, etc.). For details on creating more general rental types, Click Here.


Adding Rentals to the Inventory:
After adding additional rental types (if necessary), you can start adding rentals to your inventory. There are two ways to accomplish this:
Via Spreadsheet: This method allows you to upload your rental inventory spreadsheet. This is the suggested method when uploading a large inventory. Click Here for details.
Manually: This method allows you to manually enter rentals into your inventory one at a time. Click Here for details.
Making Changes (i.e., update, delete) to Rental Inventory:
When making changes (i.e., update, delete) to your rental inventory, we can help guide you through the available options:
Manually making changes: This method is best when you change a small number of rentals (1-4 items).
Making changes via spreadsheet: This method is best when adding new inventory or changing many items (5+).
For details on making changes, Click Here.
Add Barcodes to Rental Inventory:
While replacing your rental inventory, label the new inventory with barcodes so your staff can use the Mobile App to check inventory in and out.
Rental Process:
Every rental order goes through a process as they are issued to members and guests. Below is a summary of the process:
Reserving a Rental (if needed): When a member or guest knows they need a rental set, you can reserve it for a future date and time via a web browser. When reserving a rental, you will tie it to a specific rental set, capture member or guest information, and identify an expected reservation and return date/time. The expected reservation and return date help automate email and text notifications to ensure the rental is picked up and returned on time. For more details on this step, Click Here.
Issuing a Rental: When a member or guest wants a rental set, you can issue the rental via the computer or mobile app. When issuing a rental, you will tie it to a specific rental set, capture member or guest information, and identify an expected return date/time. This return date helps automate email and text notifications to ensure the rental is returned on time. For more details on this step, Click Here.
Finalizing a Rental: Once a rental is returned, it goes through the process of being finalized (returned). The rental needs to be put back into inventory and marked as returned to be removed from the dashboard. For more details on finalizing orders, Click Here.
Follow up with the Member/Guest: Follow up with a member/guest regarding their rental order with an Automated Email and Automated Text Message. This allows you to have one more "touch" with your members and guests to ask for feedback and if they need any additional assistance. For more details on following up on a rental, Click Here.
Viewing Reserved and Issued Rentals:
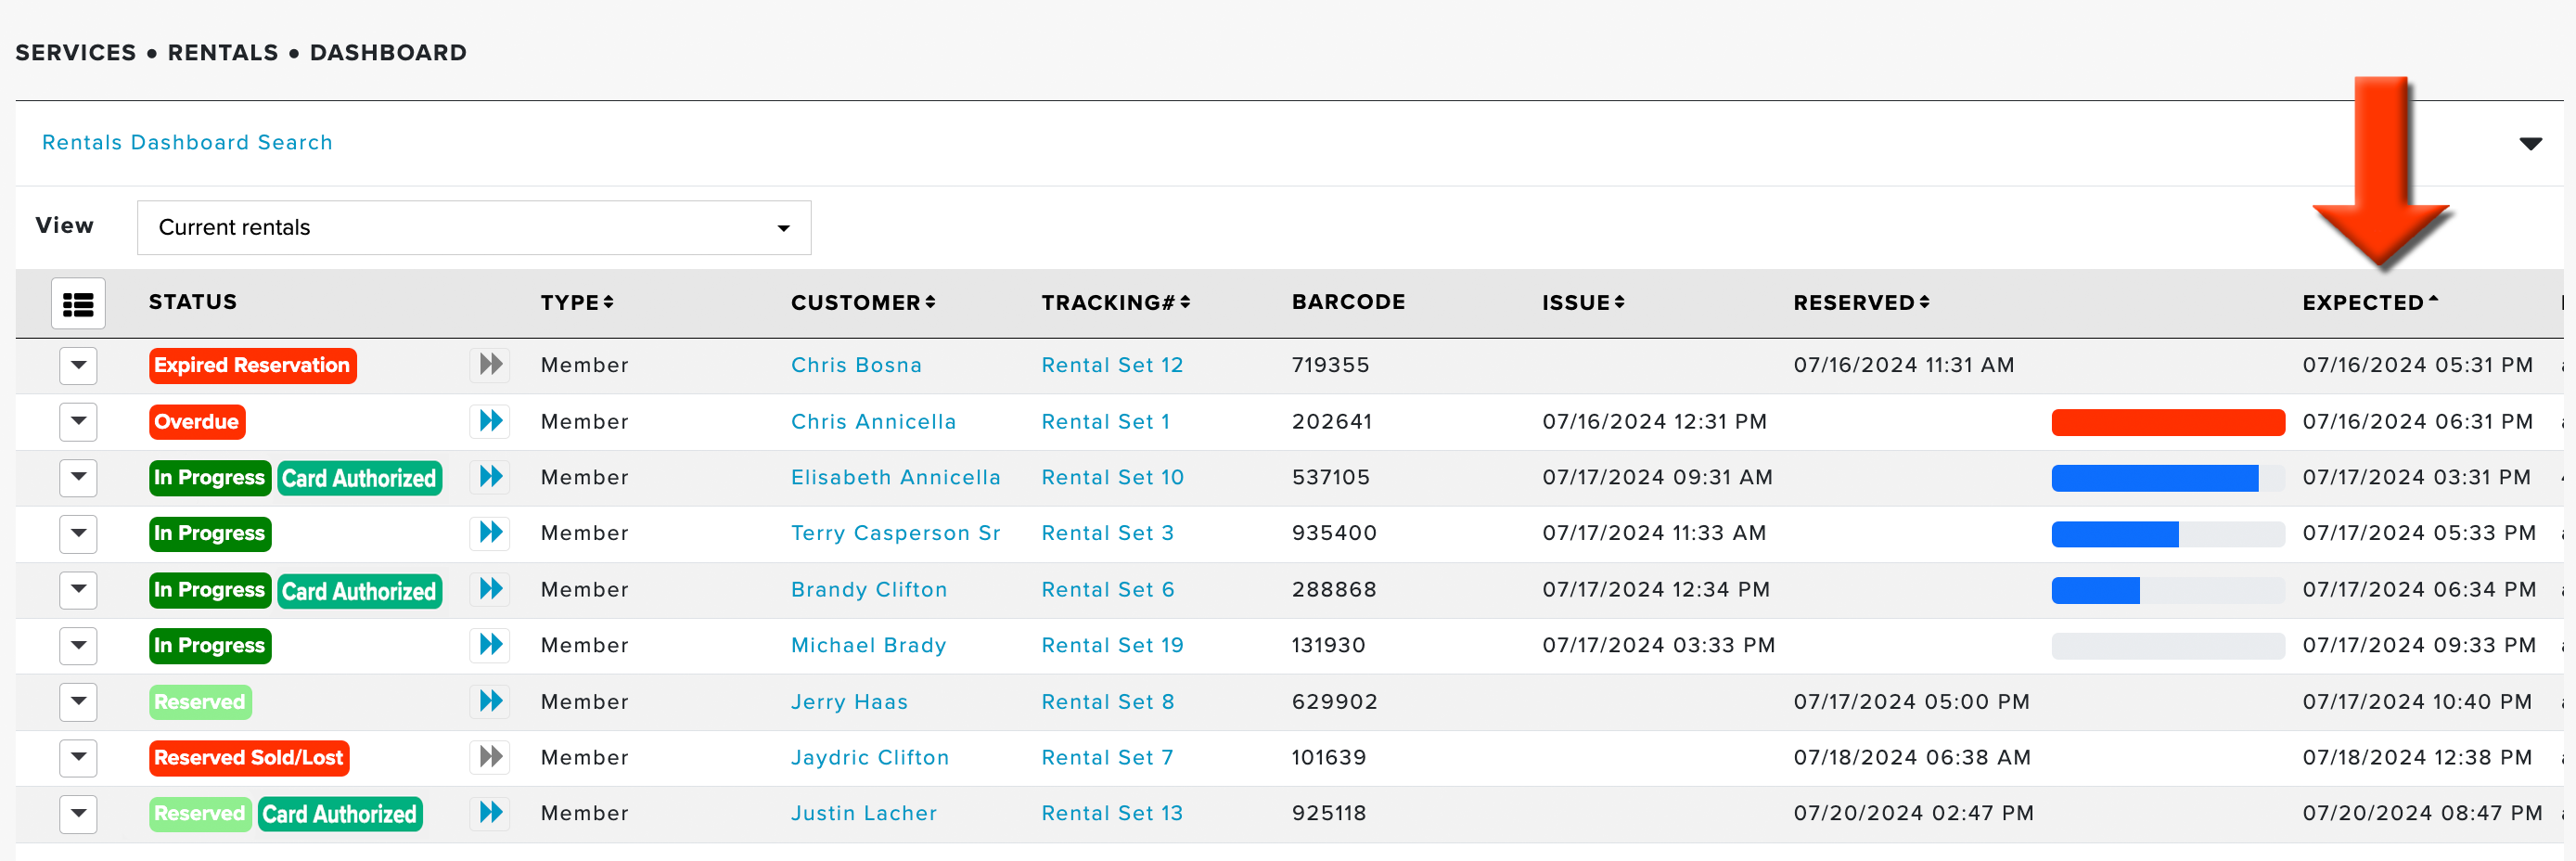
To view the reserved and issued rentals list, go to Services > Rentals > Dashboard. Current rentals are listed by default and sorted by the "Expected" column (as shown below), highlighting the expected time and date the rental must be returned.
For more details on the available options on the rentals dashboard, Click Here.
Editing Reserved and Issued Rentals:
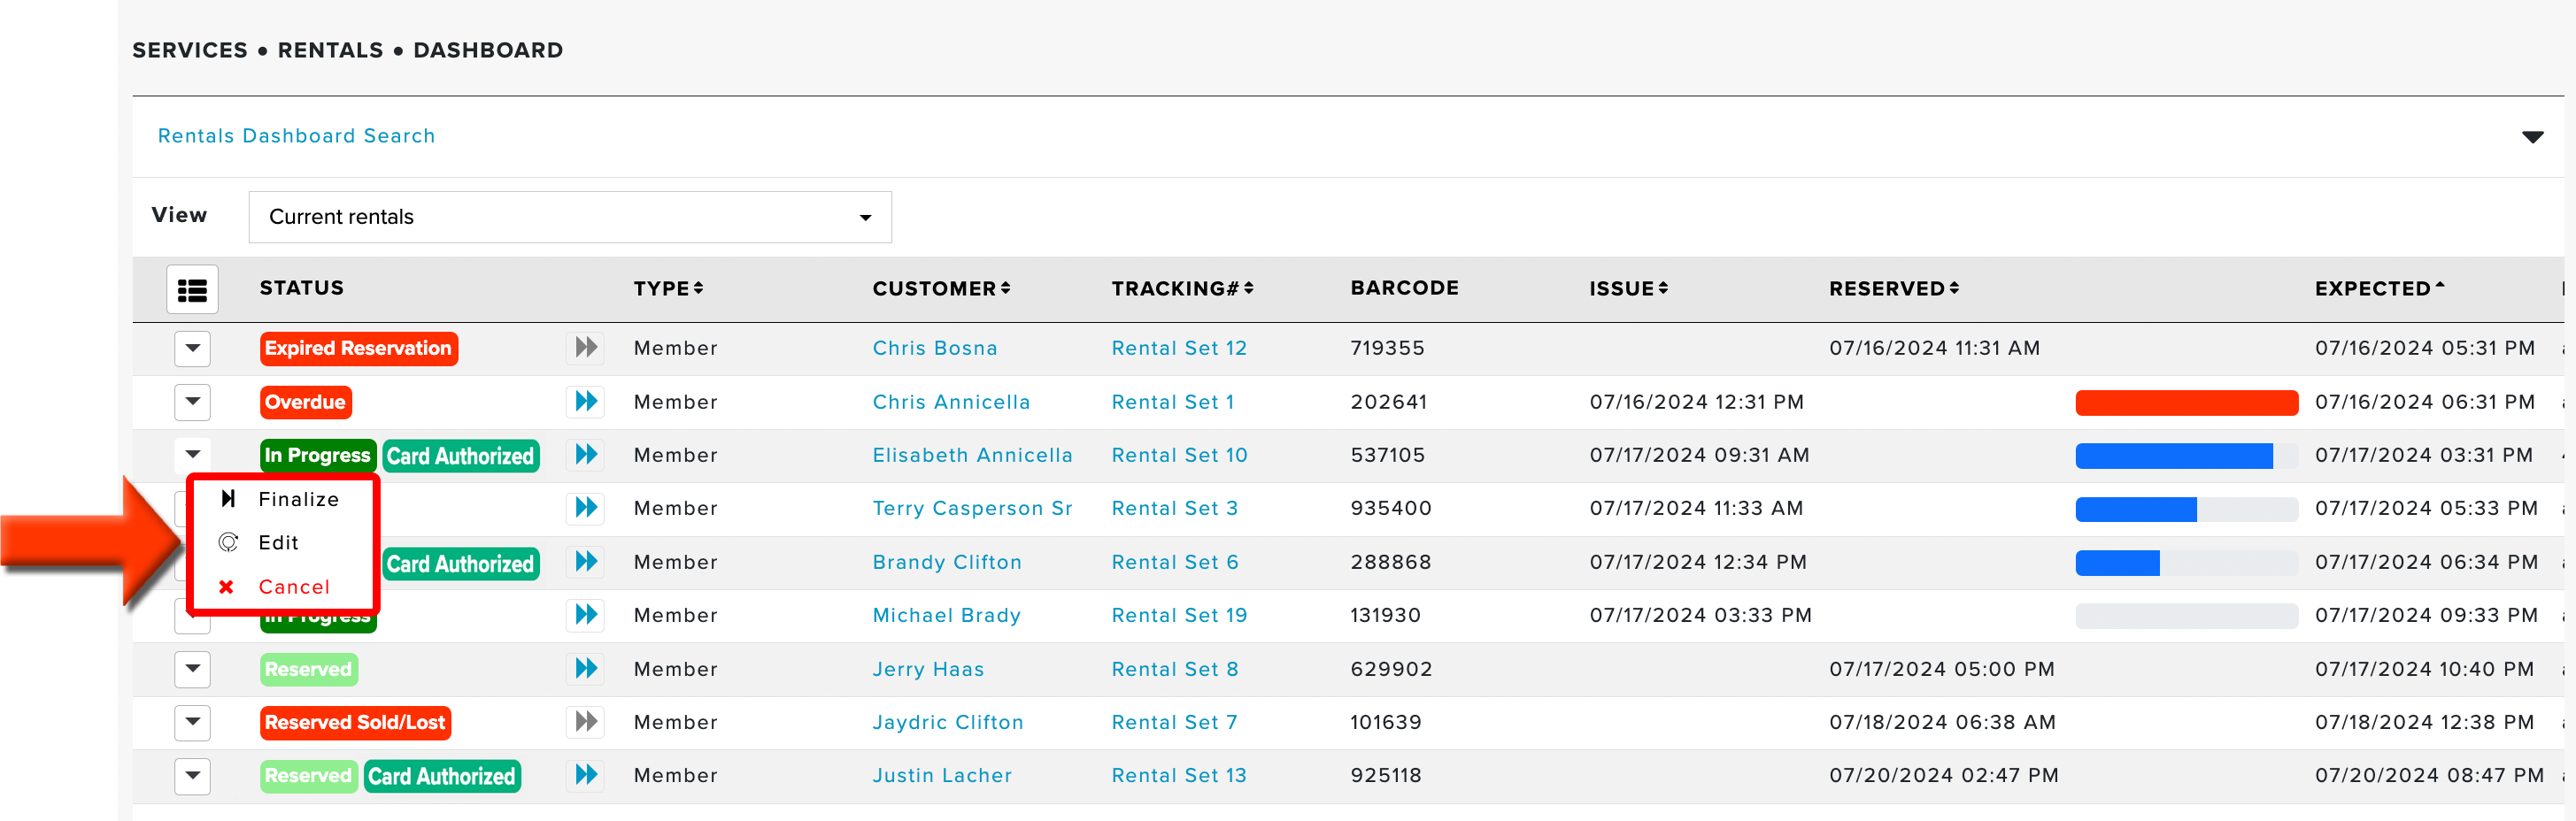
You may need to edit the information for a reserved or issued rental. For instance, you may extend the time until the customer returns the rental or change the reservation date or set. To edit a rental, click the action dropdown icon and click "Edit" (as shown below).
Viewing Past, Sold, Never Returned, etc. Rentals:
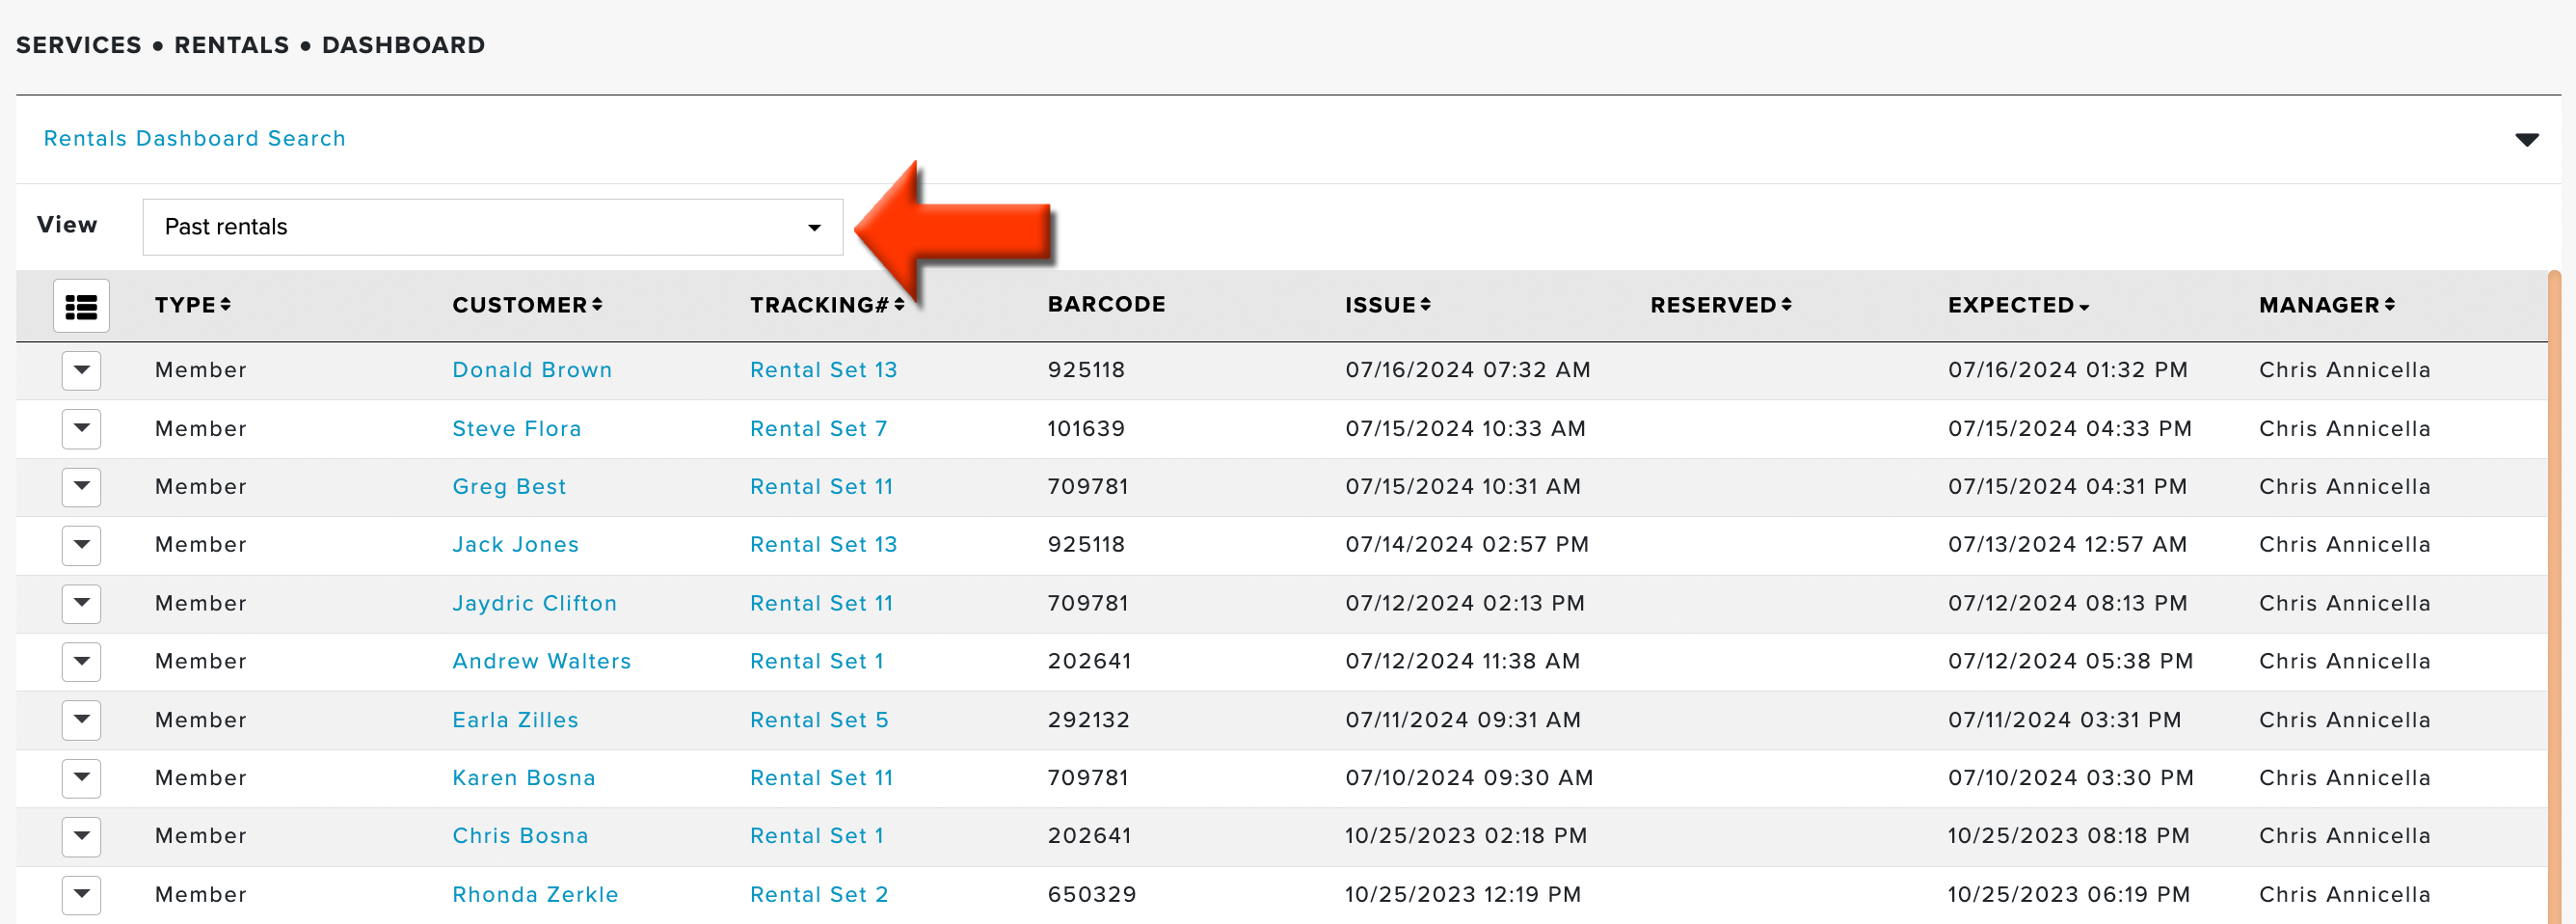
To view past rentals, go to Services > Rentals > Dashboard, and click the "View" dropdown, and select one the options, for example, "Past Rentals"(as shown below)
Rentals Reports
The following reports are available in the "Rentals" category:
Historical Rental Report: This report enables managers to select a date range and download an Excel spreadsheet containing a detailed rental history for the specified period. The following tabs would be available:
All Rentals
Rentals by Type
Rentals by customer
For more details about reports, Click Here.
Daily Snapshot
The Daily Snapshot is an email that every manager can receive daily or on the chosen notification frequency of activity tracked in Golf Genius Golf Shop. This email can include updates for rentals and other features. To manage your daily snapshot, navigate to Manager Details > Snapshot. For complete details, Click Here.