
There may be cases where you need to change, view, or add information for a vendor. For instance, a rep's contact information may have changed. It's easy to do this for a few vendors from the Vendor Dashboard. However, if you need to make several vendor changes, this might be easier to do via a spreadsheet update. For details on updating existing vendor via spreadsheet, Click Here.
In this article, we will discuss how to edit vendor information from the Vendor Dashboard.
Editing Existing Vendor Information:
To add, view, or change information for a vendor, follow these instructions:
Go to Club Details > Vendors > Roster.
Click the action drop-down and select "Edit" for the vendor.
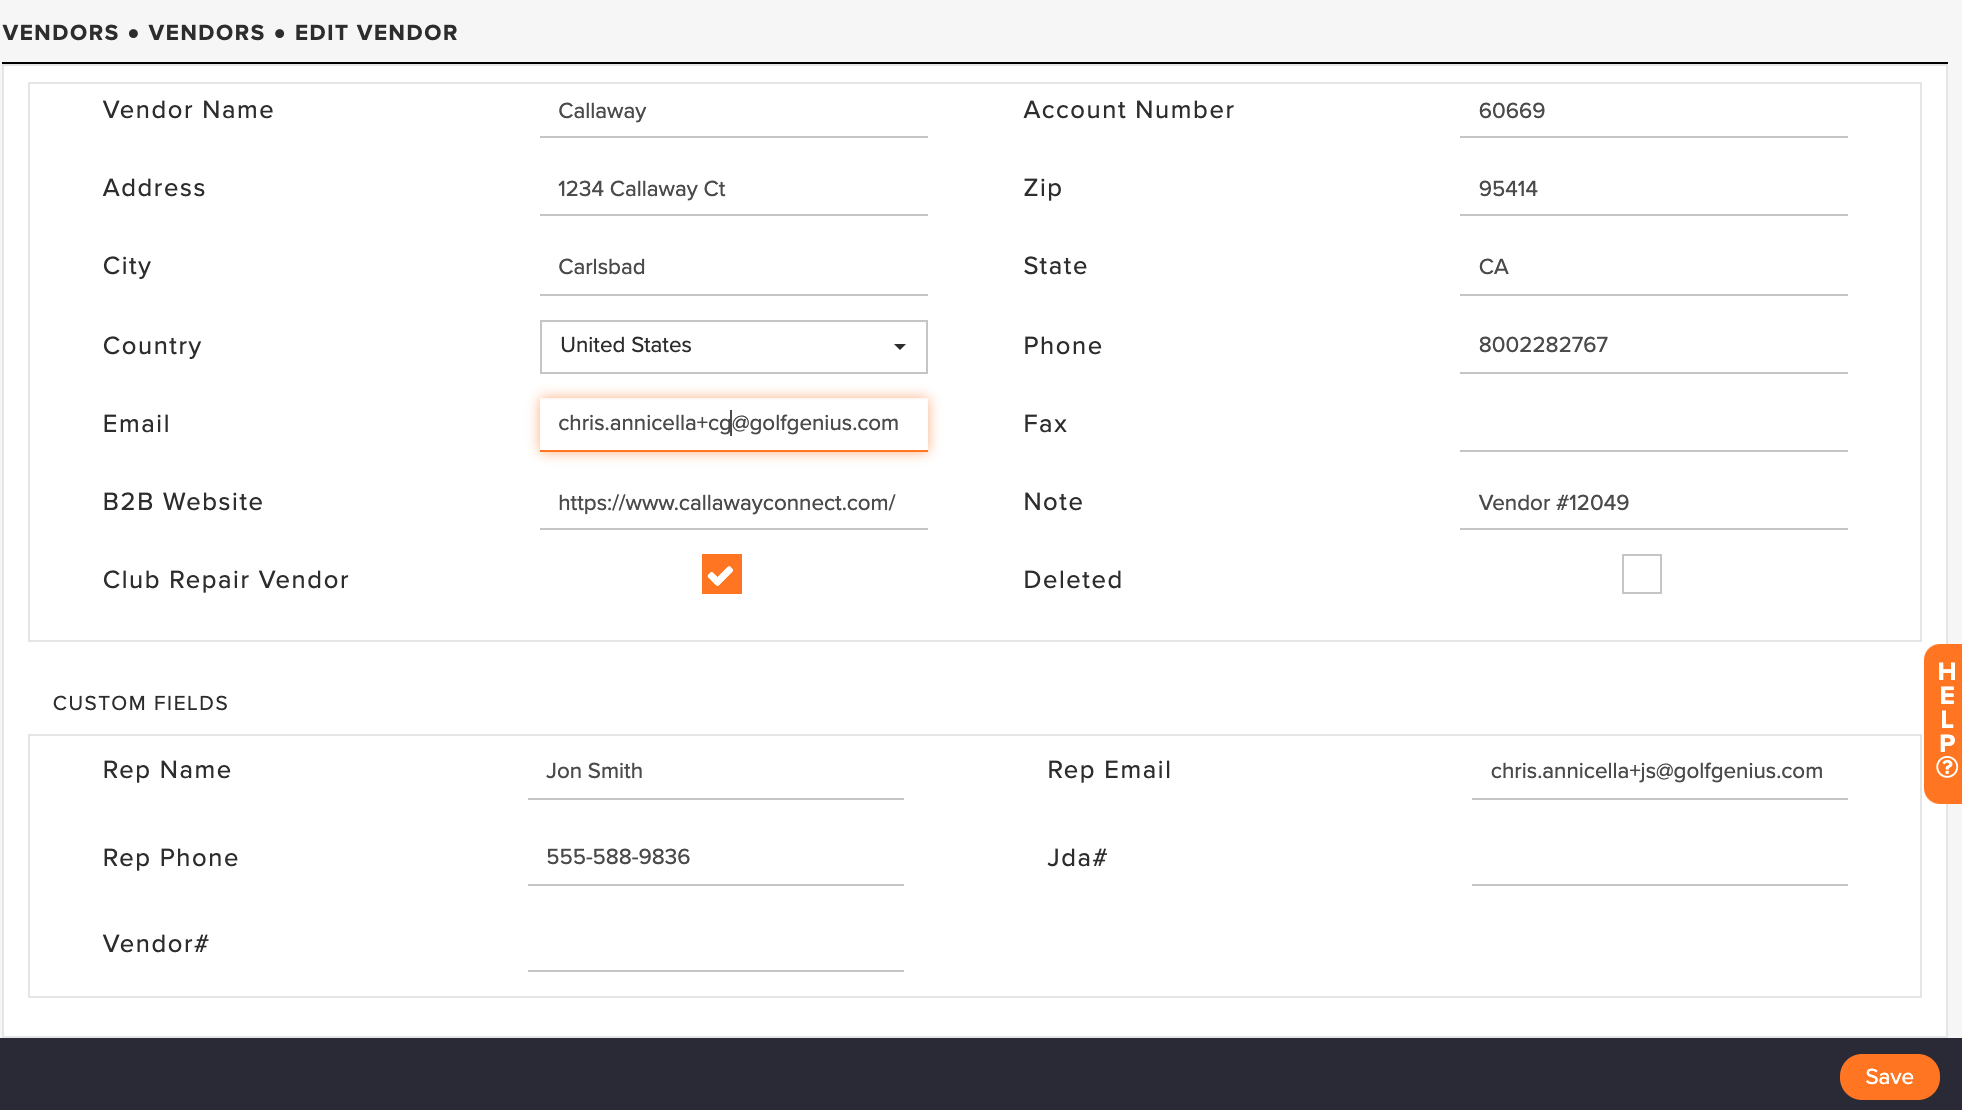
Add/Change the necessary information in the vendor form (as shown below).

Click "Save."
You can add more custom fields to store more information for your vendors. For details on vendor custom fields, Click Here.
Vendor Best Practices
When adding vendors, remember that:
Some fields are optional. For instance, you do not need to enter an address.
If you'd like the vendor to receive email or be able to view the vendor's phone number when placing a special order, they must have their email and cell phone in the roster.
Only add vendors to your roster.
Many different number formats can be used when formatting a vendor's mobile phone number. They may include a dash or parentheses. International (non-US and Canadian) phone numbers will need the country code prefix before the phone number, using the plus symbol.
Examples of Accepted US and Canada Phone Number Formats:555-555-5555
(555)555-5555
5553338888
Examples of Accepted International Phone Number Formats:
+44-555-555-5555
+445553338888
When entering a phone number, do not use symbols other than those listed above.